Original Switchable Gift Card
Introduction
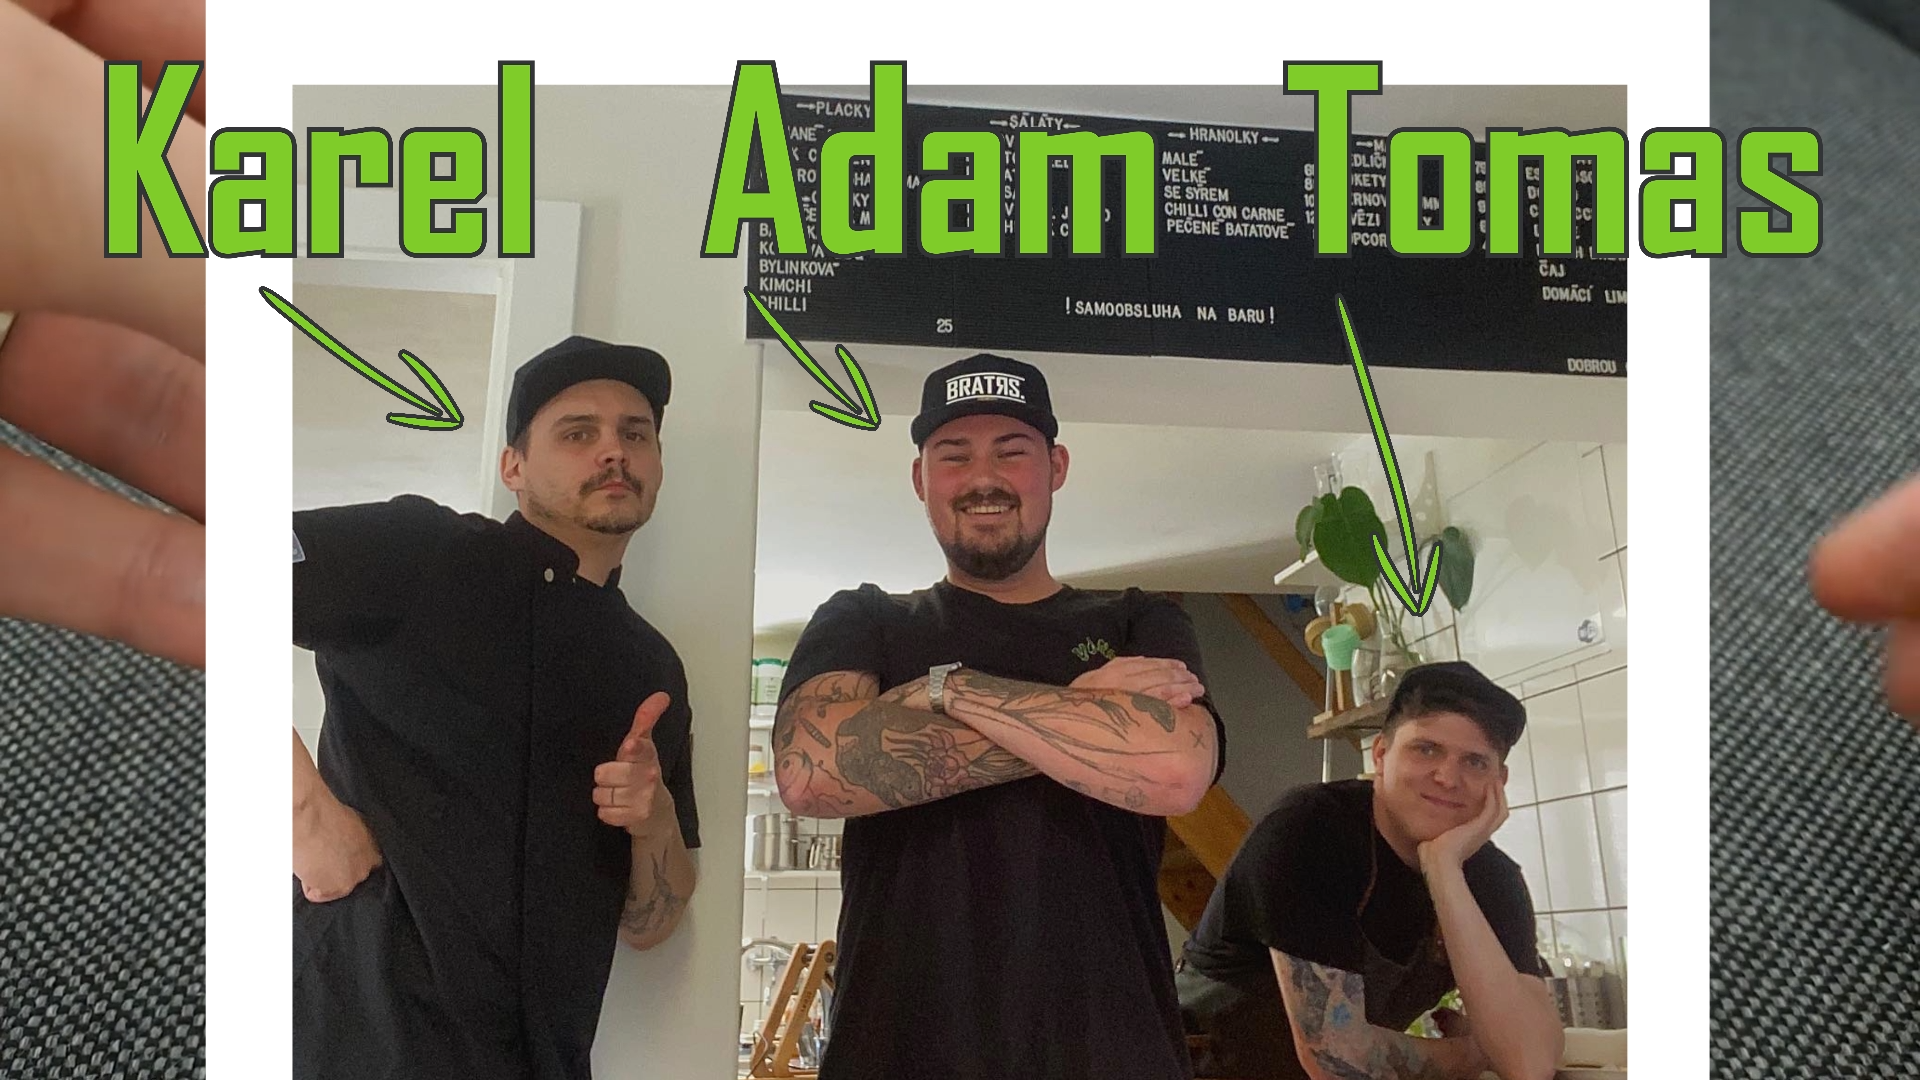
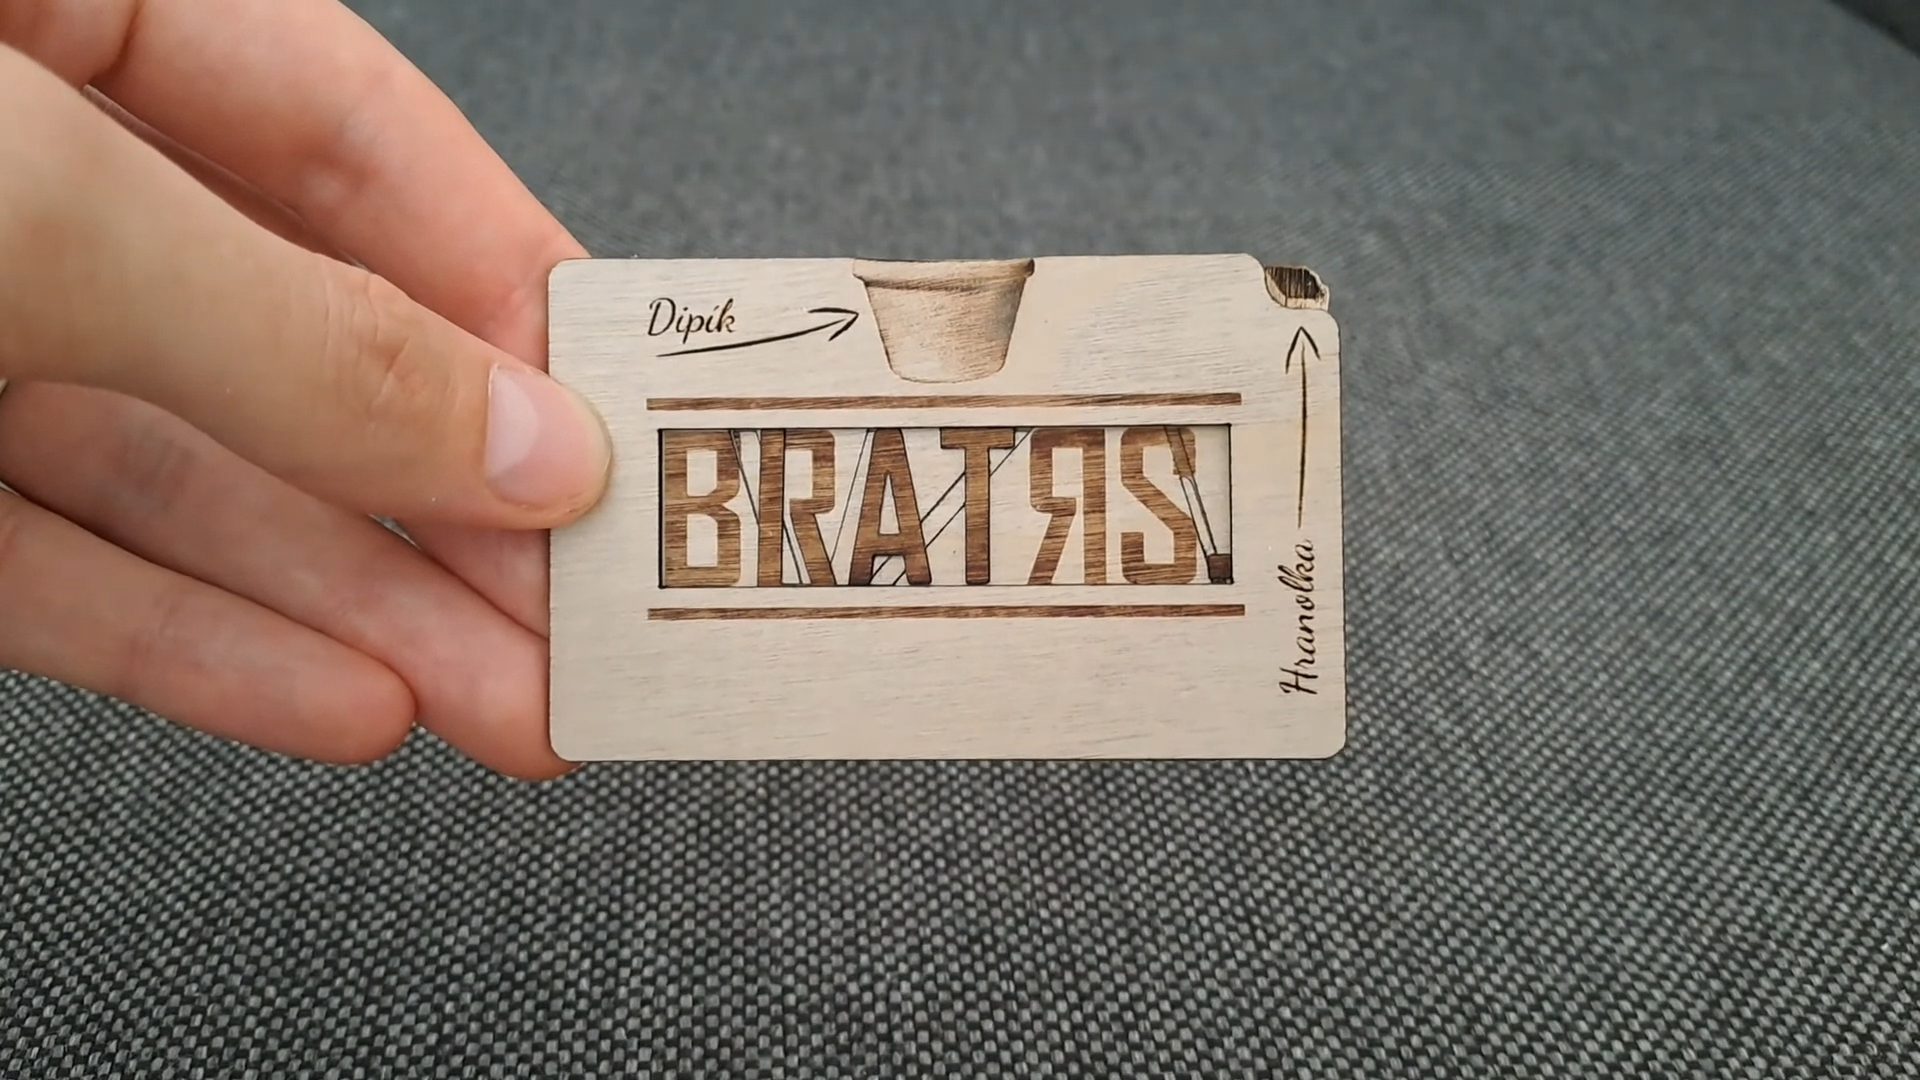
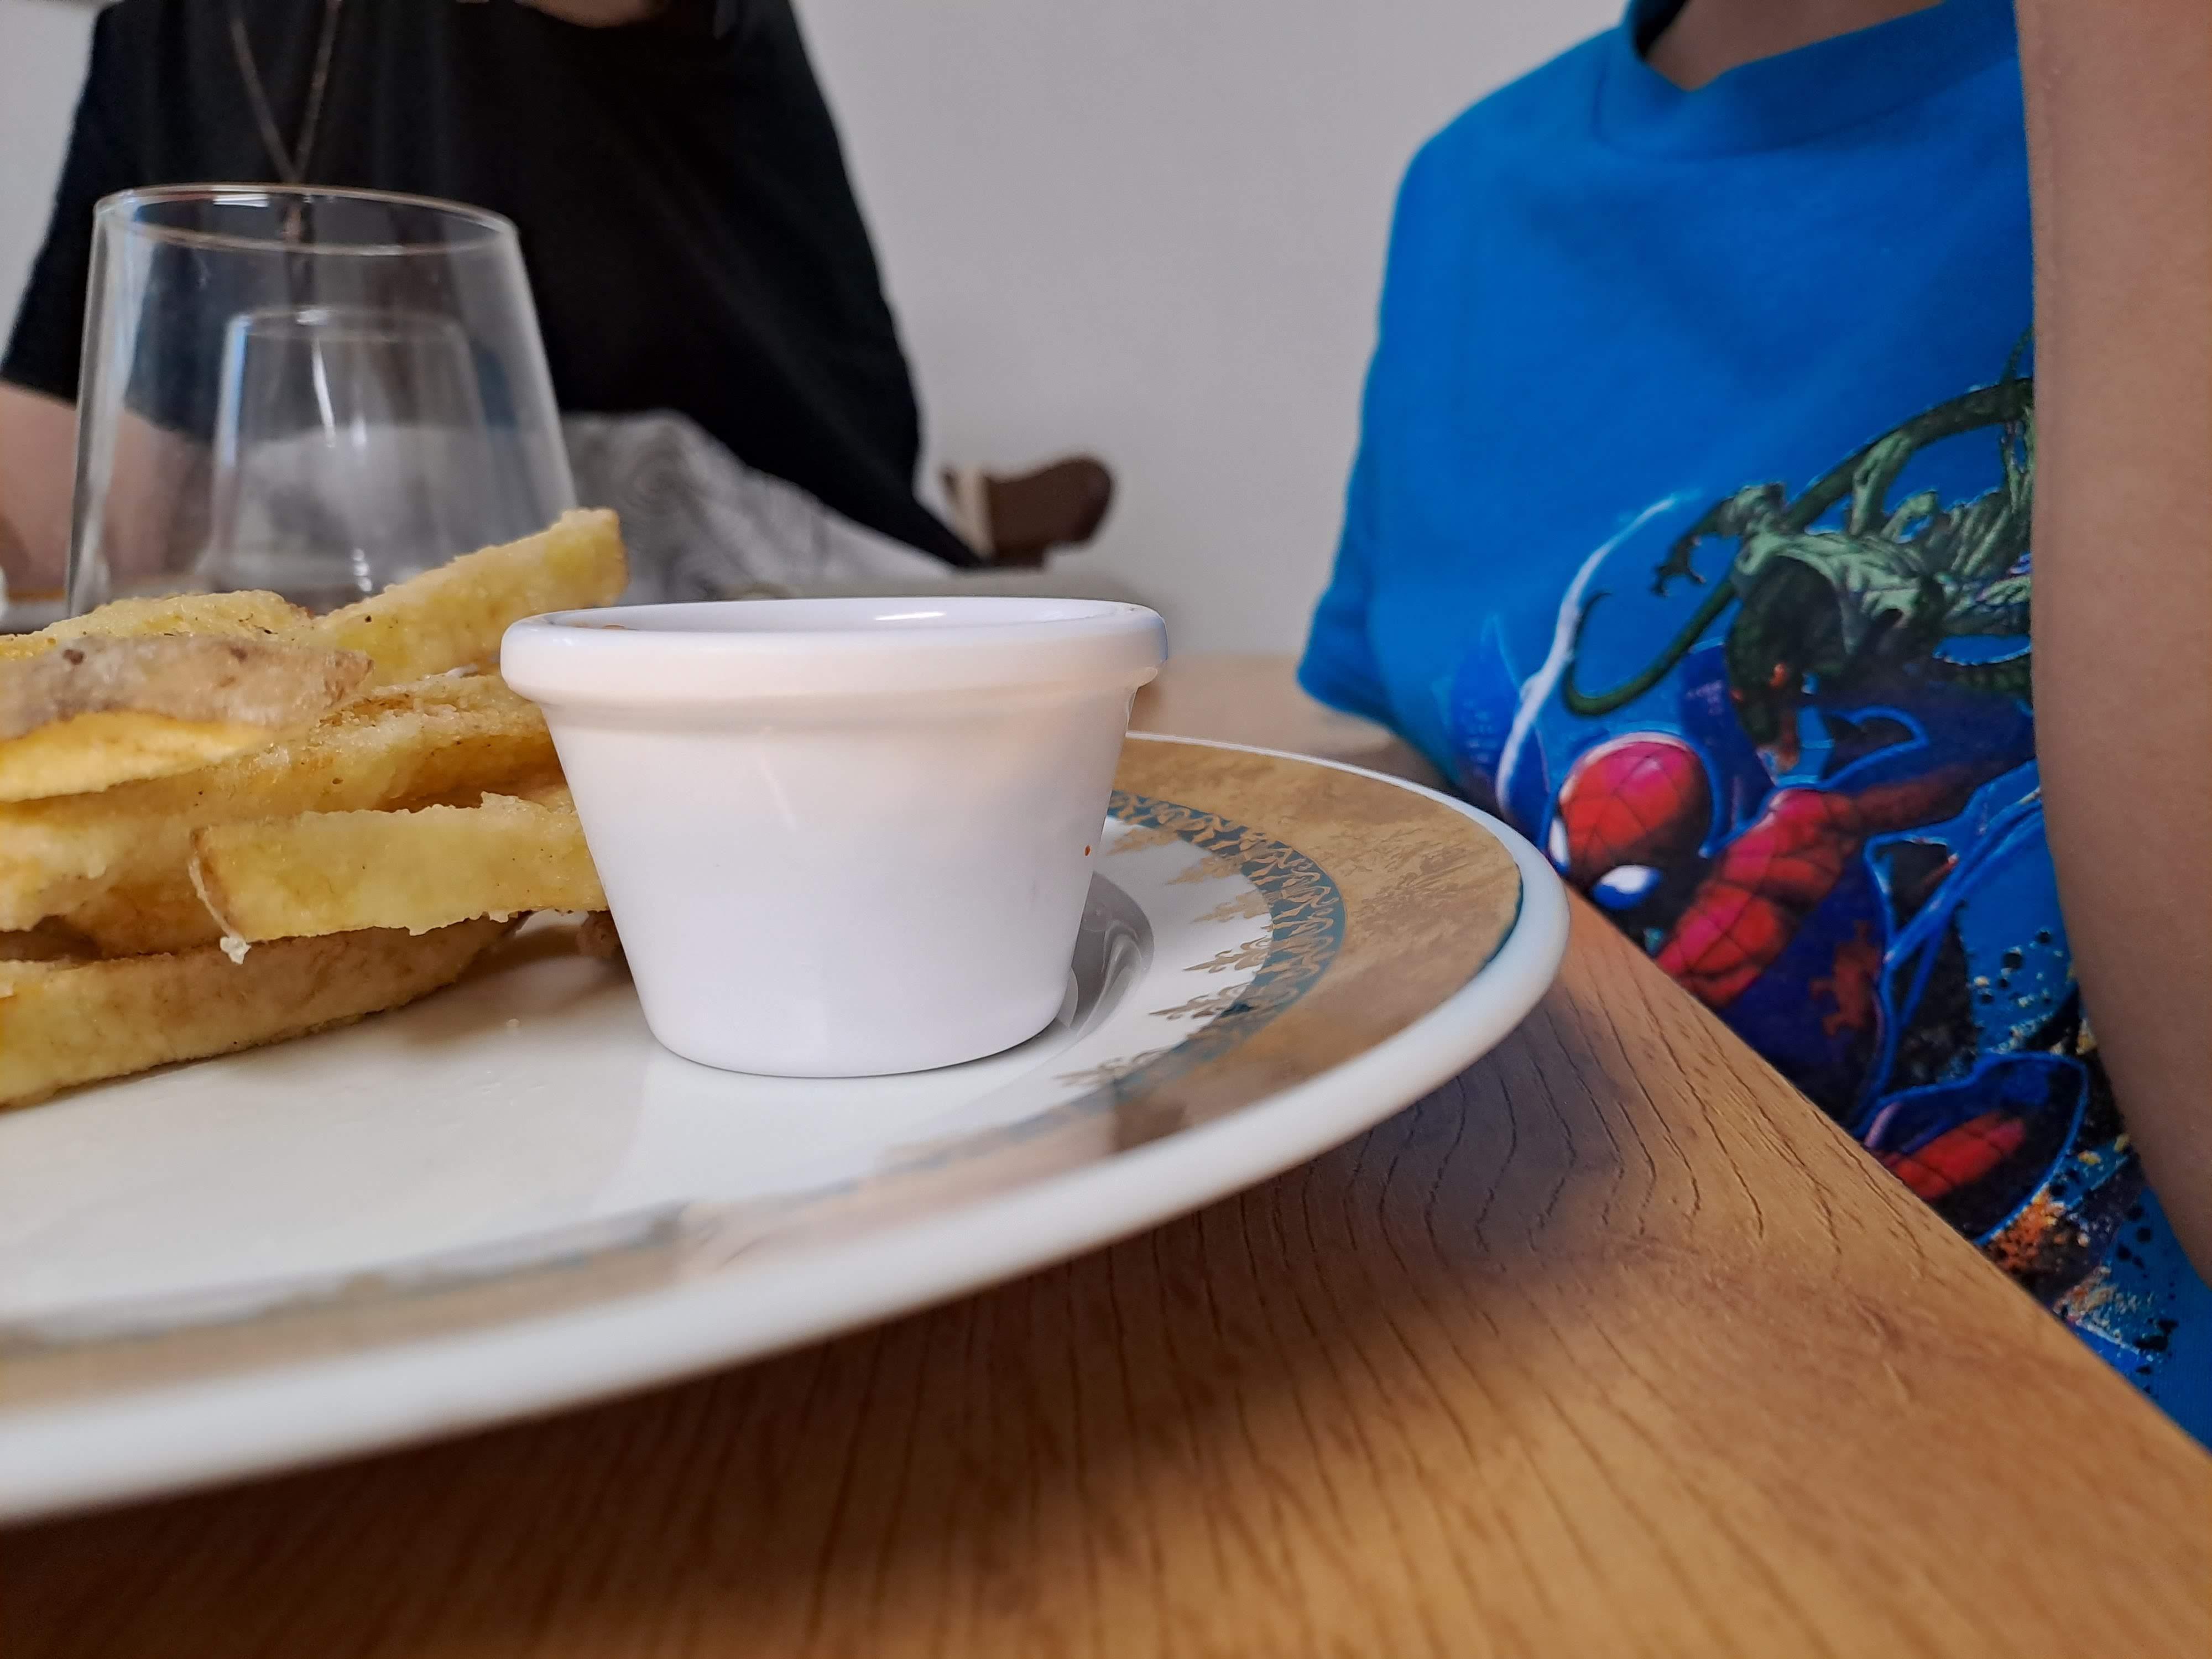
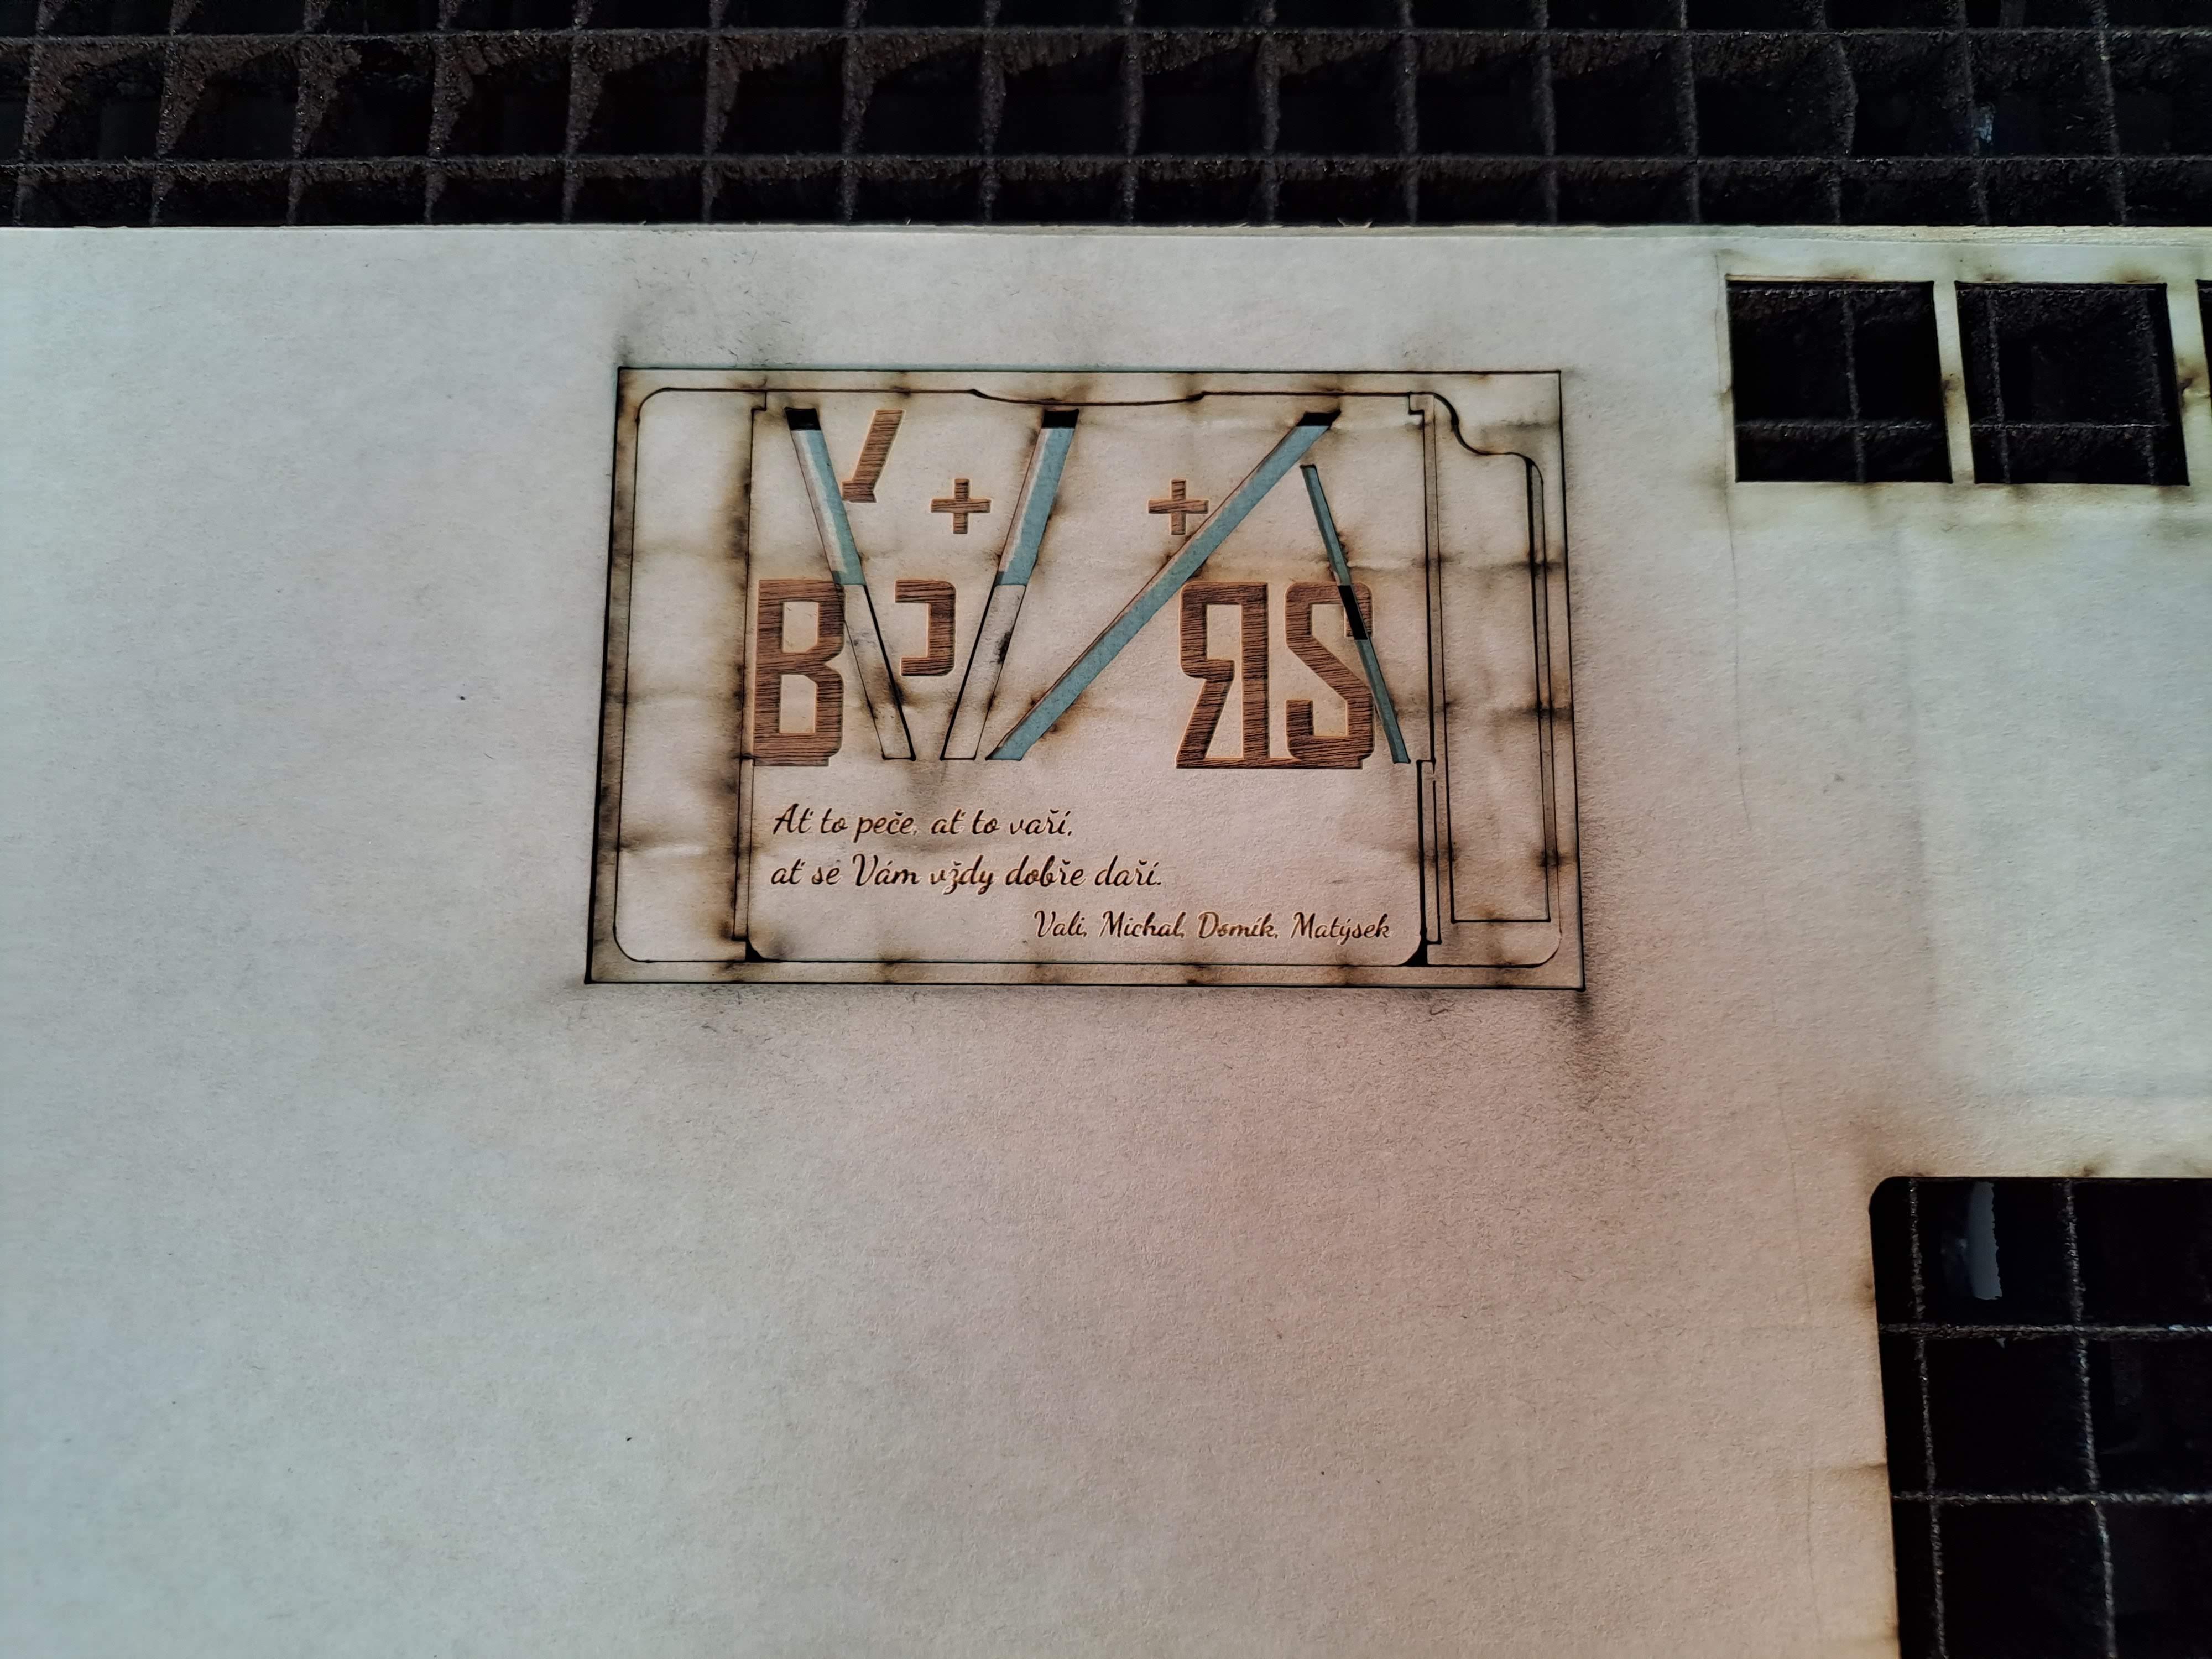
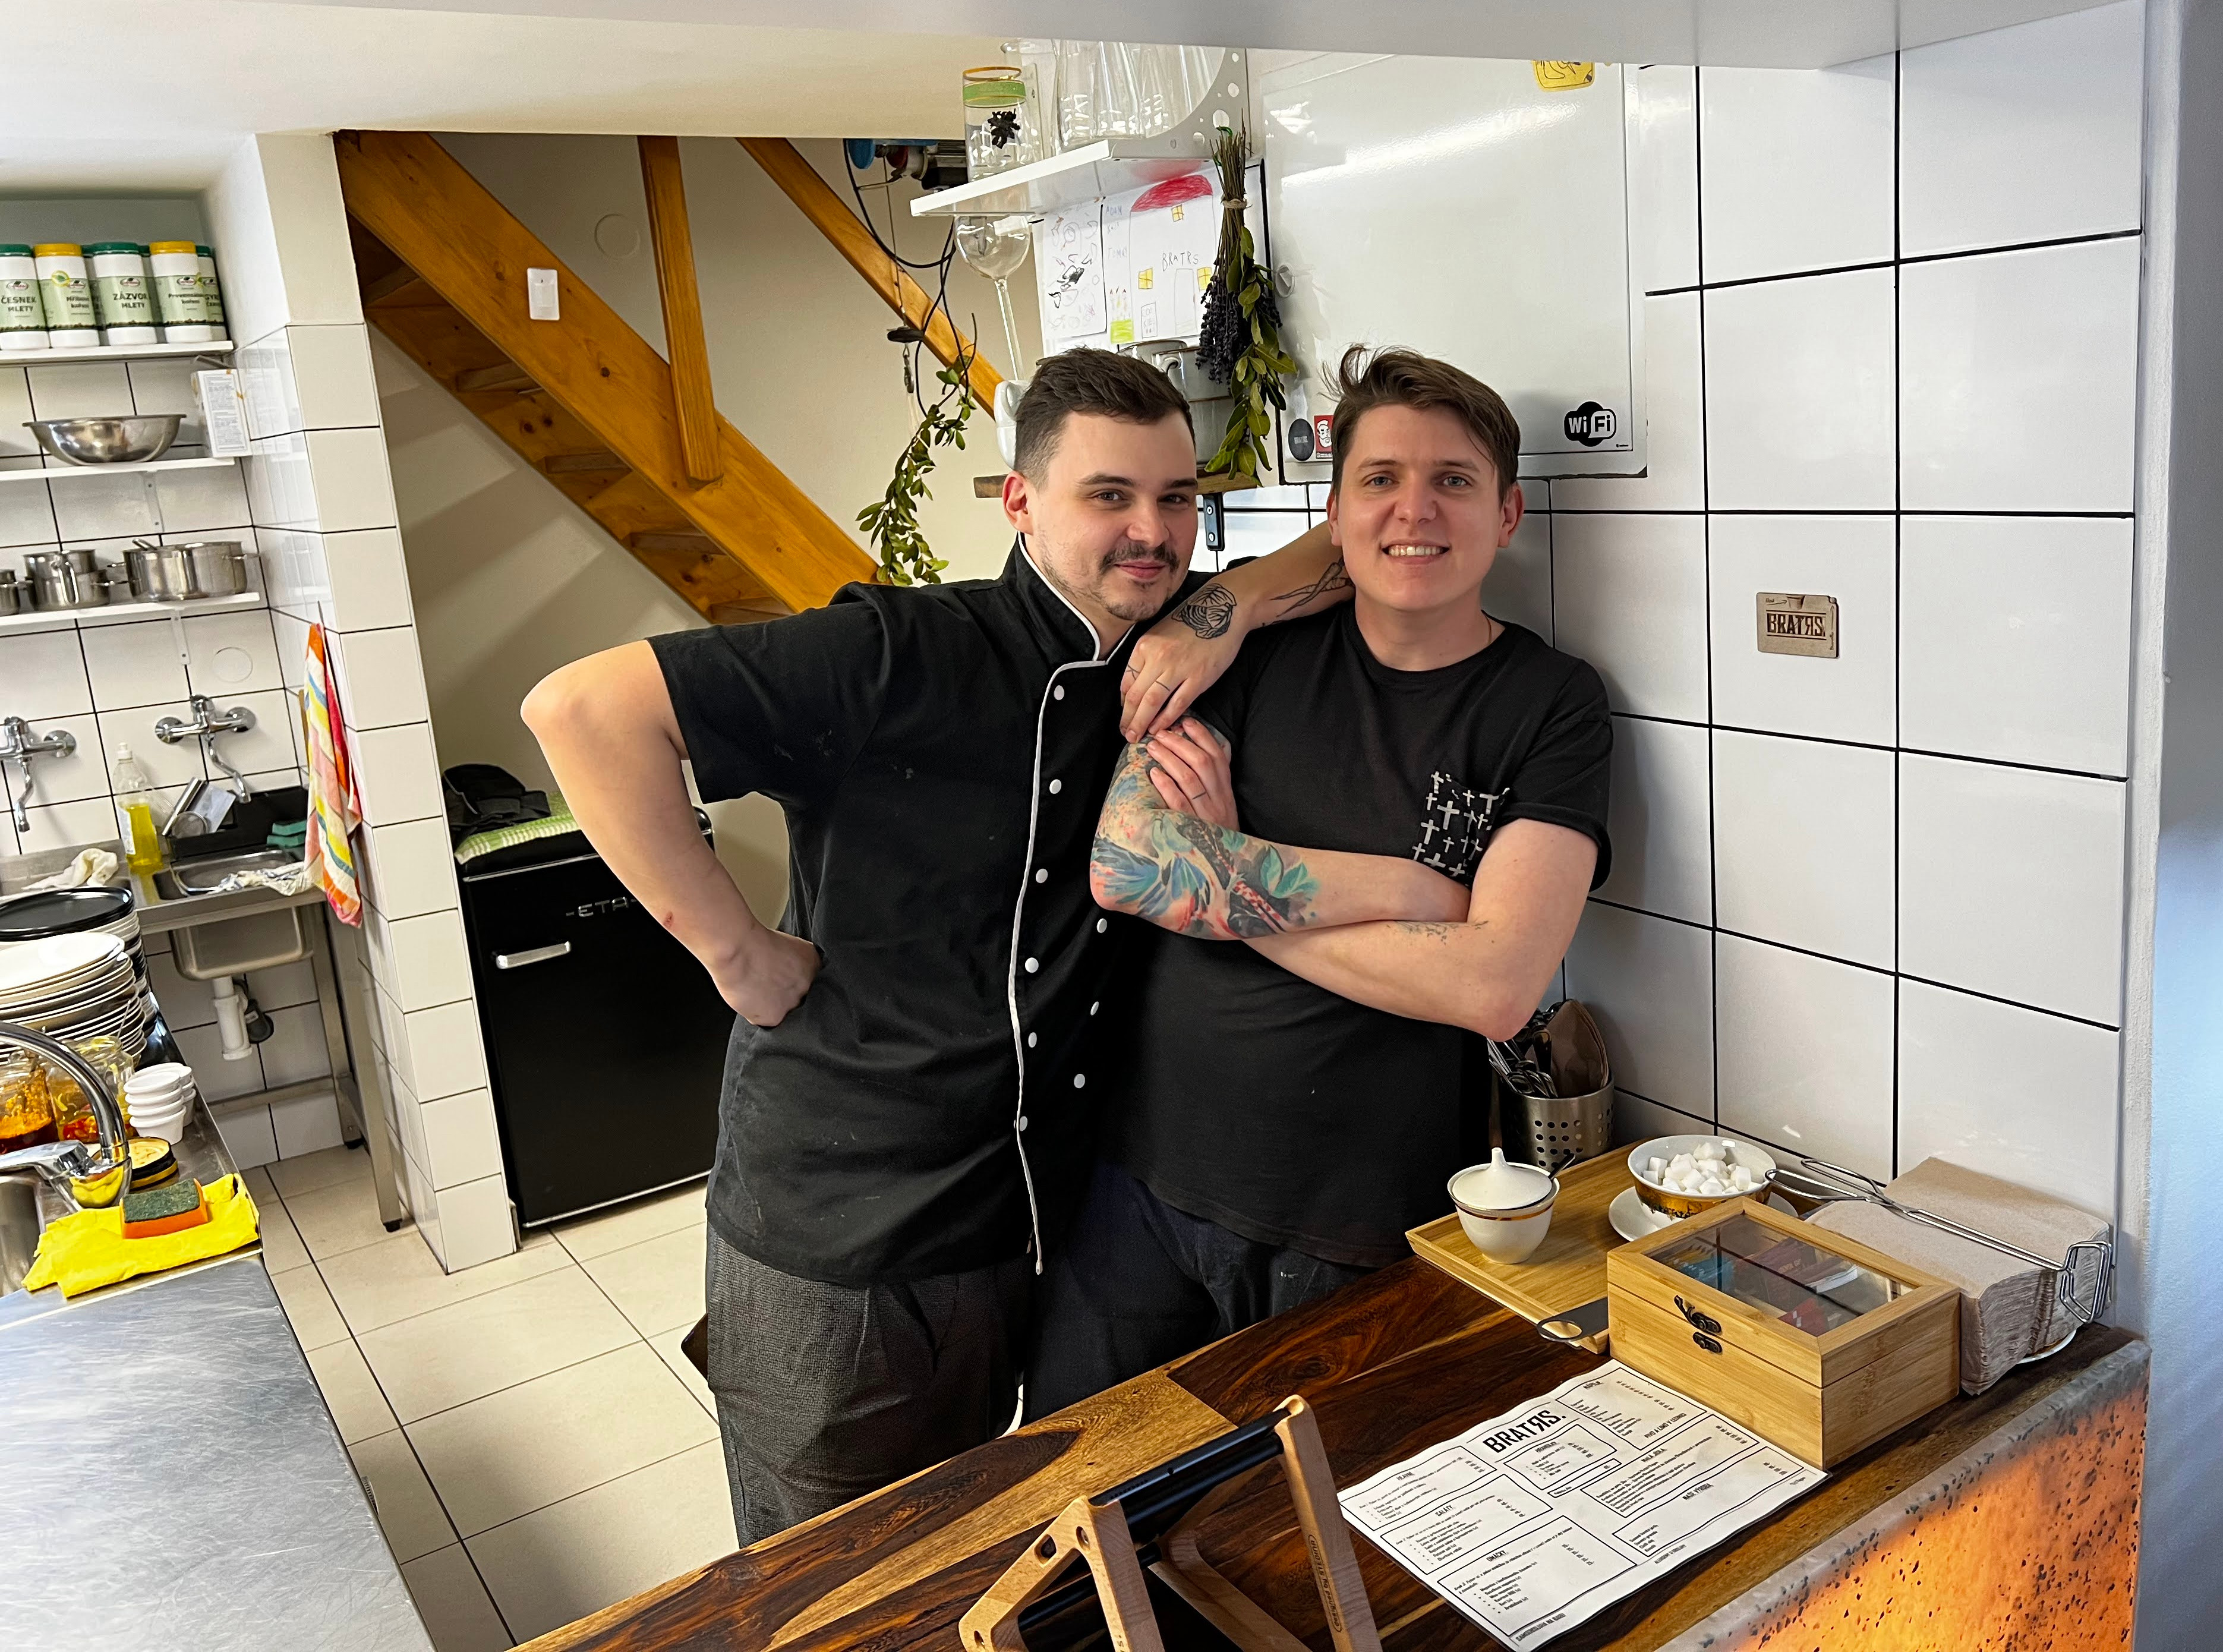
A new bistro Bratrs was opened right before our house. And because they cook so well and because we become a friends, I have decided to create a small gift card for them to celebrate their opening. The bistro was opened by 3 great guys: Karel, Tomas and Adam. Their bistro's name is Bratrs and their signature dish are french fries with dip. So I combined all these things together and this gift card is the result.
In this instructable I am going to tell you about all the principles and techniques which I used so you can make your own original moving gift card or a visiting card.
Idea
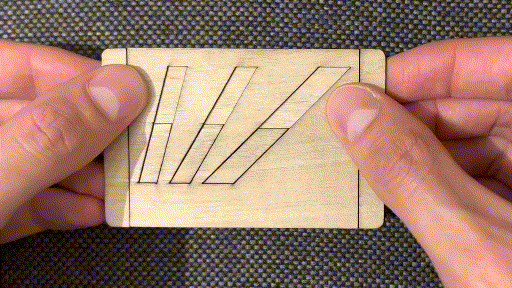
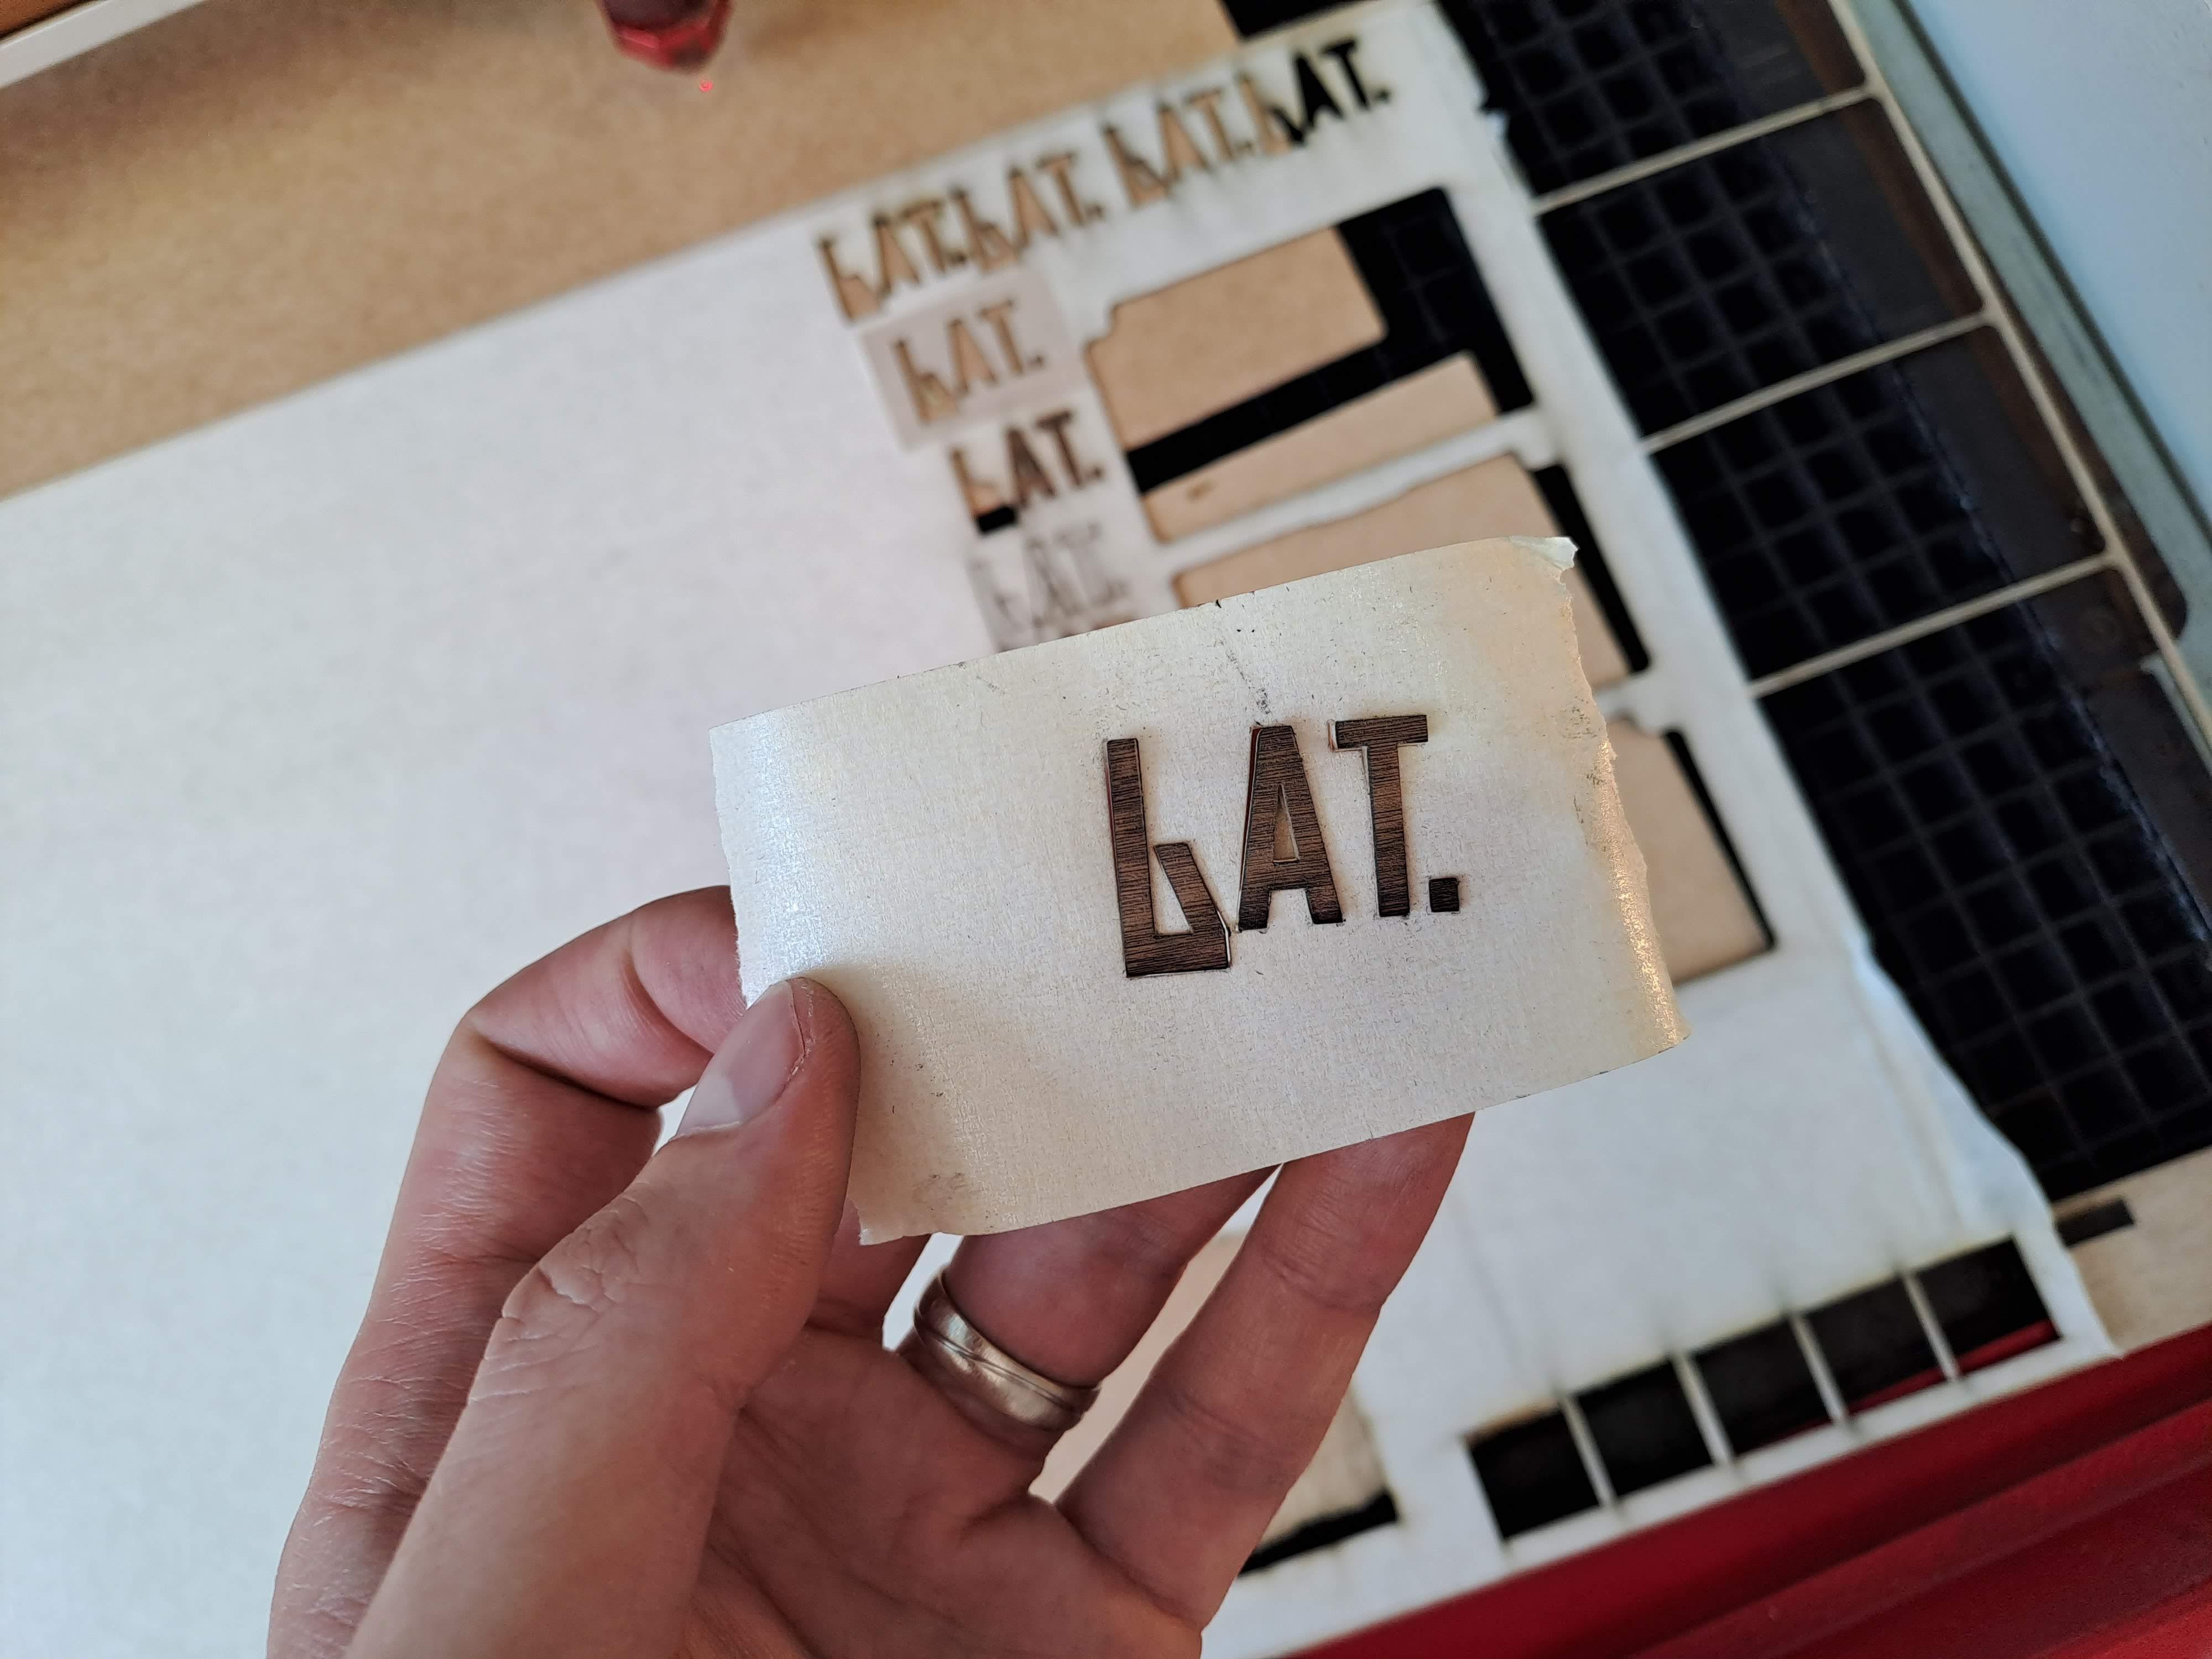
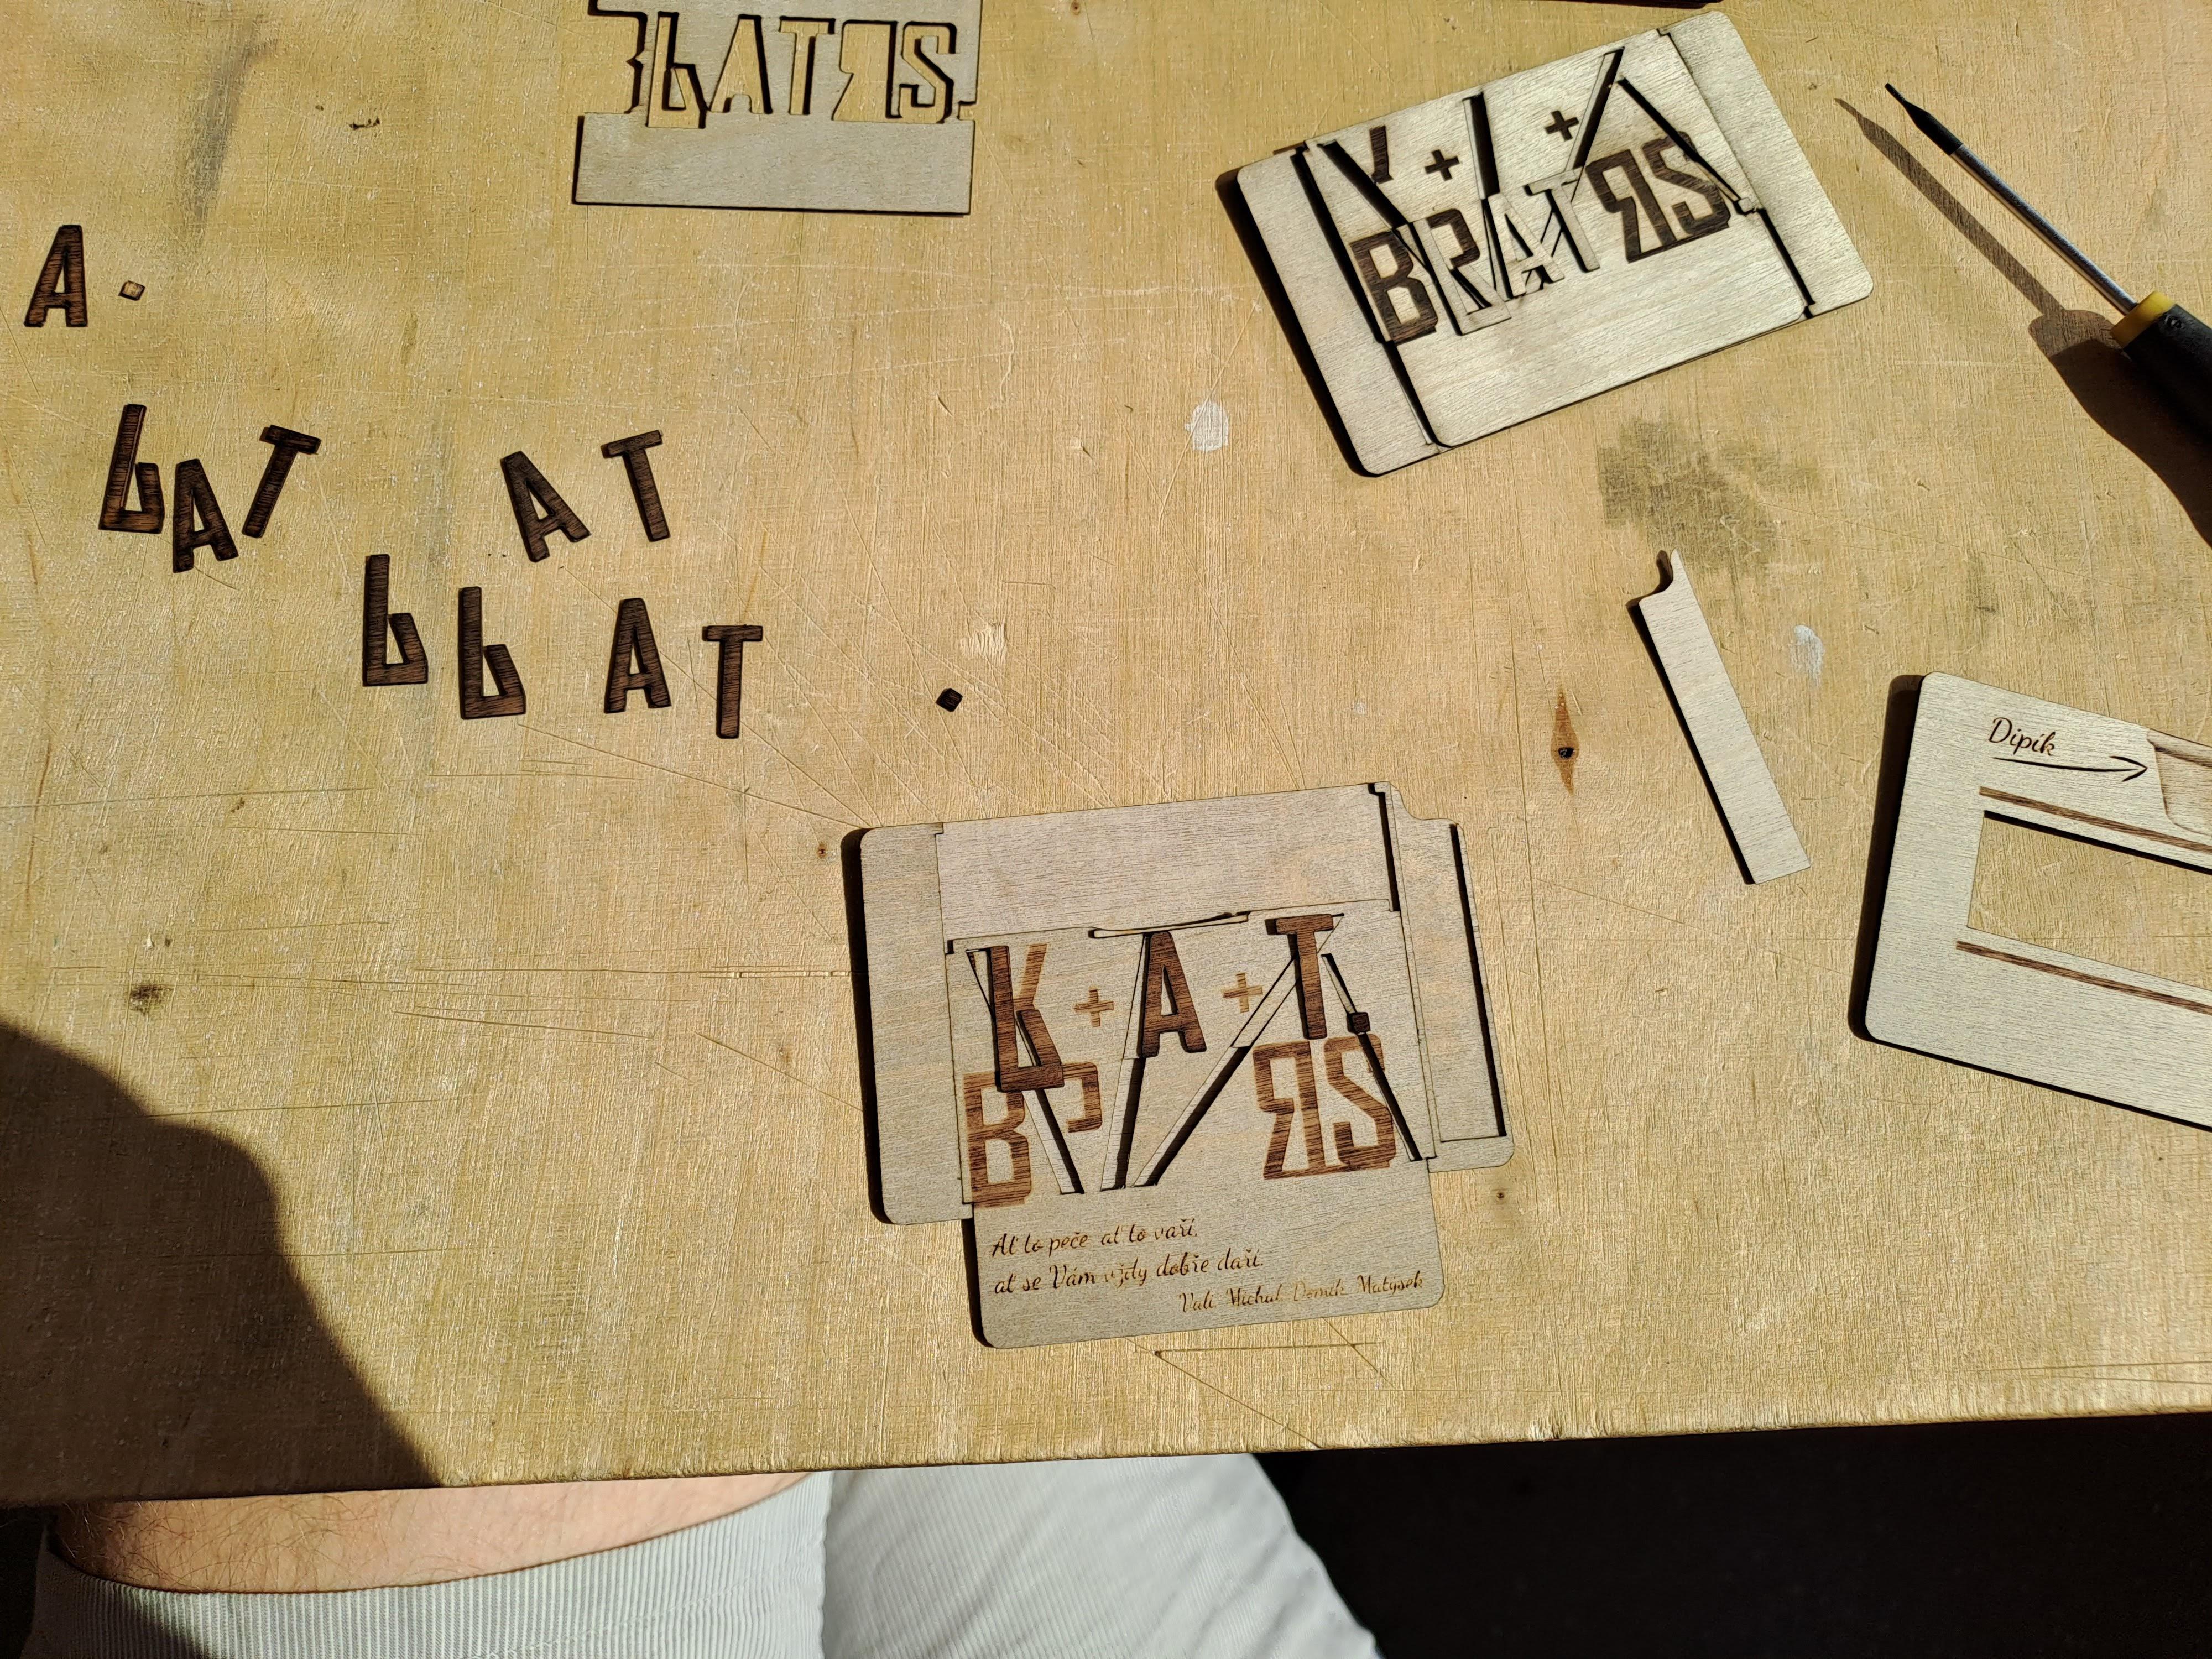
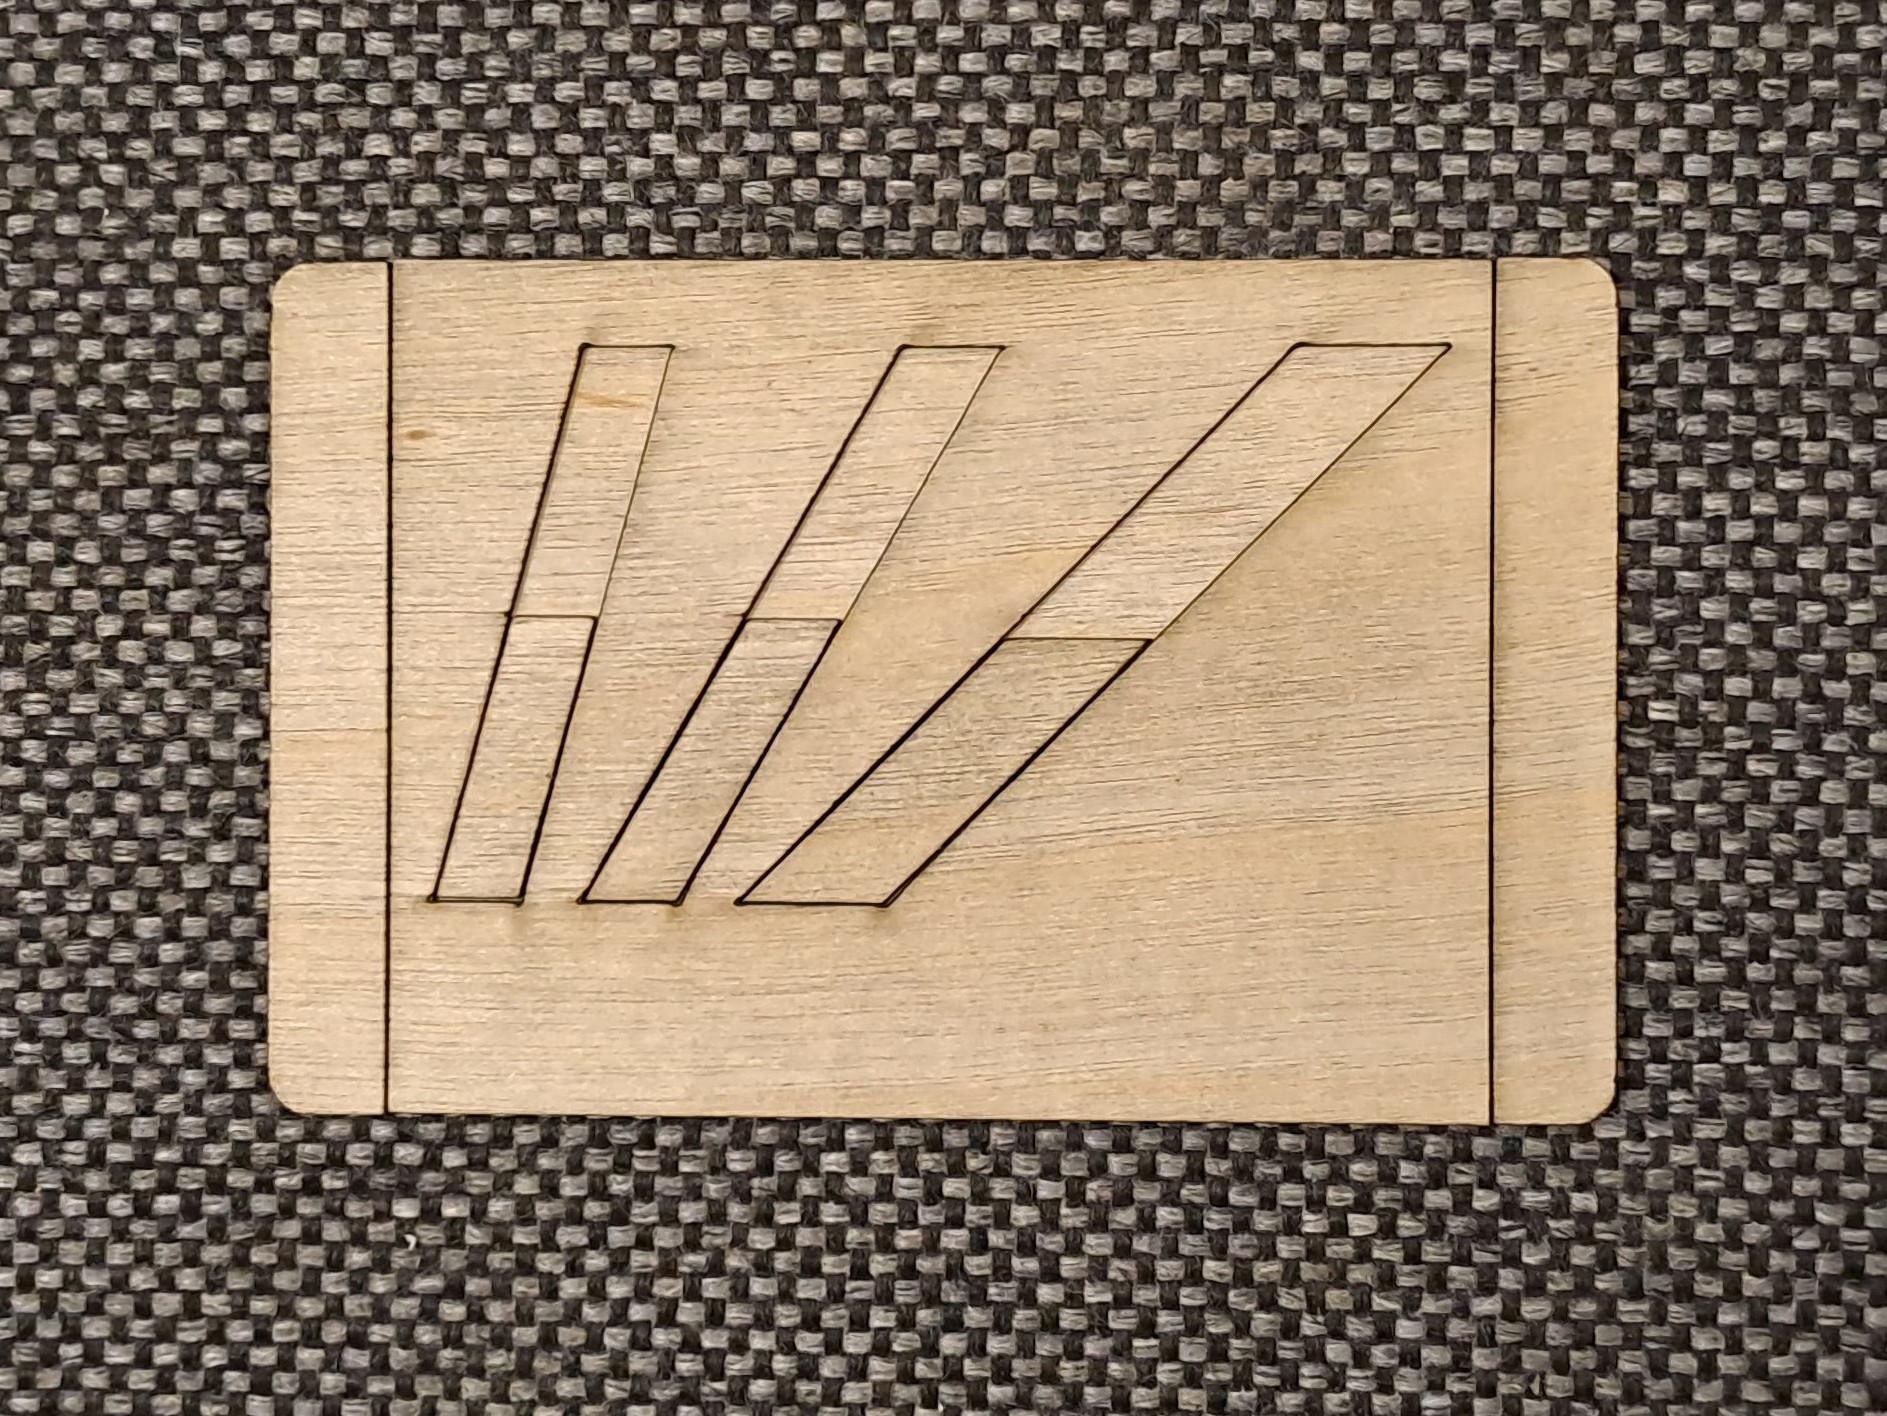
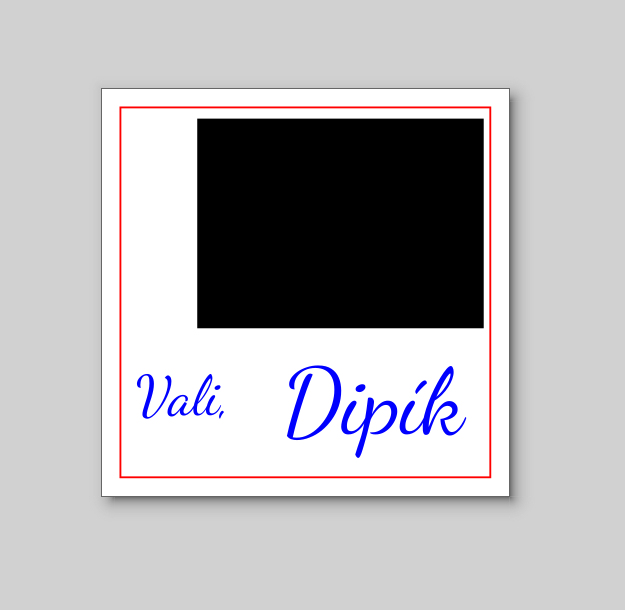
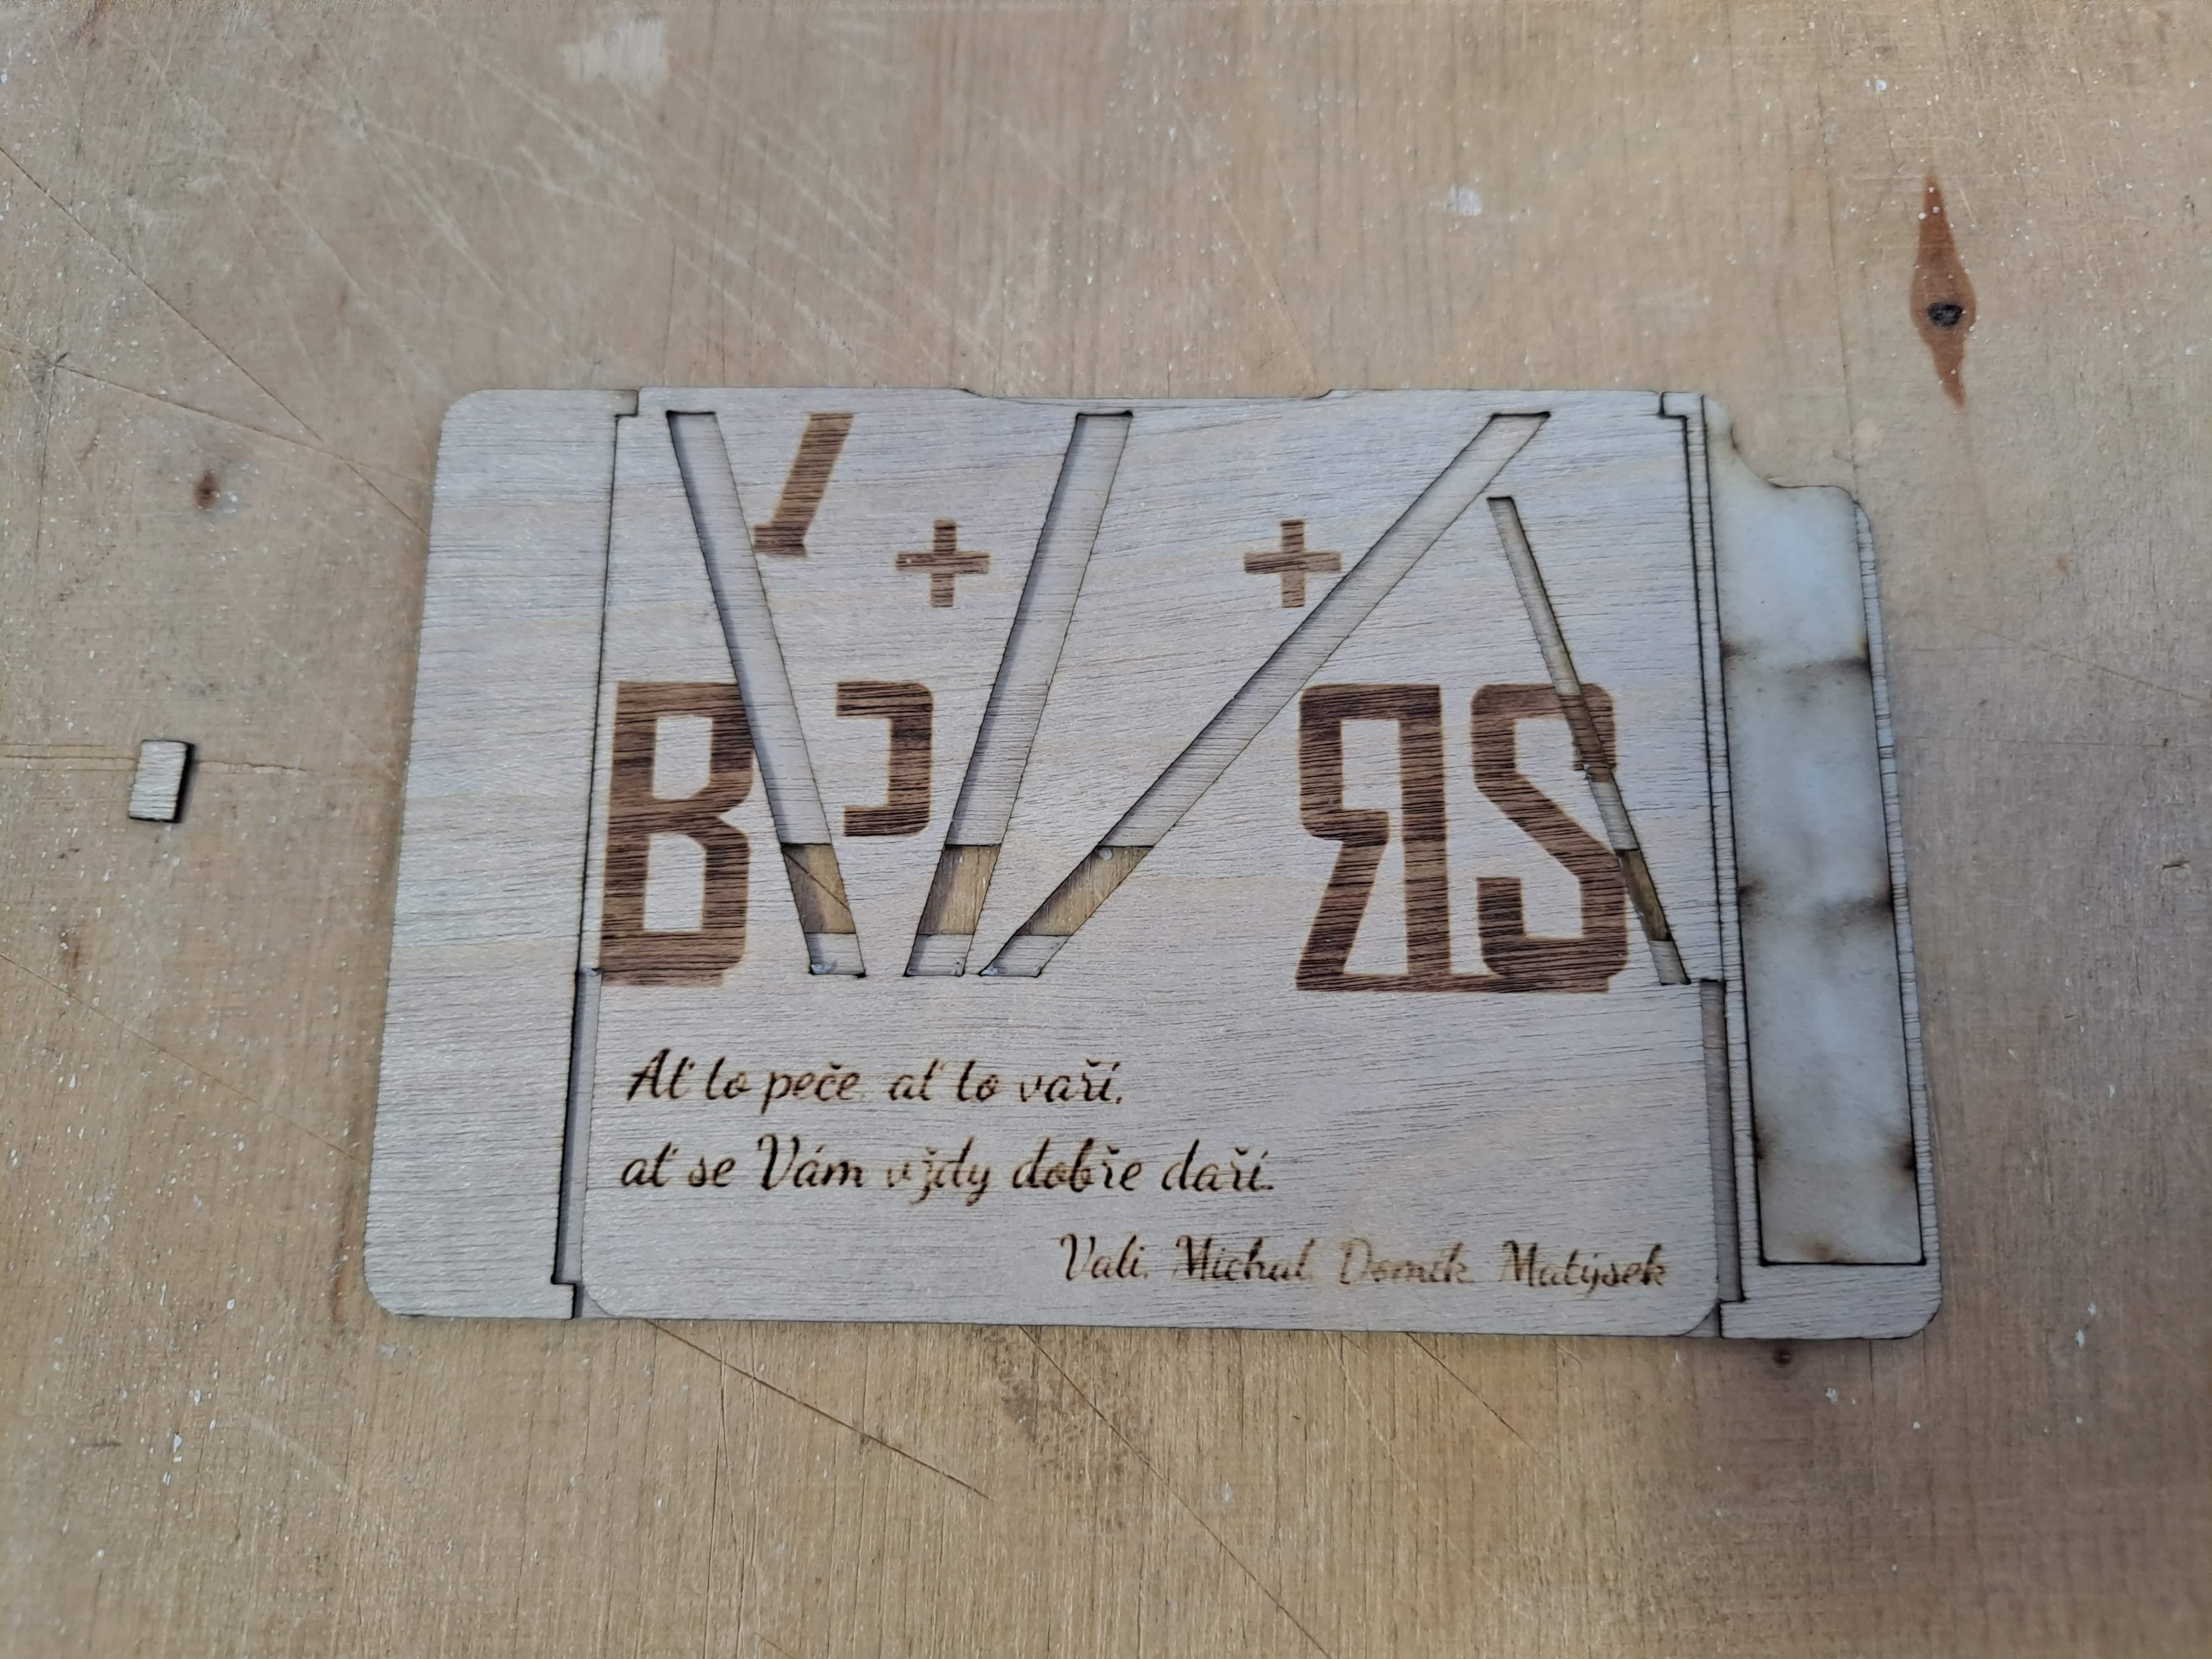
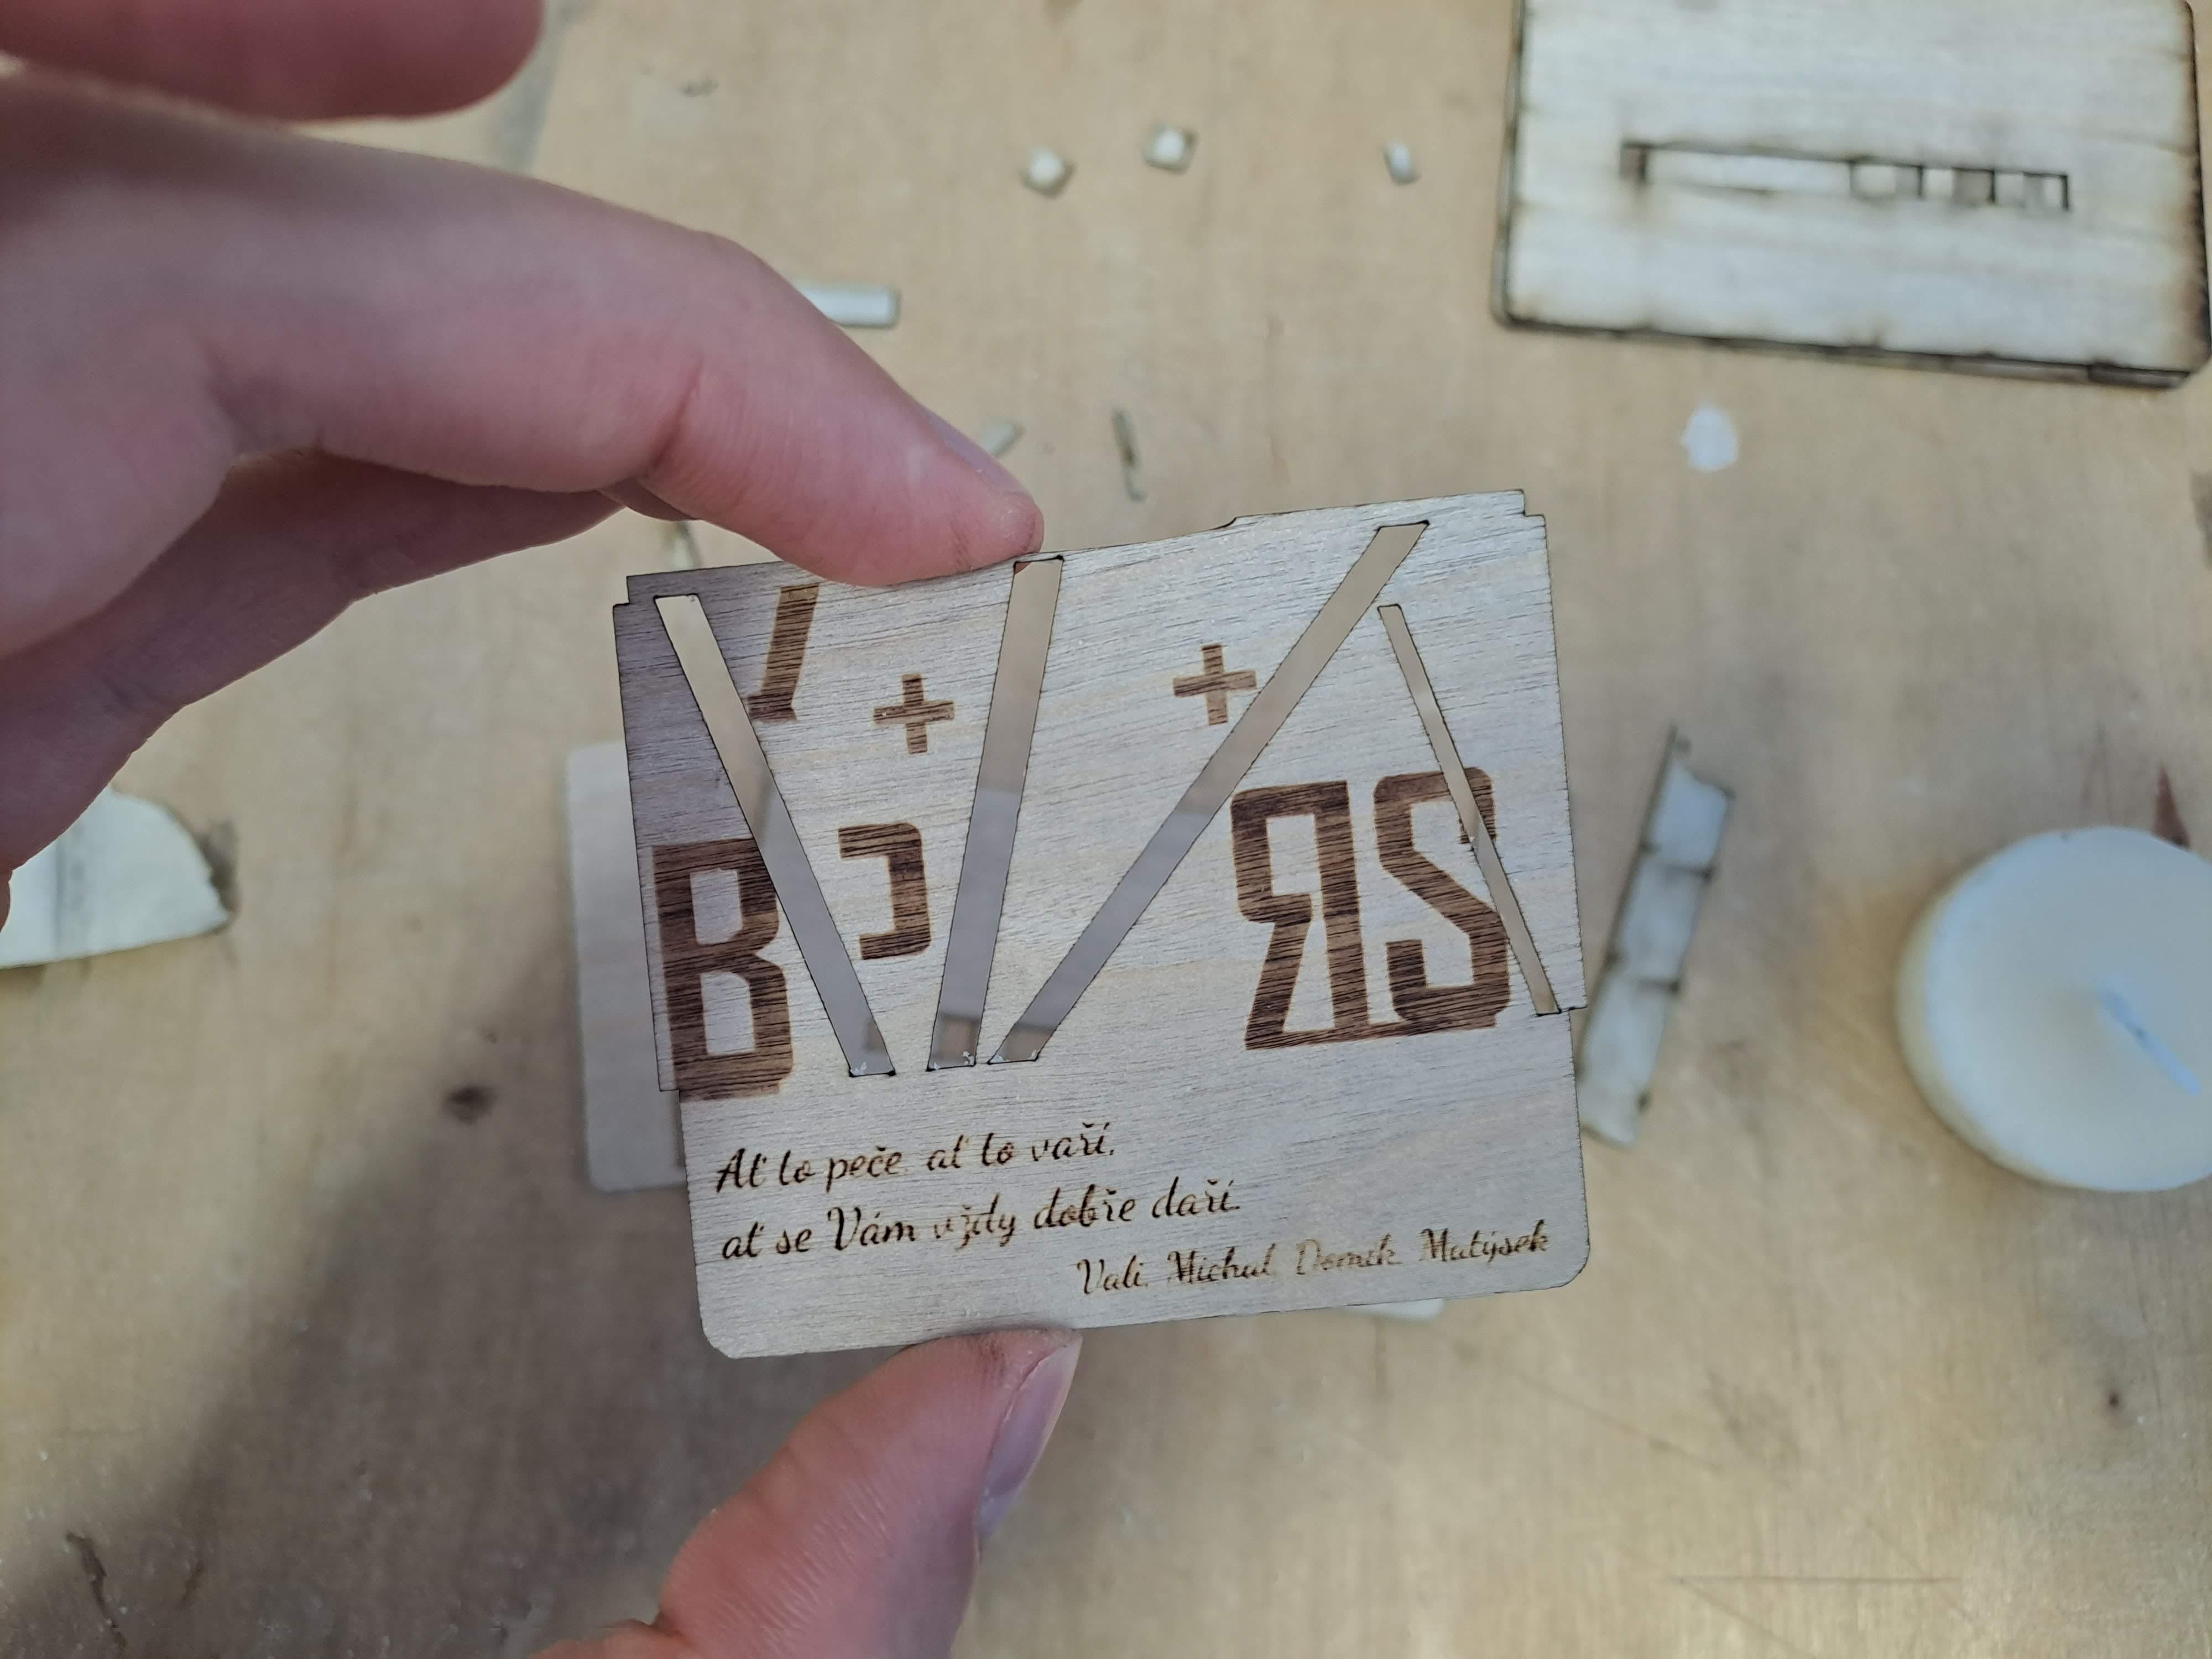
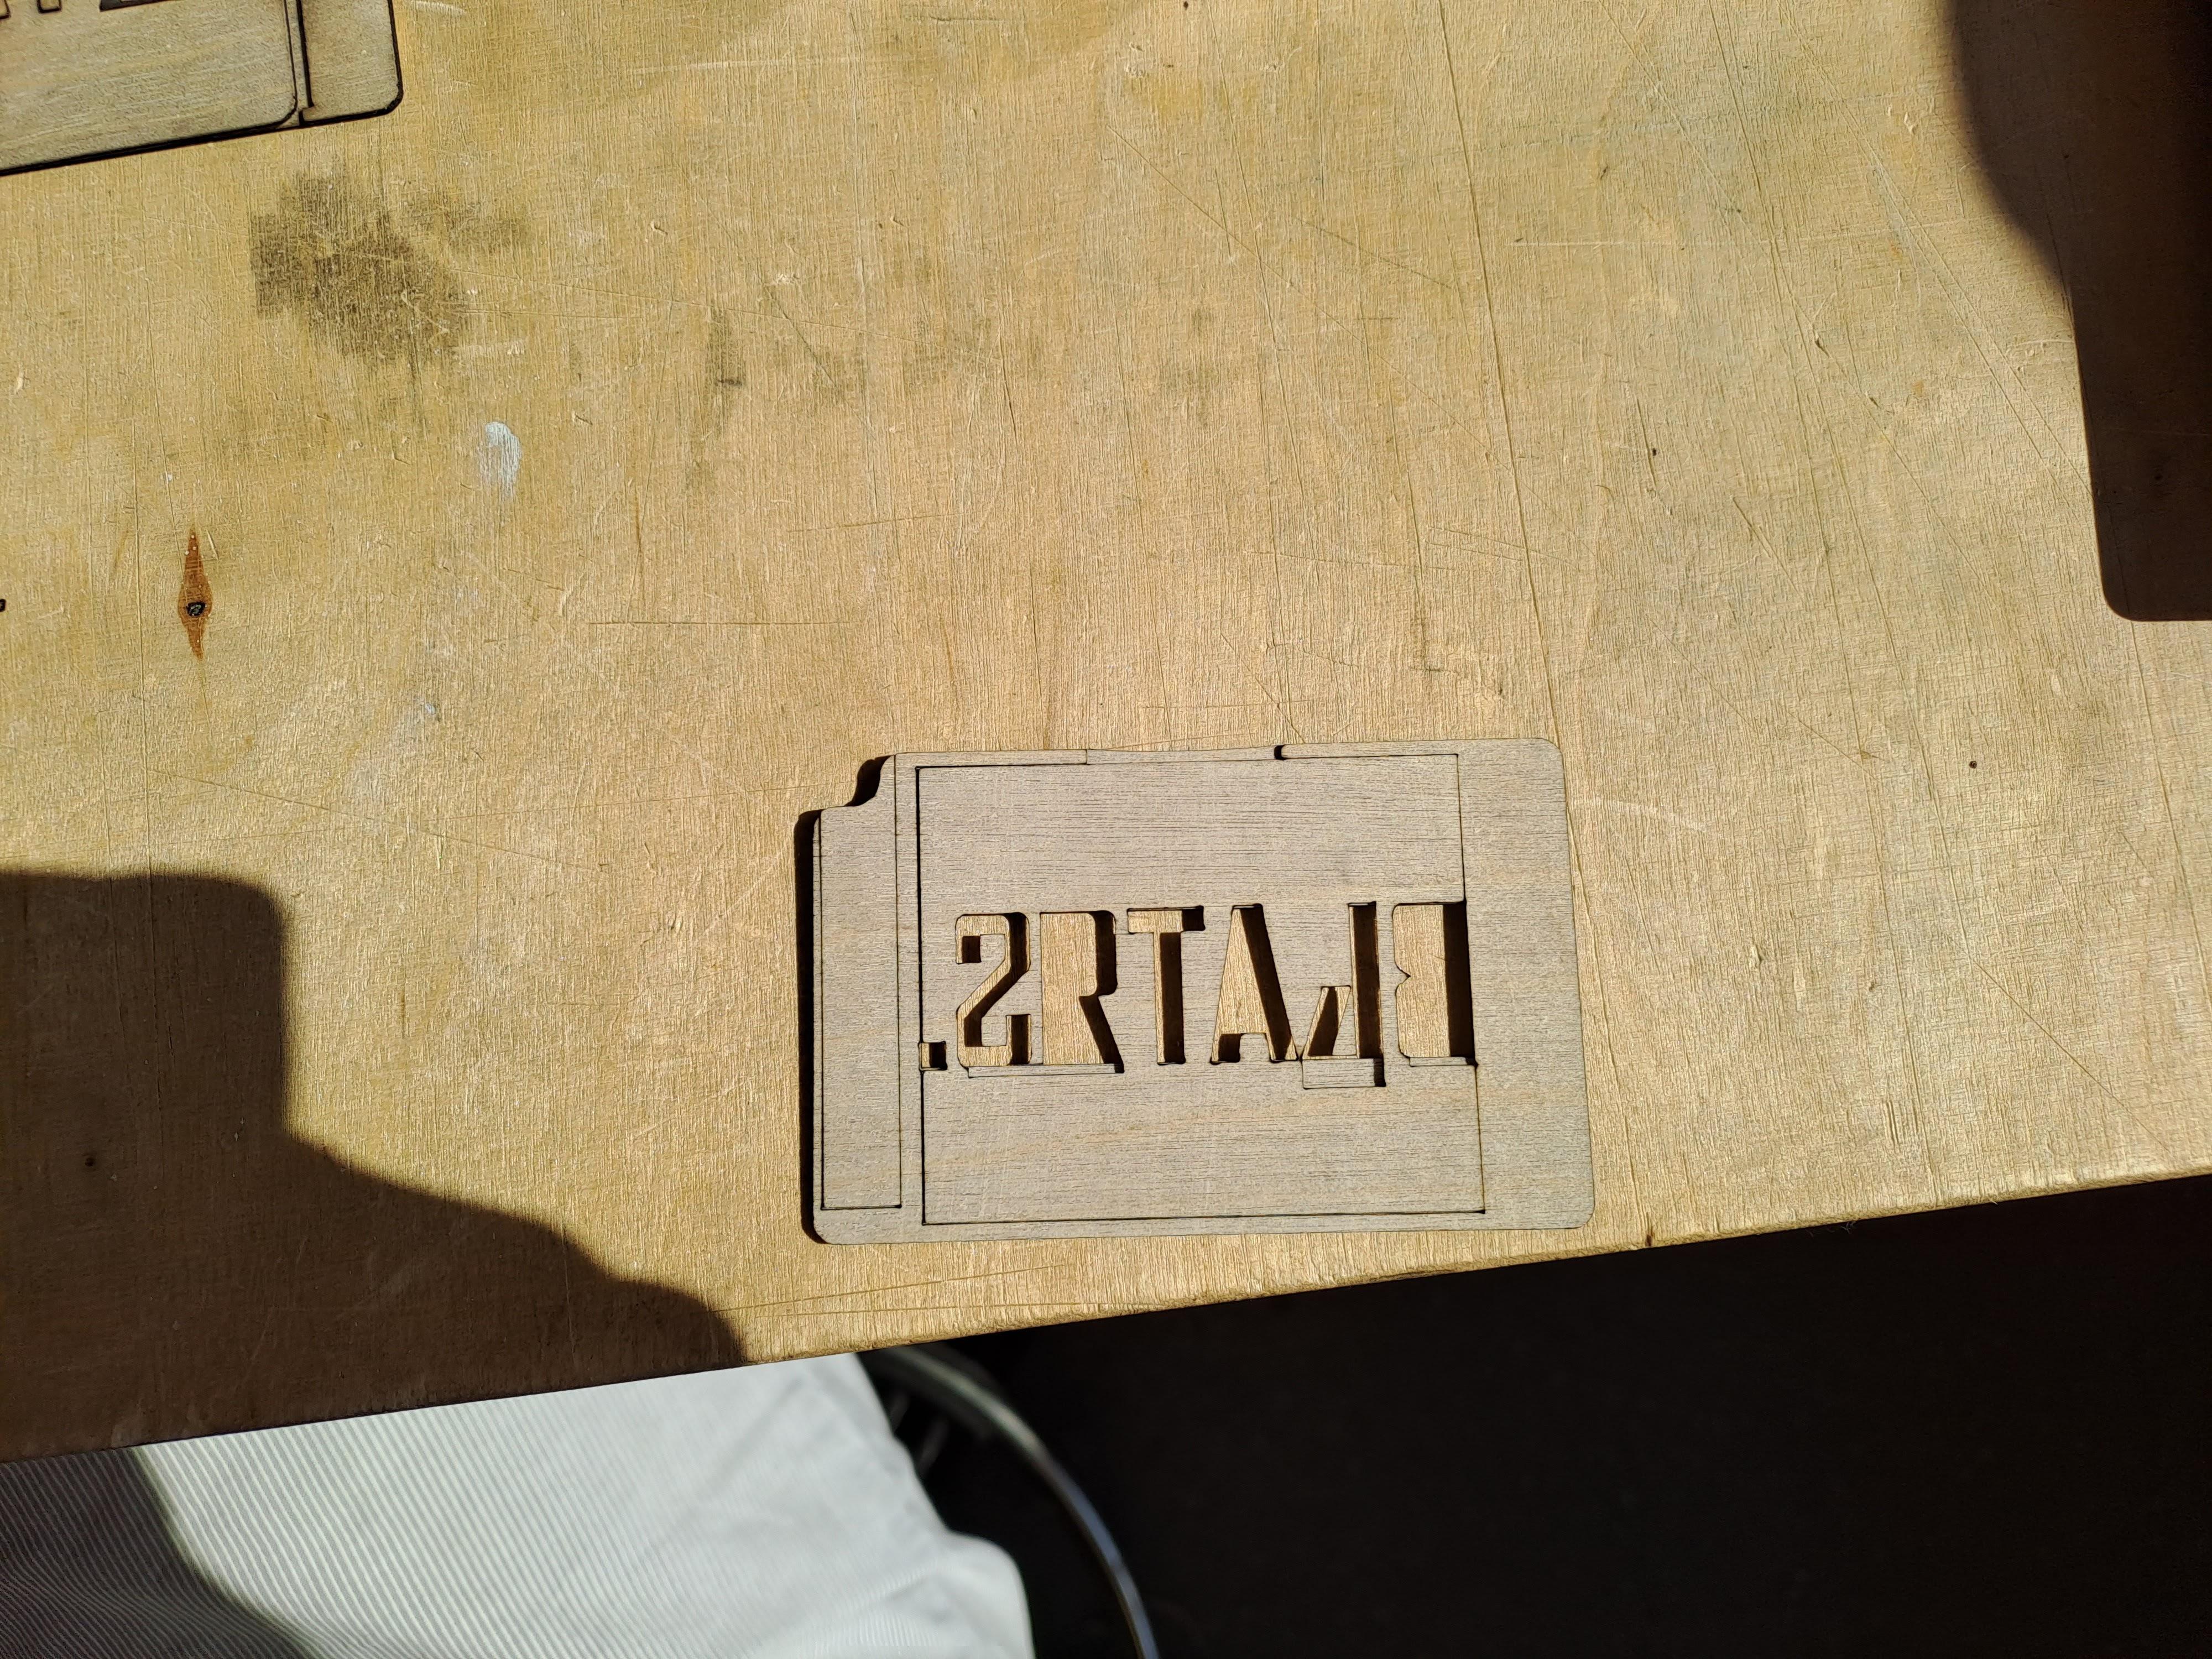
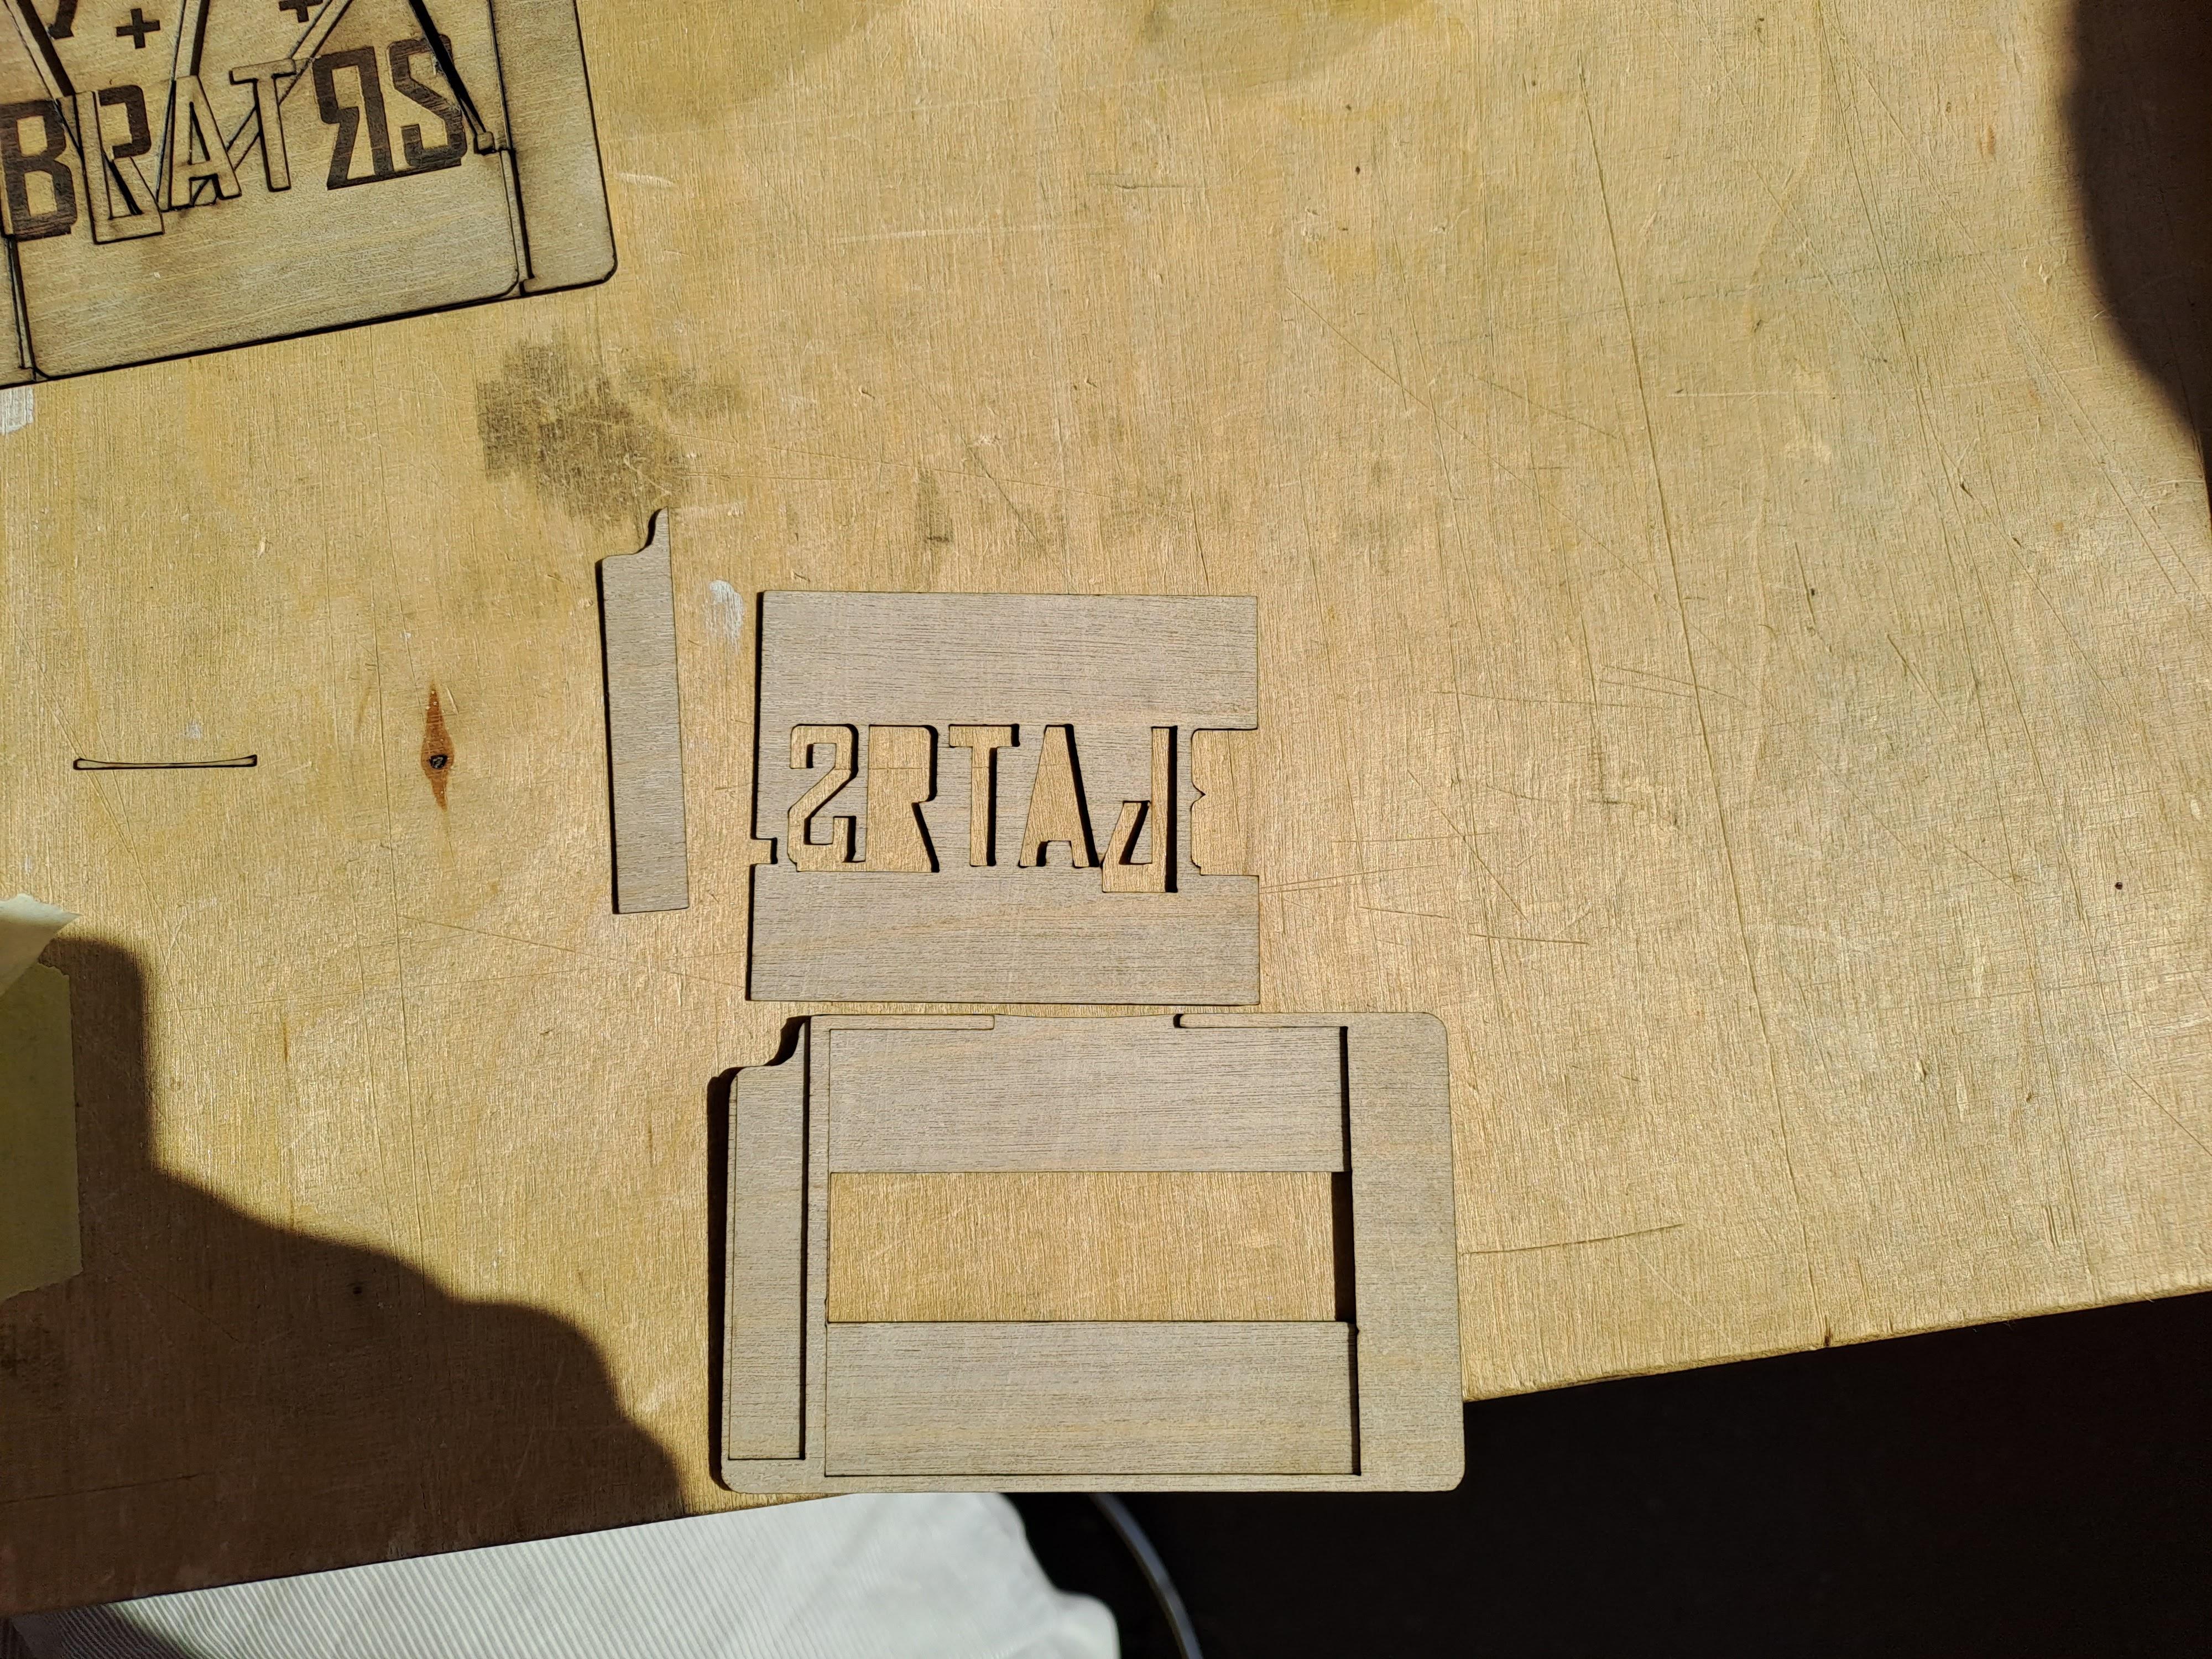
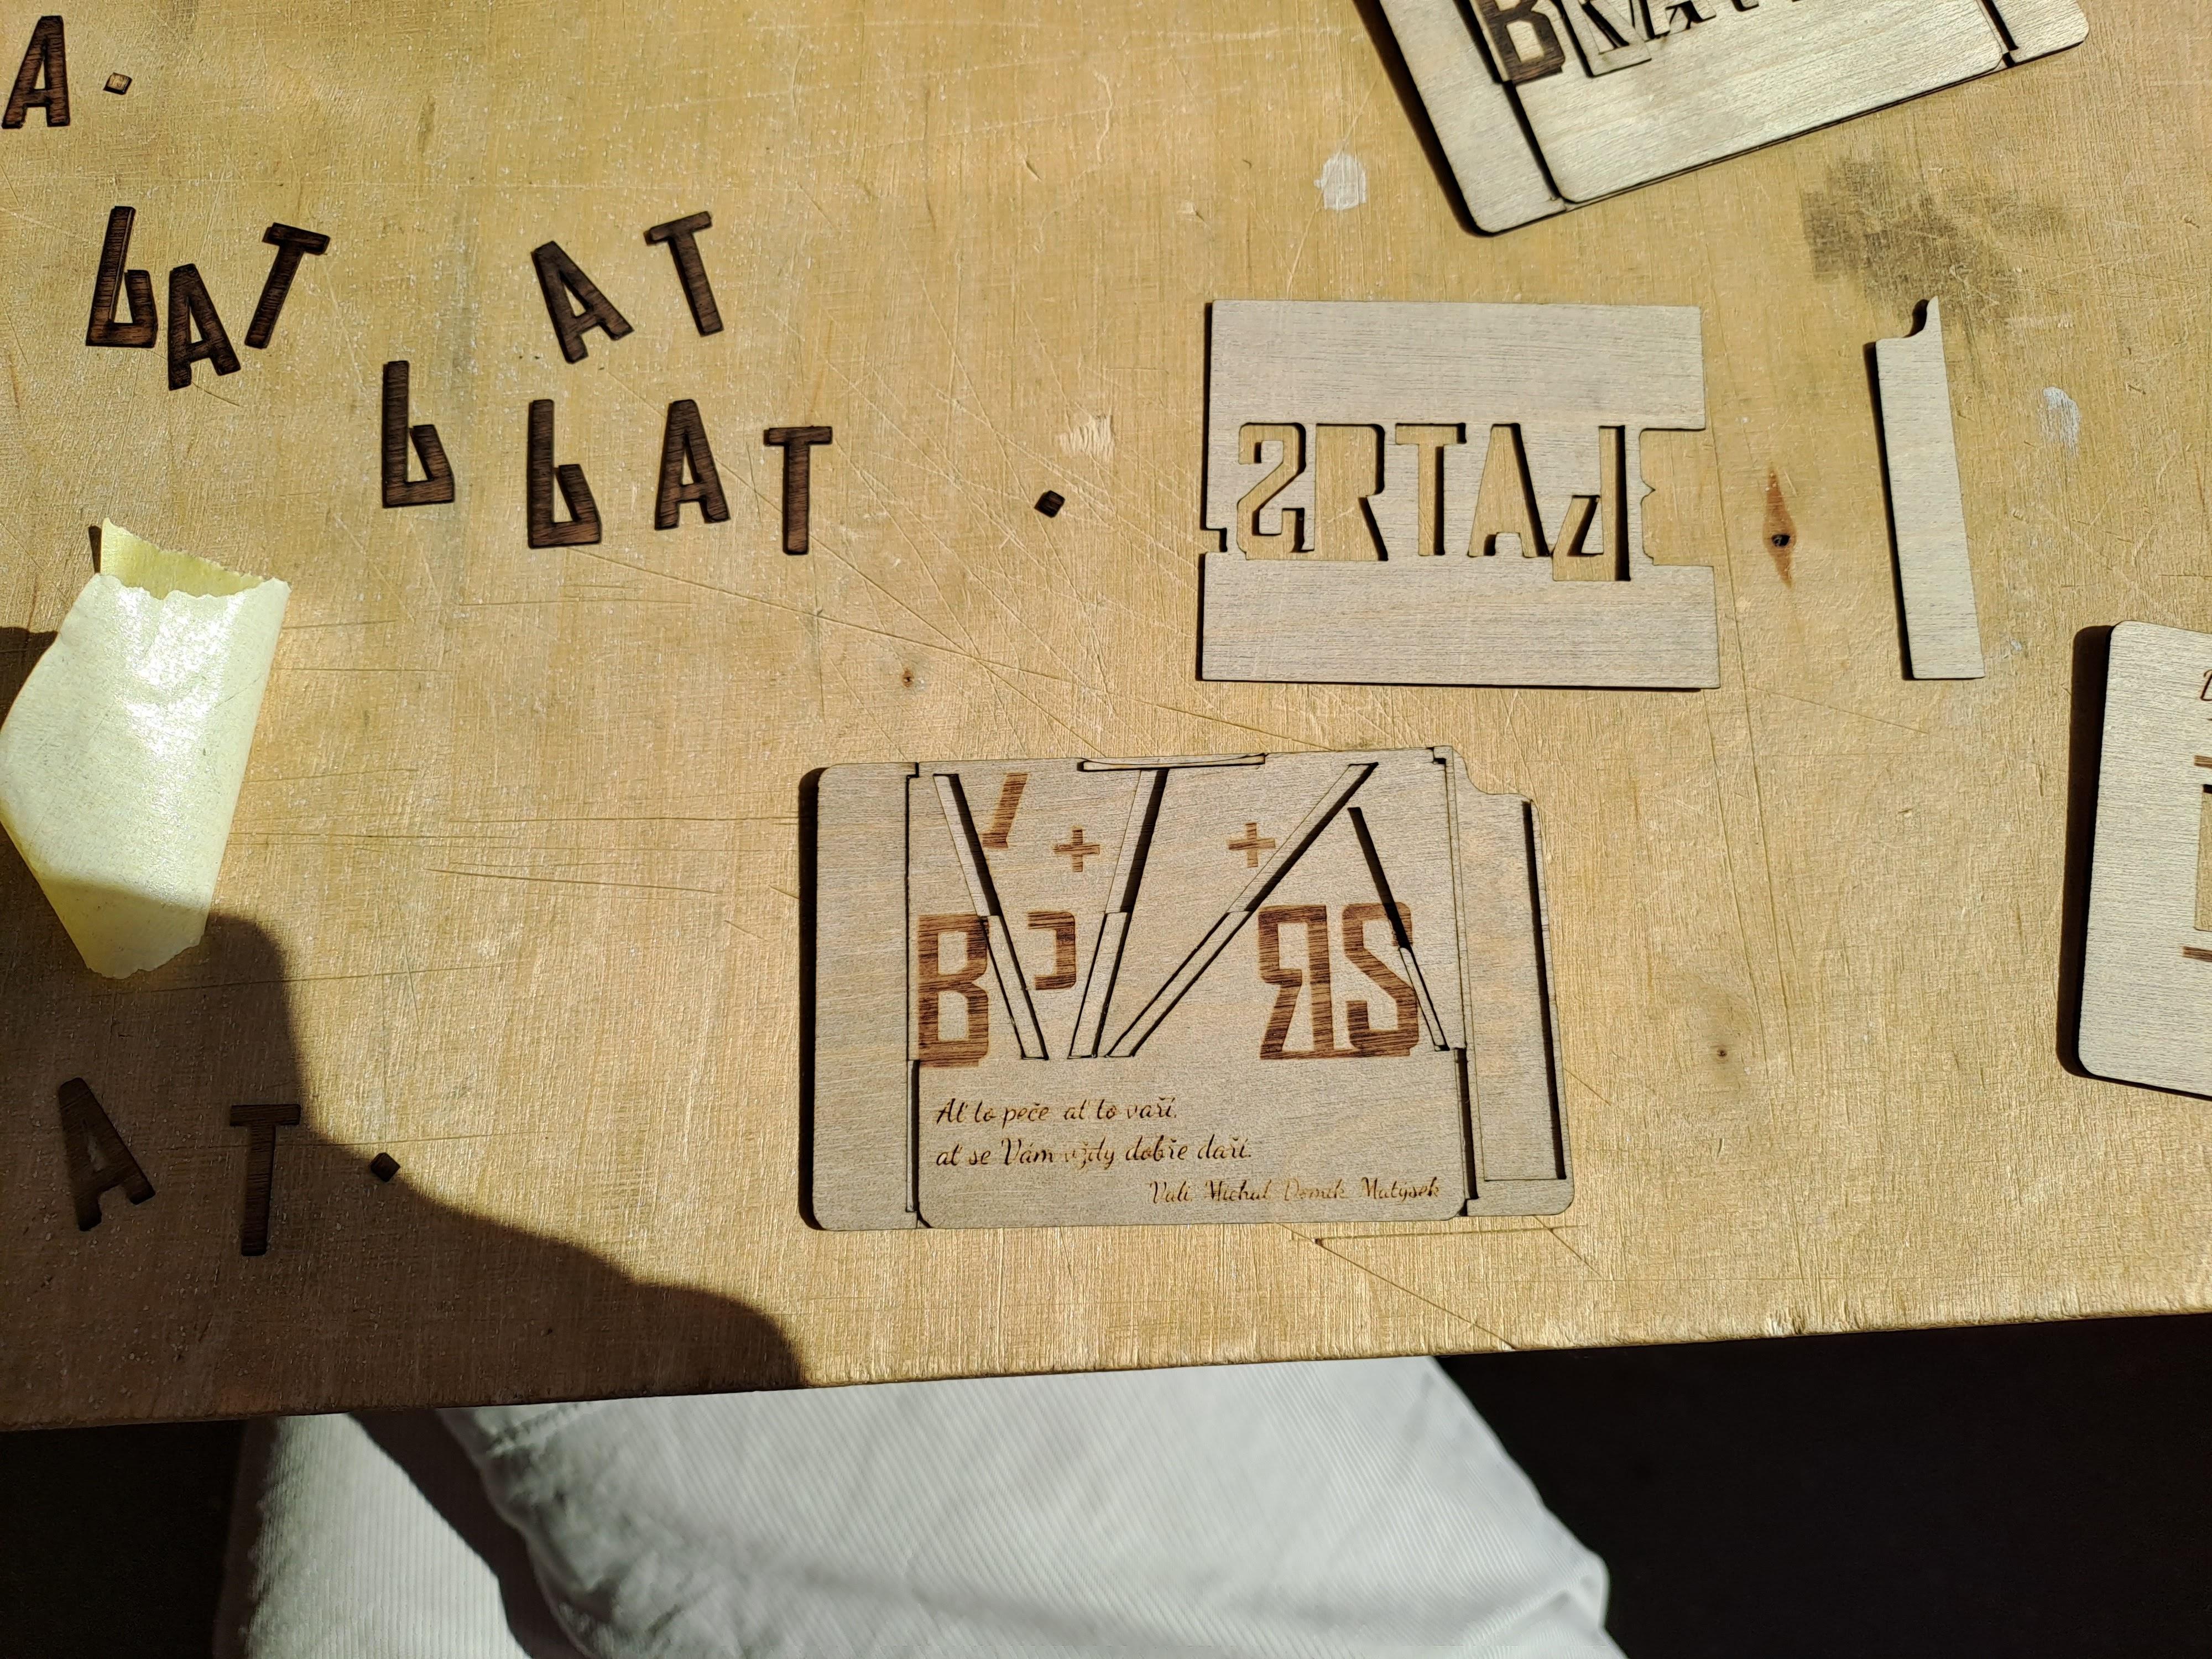
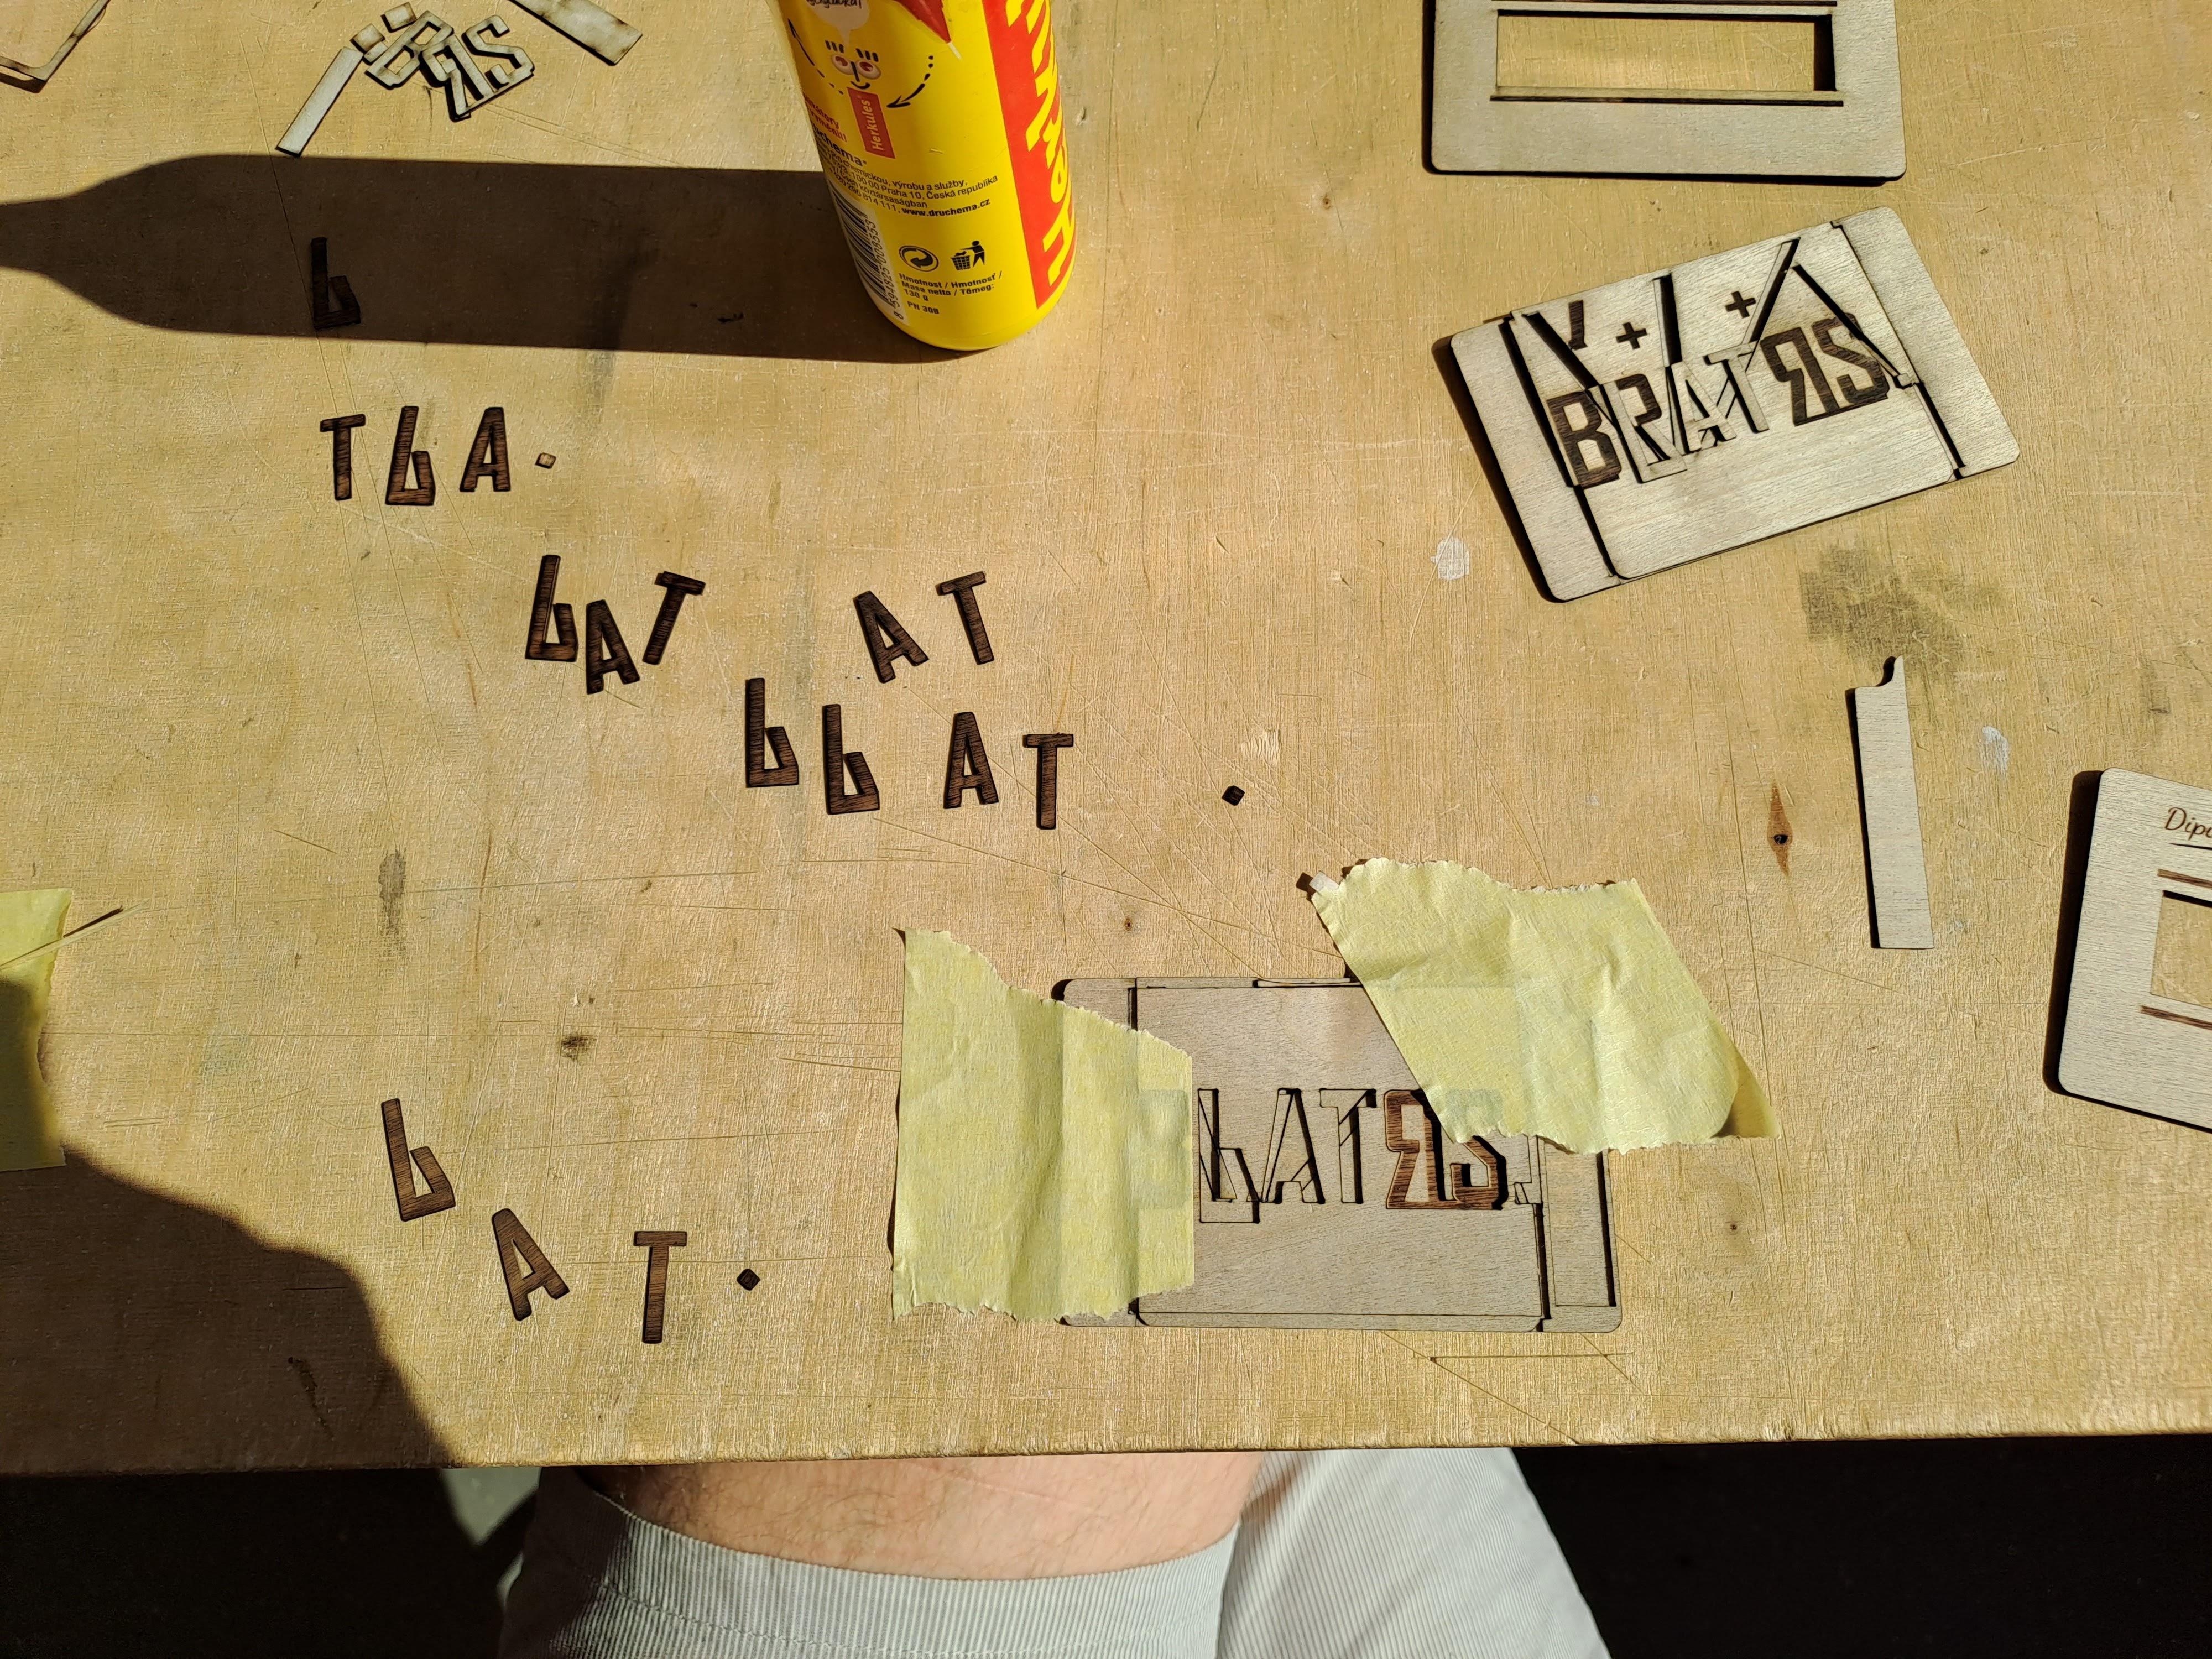
My first idea was to somehow combine their logo BRATRS with their names Karel, Tomas and Adam. I figured out that BRATRS already contains letters A and T and that letters K and R are a little bit similar. So I decided to somehow switch the BRATRS into K+A+T.
I wanted to have the wishes written on a moving part too. The wishes should move out and all the needless letters should hide. The letters A and T are too close to each other so I need to move them far away for a little bit and that's why I included the transition from vertical movement to horizontal one.
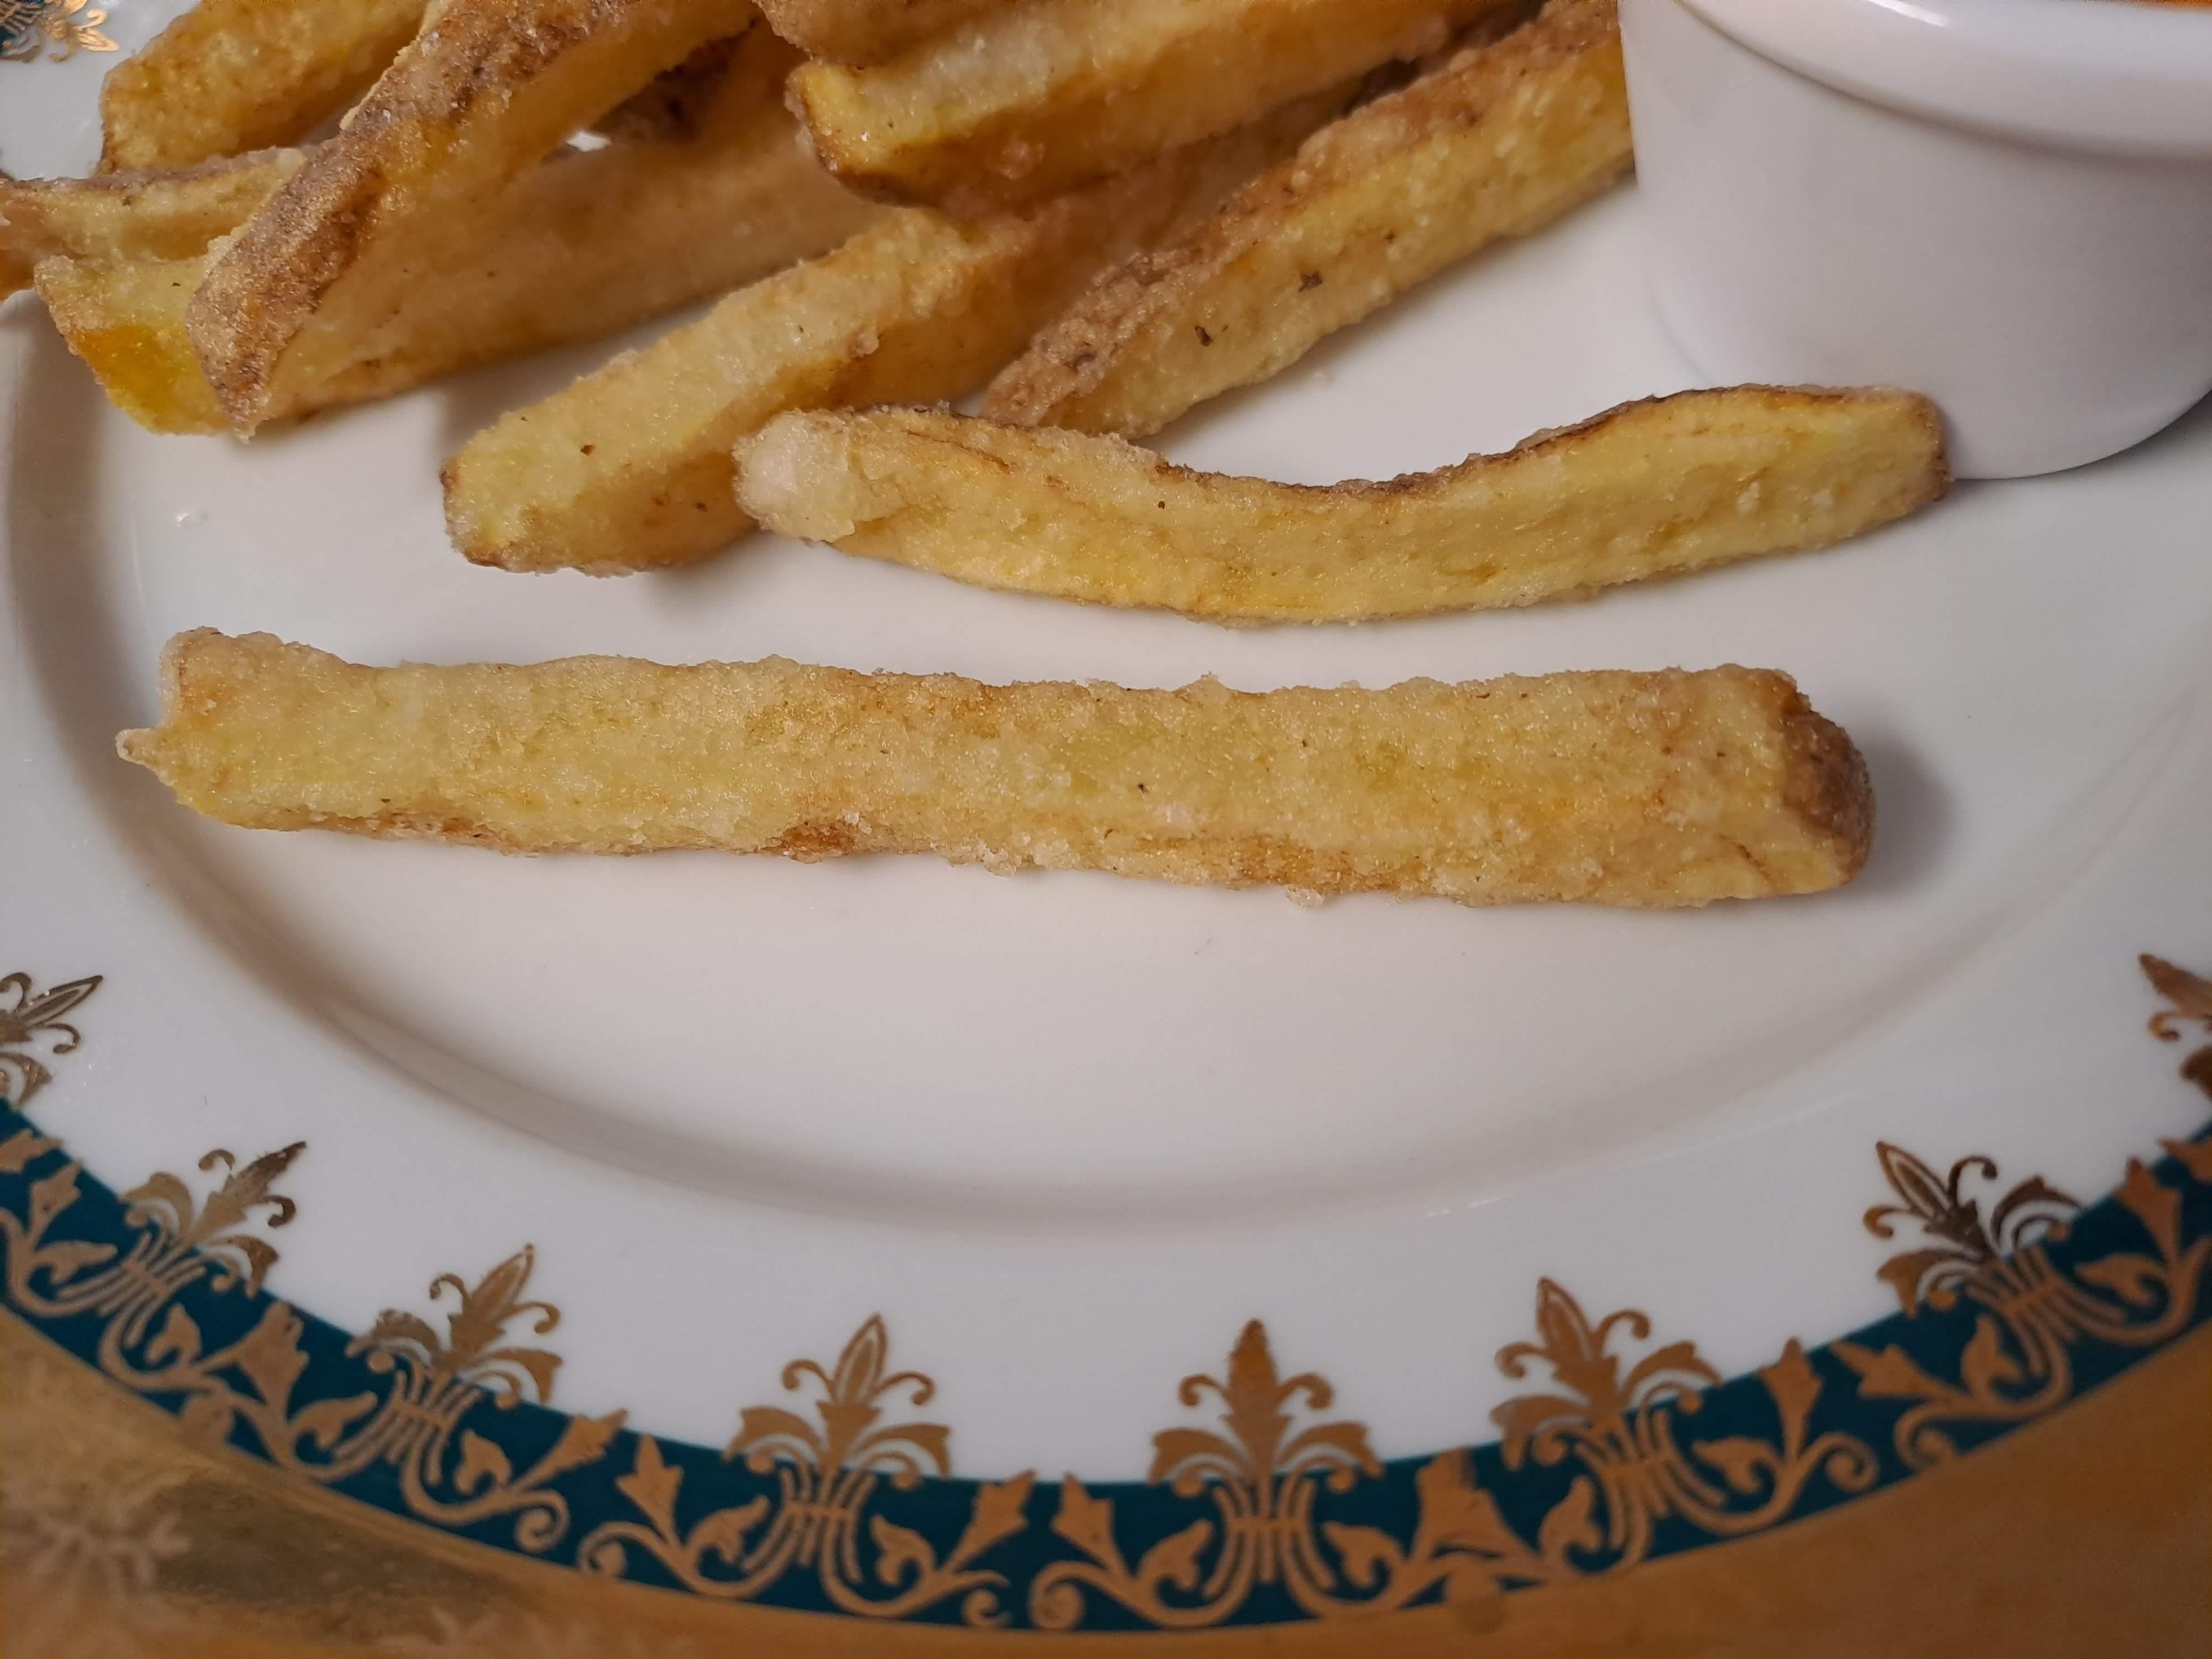
Then I was thinking about the process of pushing on the gift card which would start the own move. The best idea was to take their french fry and dip it into their dip :-).
Proof of concept
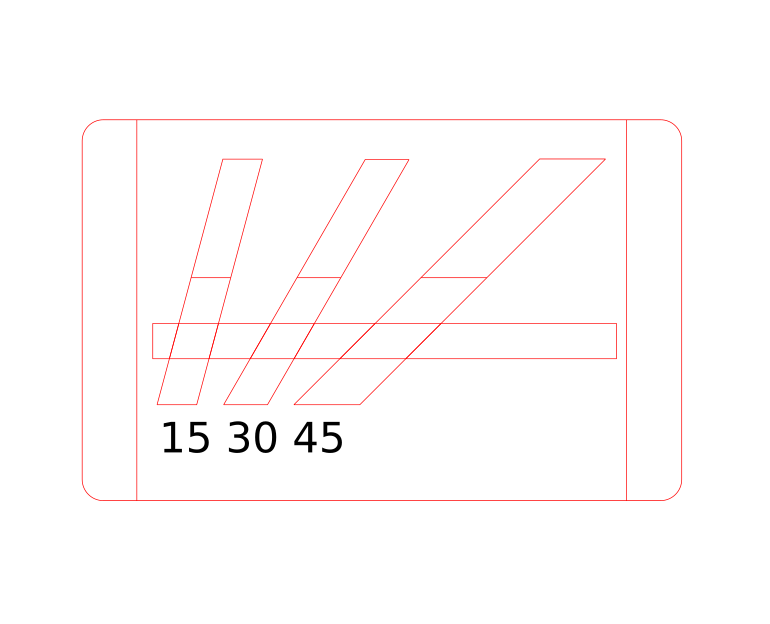
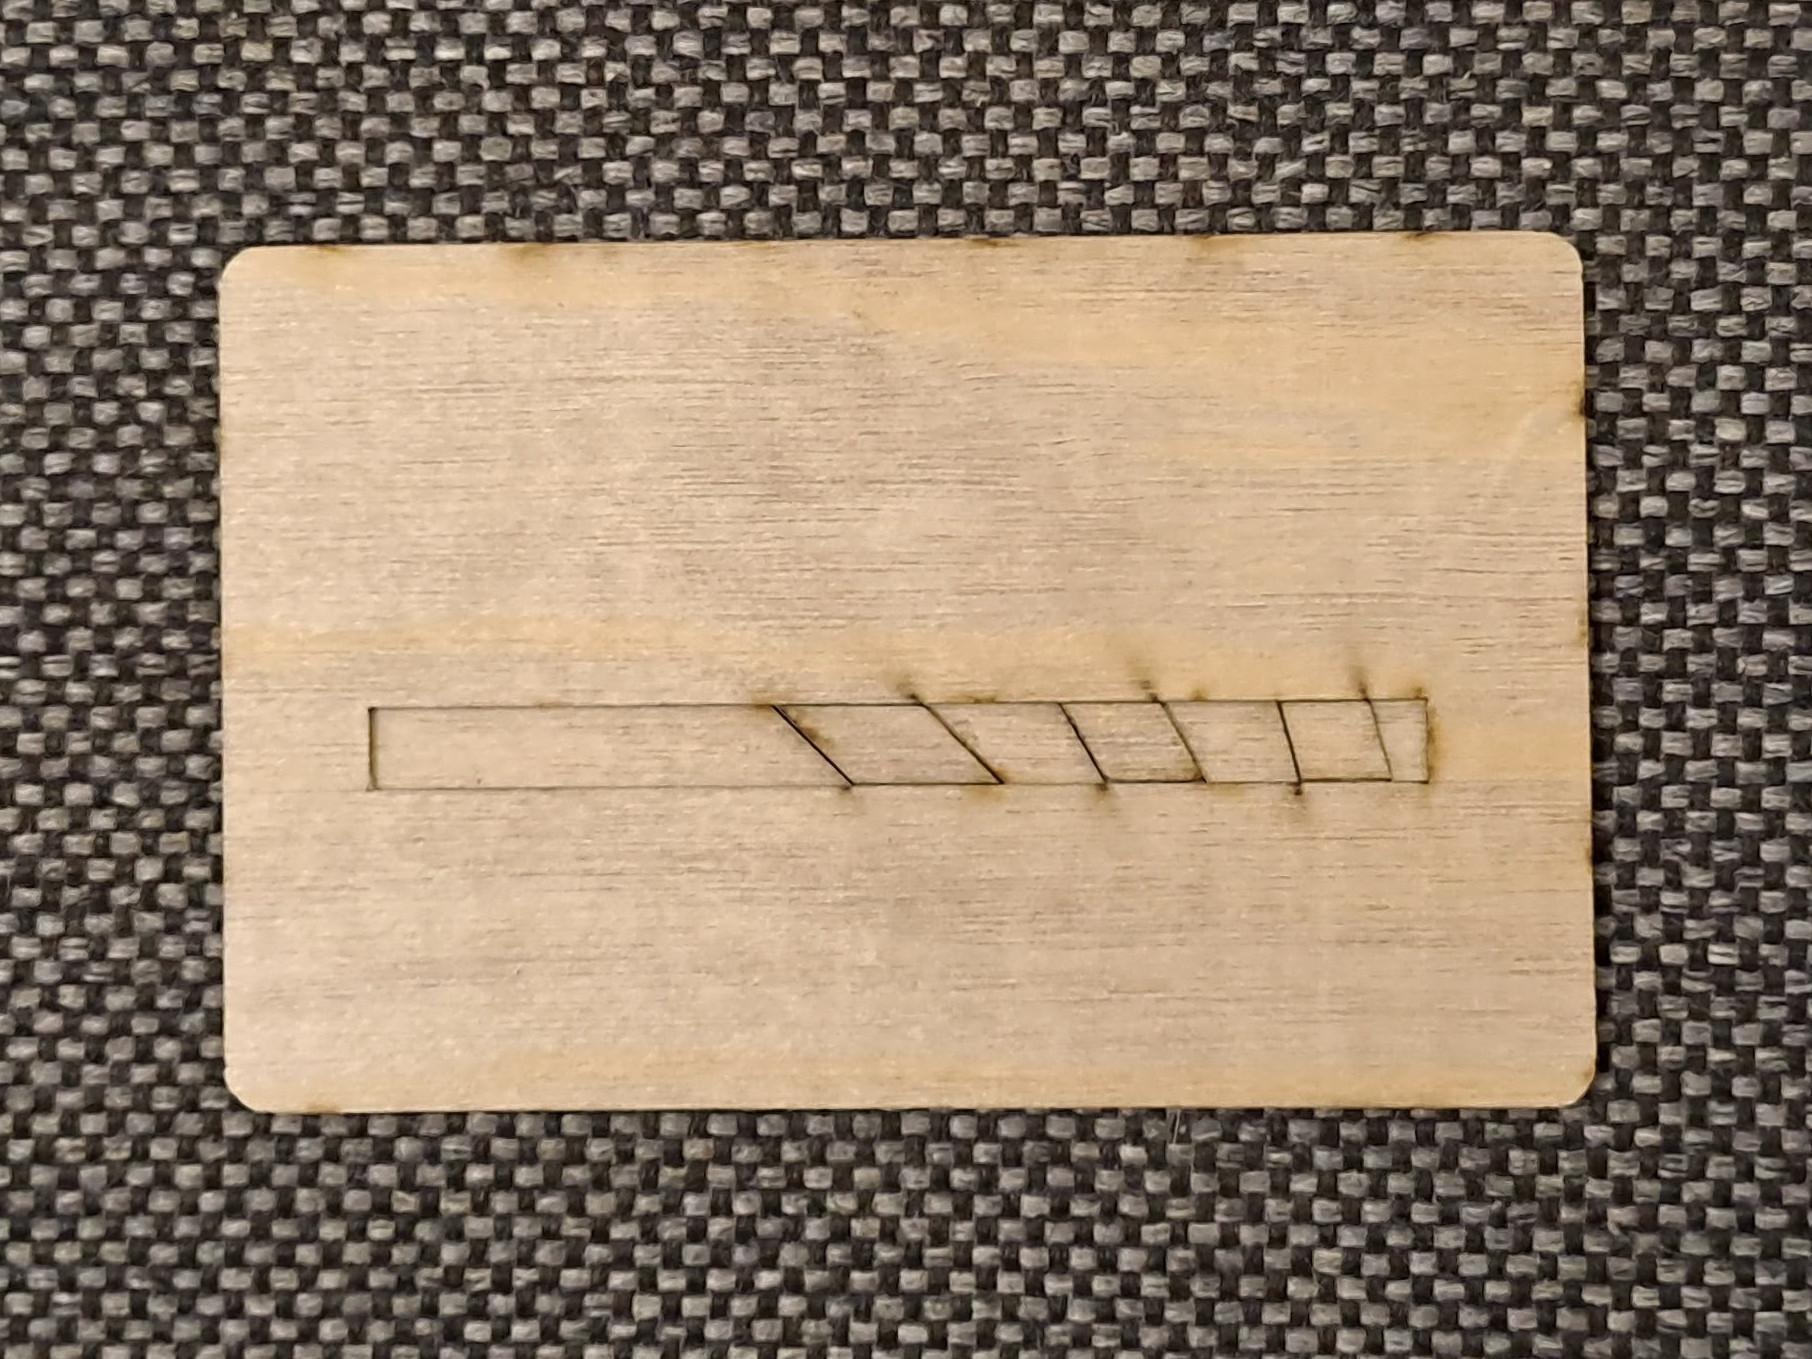
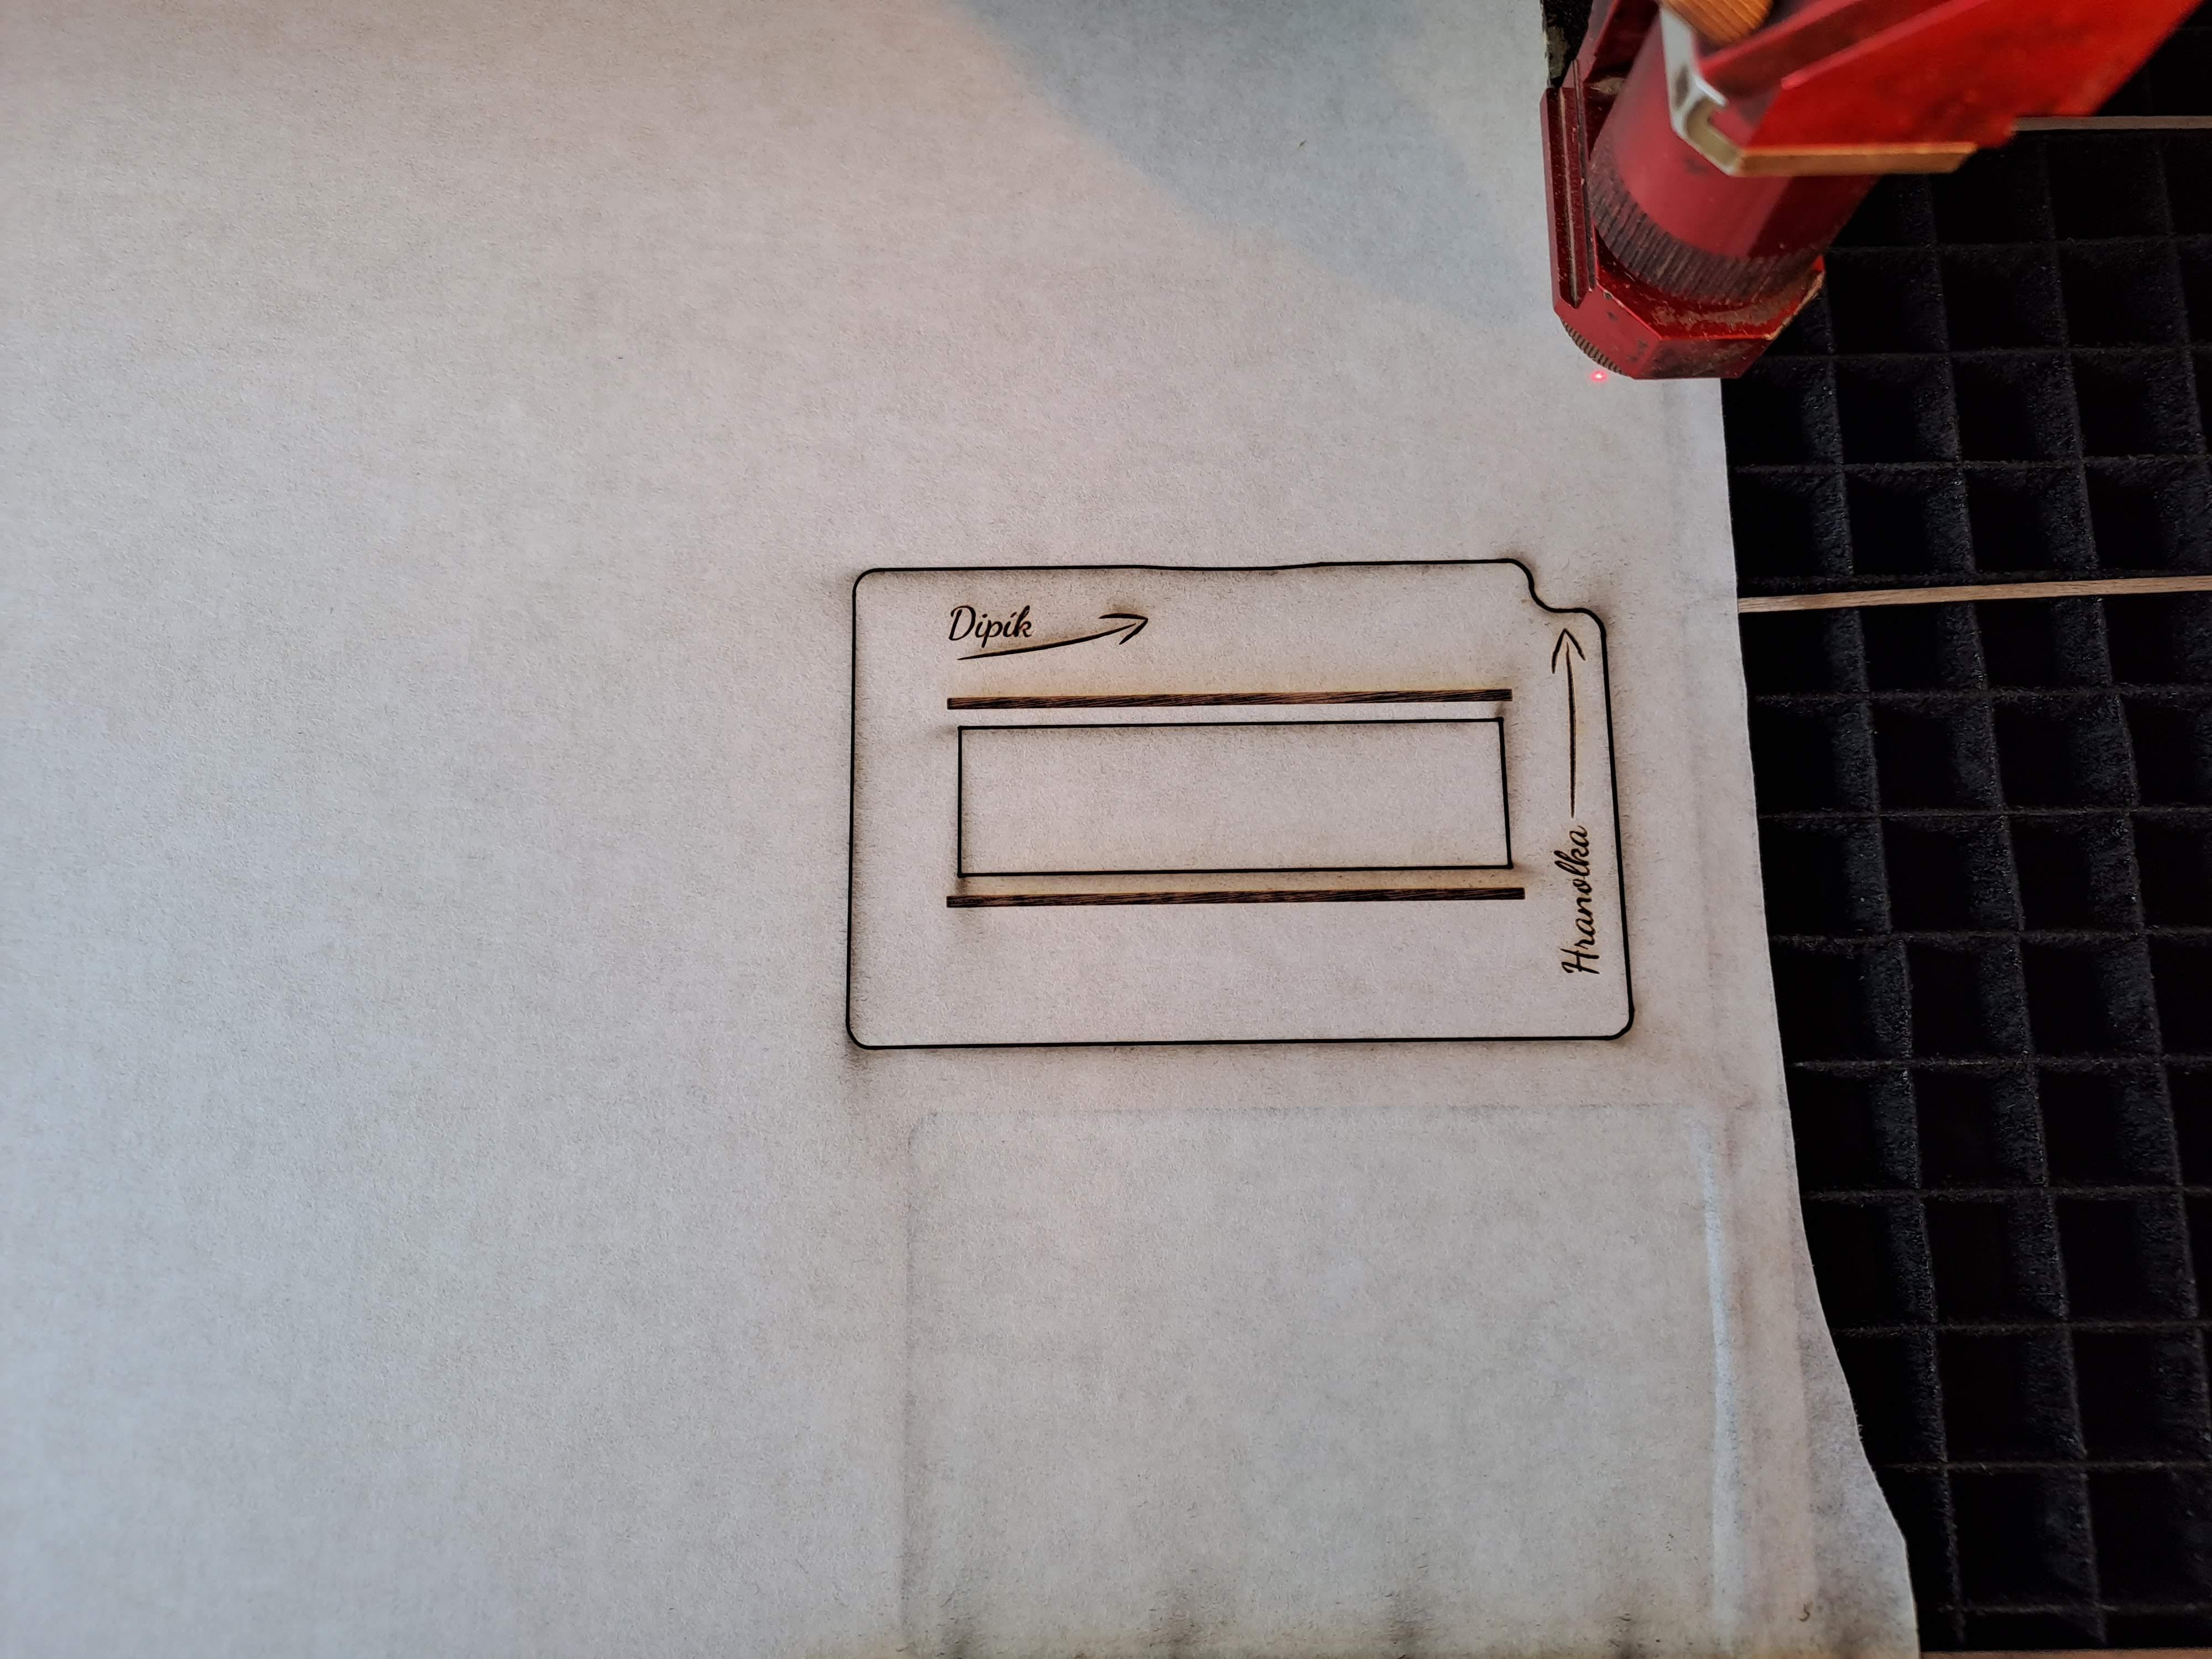
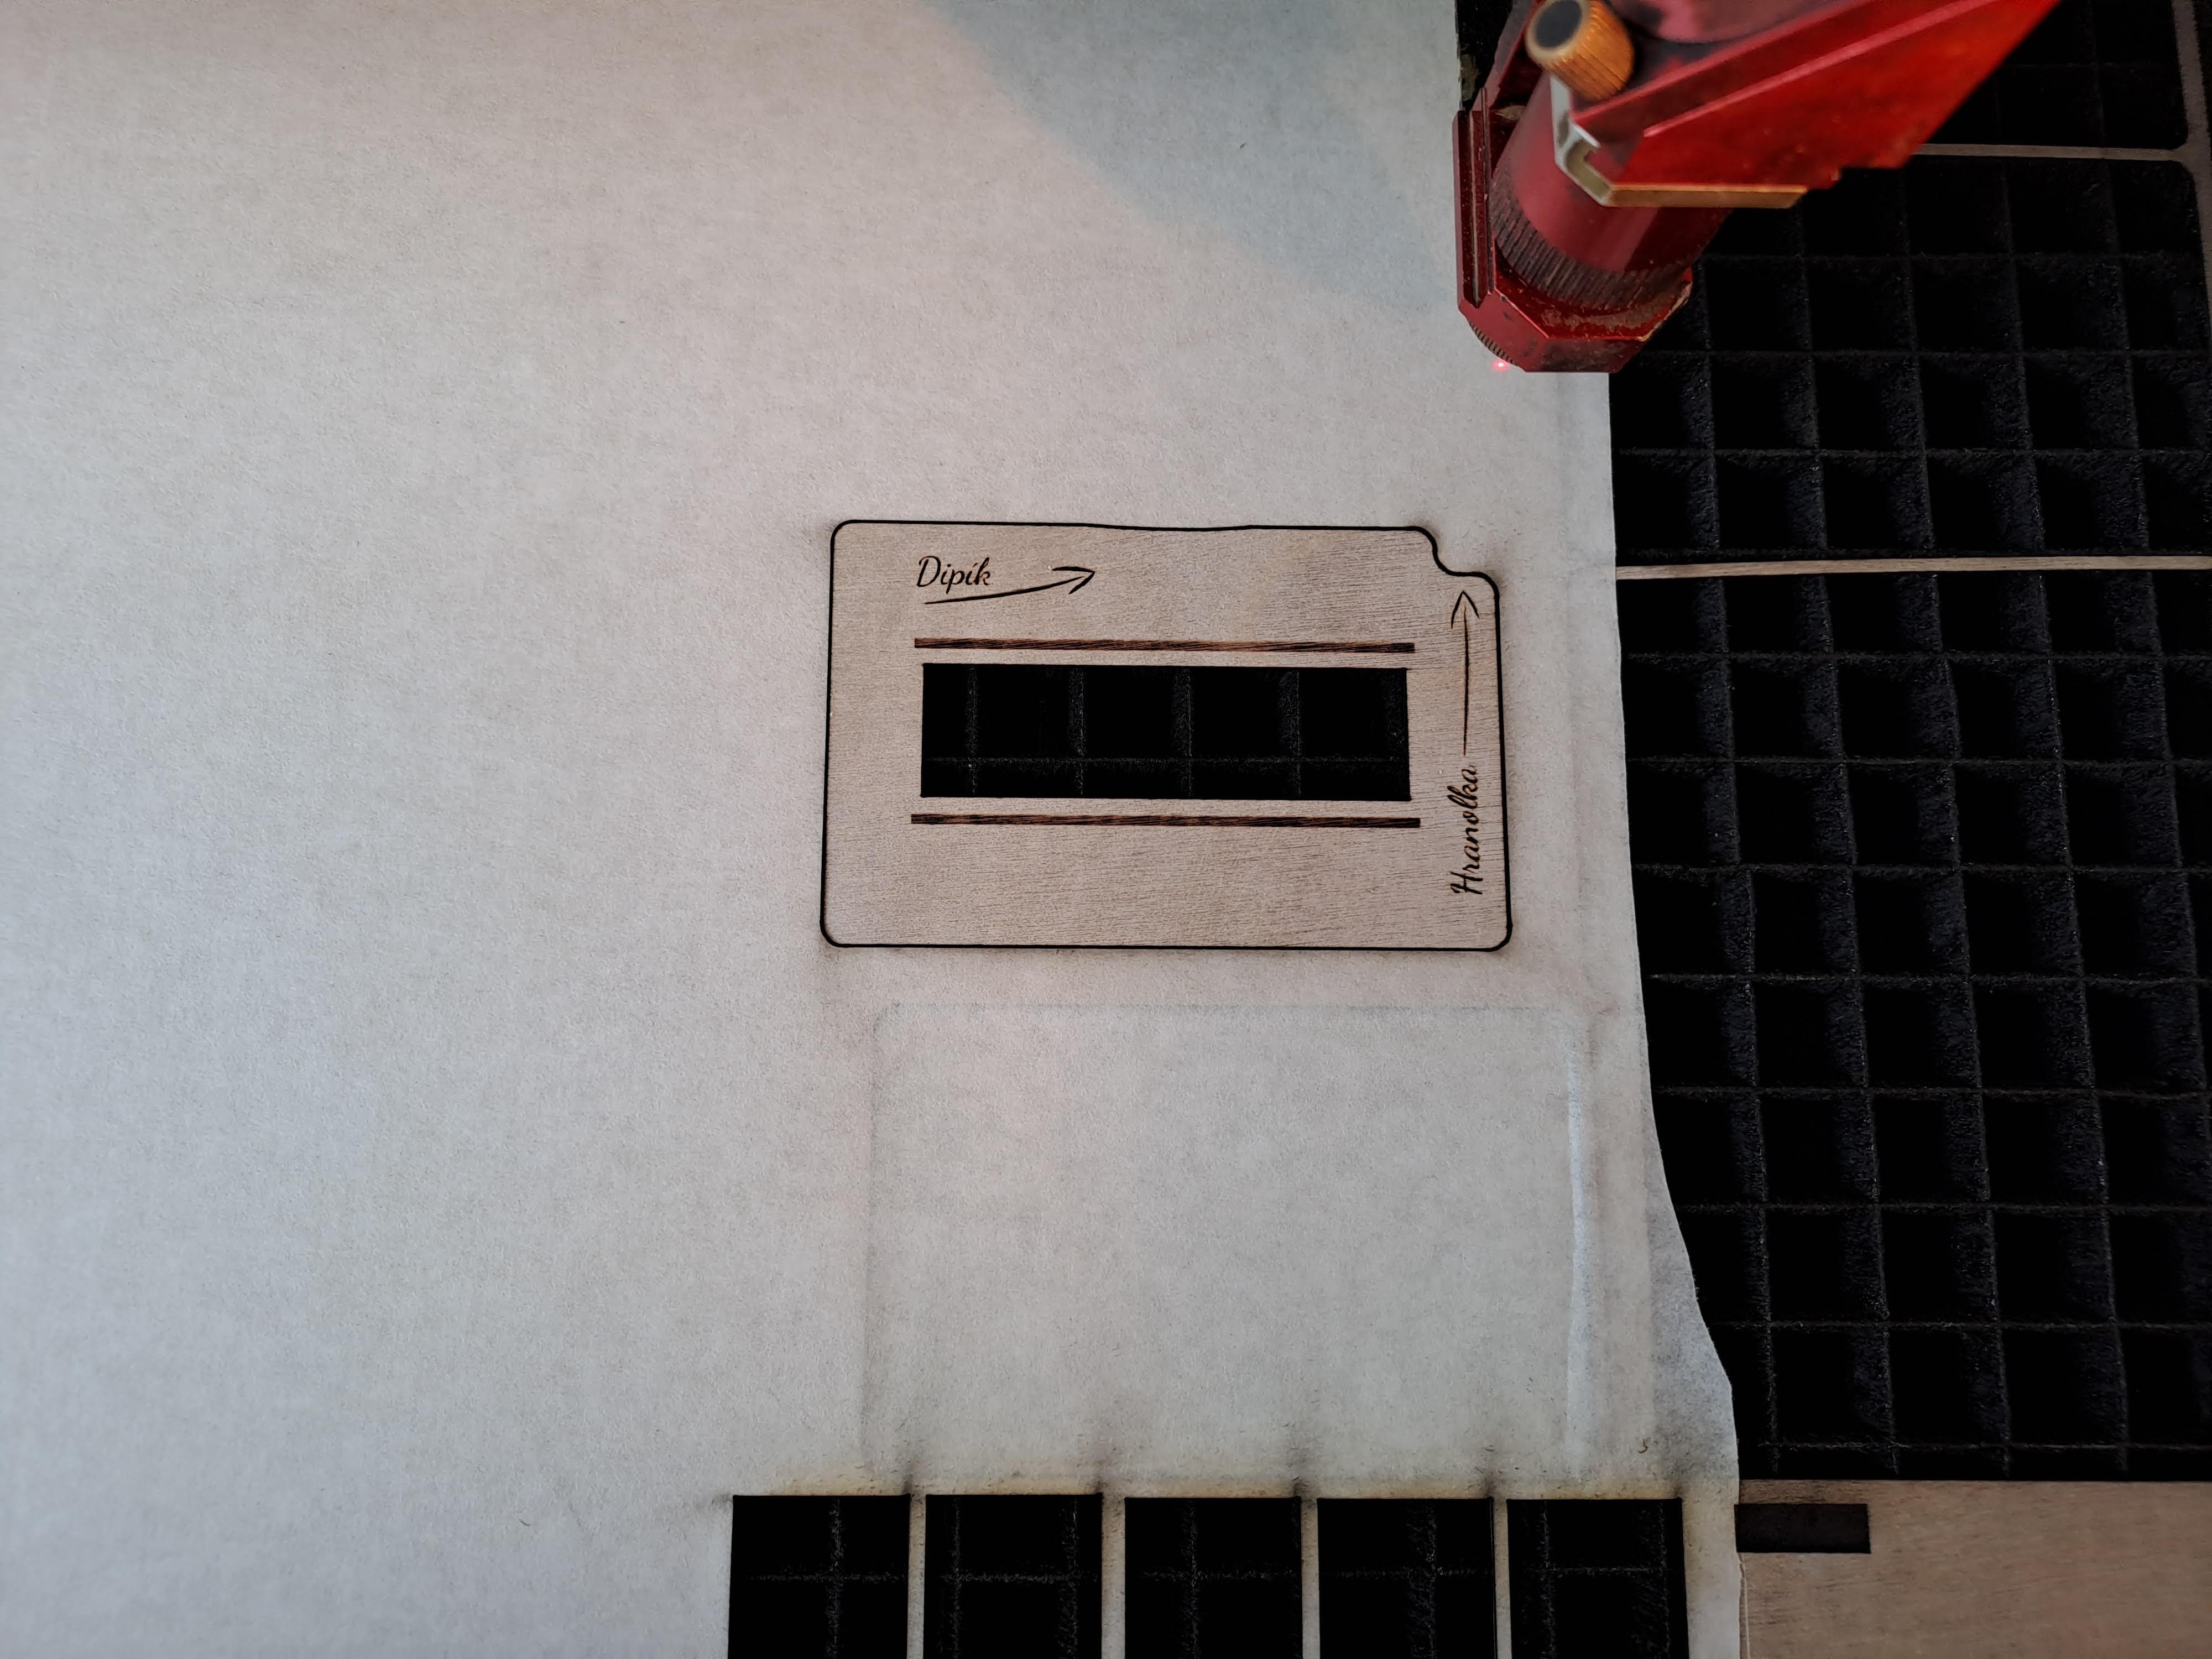
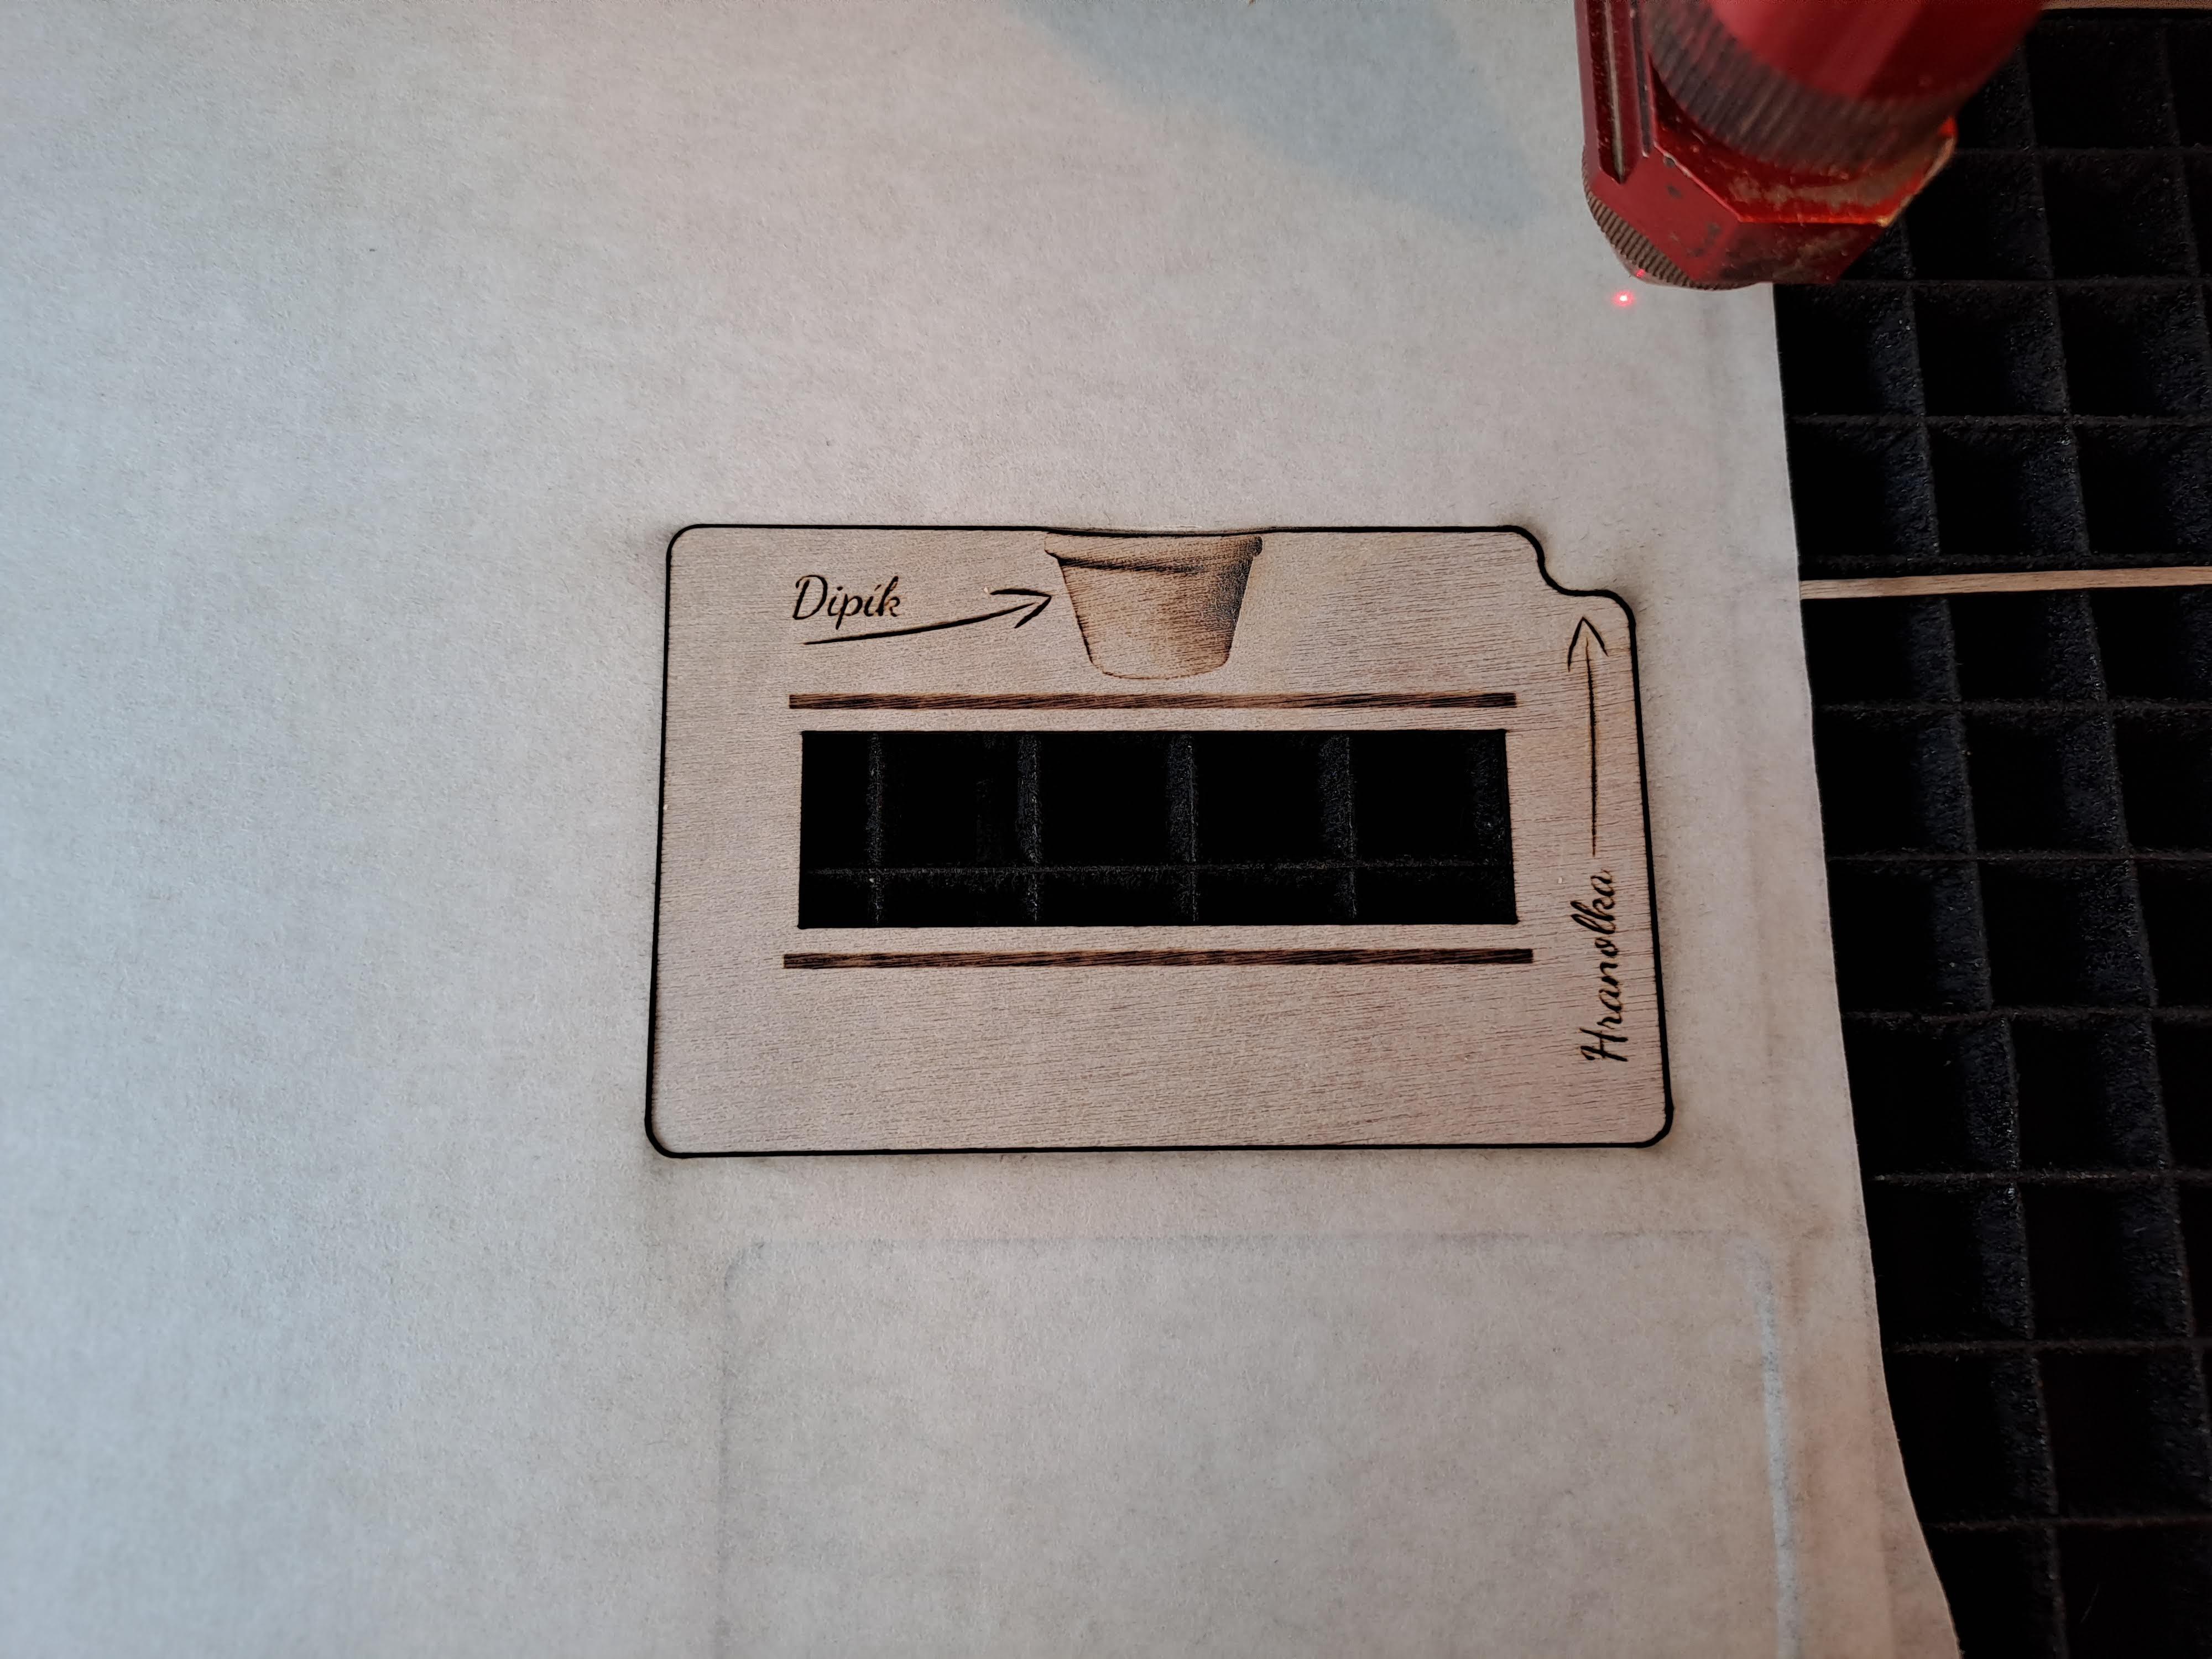
The base of a moving gift card is the movement :-). I liked the idea to push vertically on the gift card and something another moves horizontally. It's a little bit nonintuitive and surprising specially in this small and thin gift card. The principal is to transfer vertical movement into the horizontal using a sloping edge. I tried different angles to figure out which I can use and which I can not because of a friction. And I found out, that none :-). The mechanics was almost stuck even with the first small angle of 15°. The trick is to wax the contacting surfaces using common wax candle. Than I get nice smooth movement even with the 45° angle and with multiple moving parts simultaneously.
 _
_
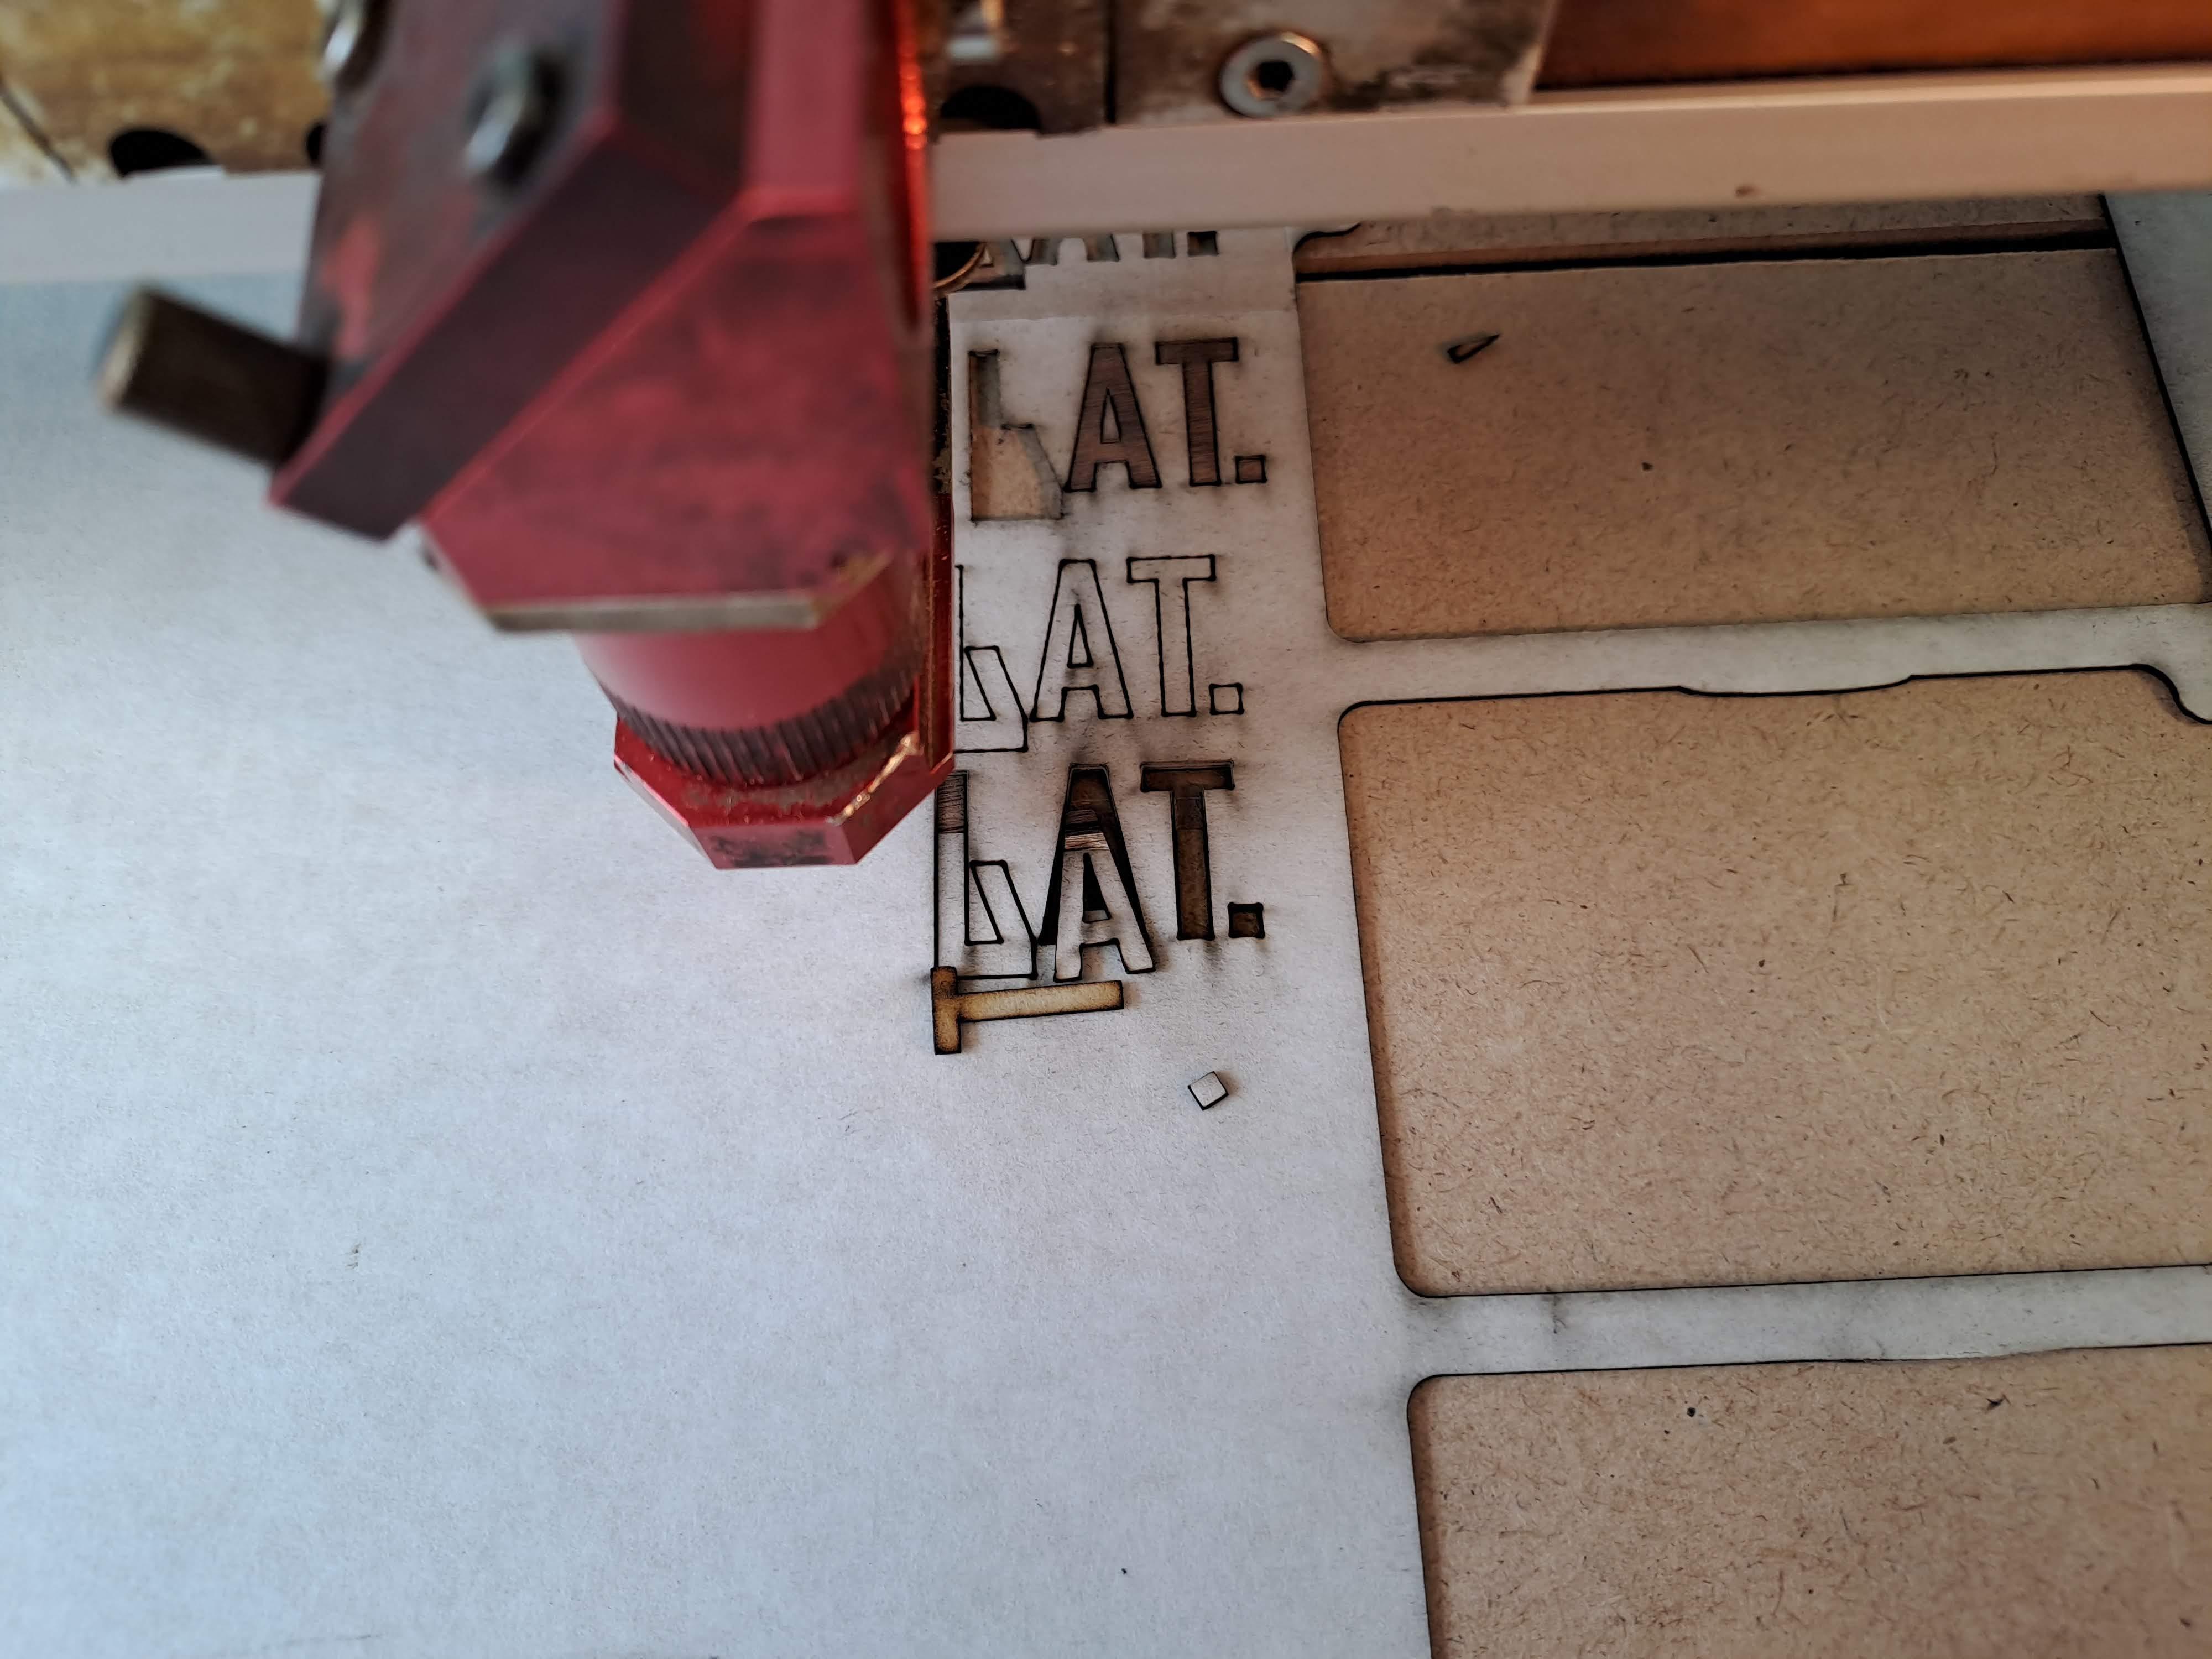
I needed to move each letter (and dot) a different length, which I did by shear each drive below the letter at a different angle. The angle can certainly be calculated, but I found it easier to try it in Inkscape and after a few tries I found the right angle.
Graphics
Once I had verified that the basic mechanics would work, I started on the rest of the gift card.
I used GIMP for my raster graphics. I took a picture of the dip and fries in the bistro, cropped it in GIMP and converted it to grayscale. For the fries, I had to adjust the shape a bit and highlight the edges, because otherwise after engraving and laser cutting it looked more like a cigar than a french fry :-). Since I engraved the french fries from both sides, I had to modify them so that their outline was axially symmetrical. To get the outline of the chip for laser cutting, I used the "Trace Bitmap" tool in Inkscape and set the "Brightness cutoff" value to 0.999. Then I used Dynamic offset. That way I didn't have to go around the shape with curves, which would have taken me a lot more time.
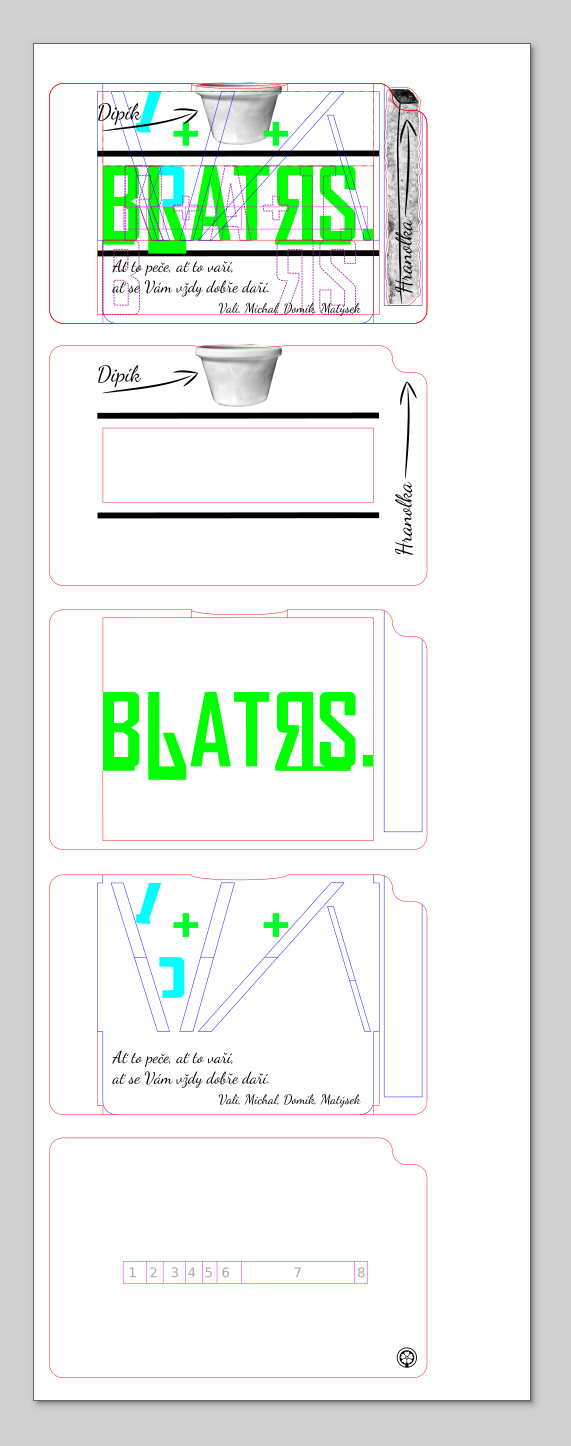
I used Inkscape for vector stuff. I wanted to squeeze the whole card into the size of a business card, so I made a rectangle and roughly put all the things I wanted there, i.e. the logo, the photo of the dip, the fry and the text of the card. When I knew where everything would be, I gradually added details layer by layer and also always visualized the moving parts twice: at the starting and the final position. This helped me a lot to visualize where there might be a mechanical problem later in production.
Even though I was using layers, I was starting to get lost in all the details. And that was mainly because one feature overlapped the other, so something could not be seen at all. I thought that I would like to have multiple views of one thing at once and for that I used clones in Inkscape. I used the Clone tool to clone all the important things. And to make everything fit precisely, I moved each layer by 100mm by changing the value in Y by 100 for the first layer, by 200 for the second, etc. If you would like to move something by a relative distance with a not-so-round value, use this trick: you can add +321 to the value "123.456" in the Y field, so you write "123.456+321" and press enter. Then Inkscape itself calculates the final value "444.456”.
Laser
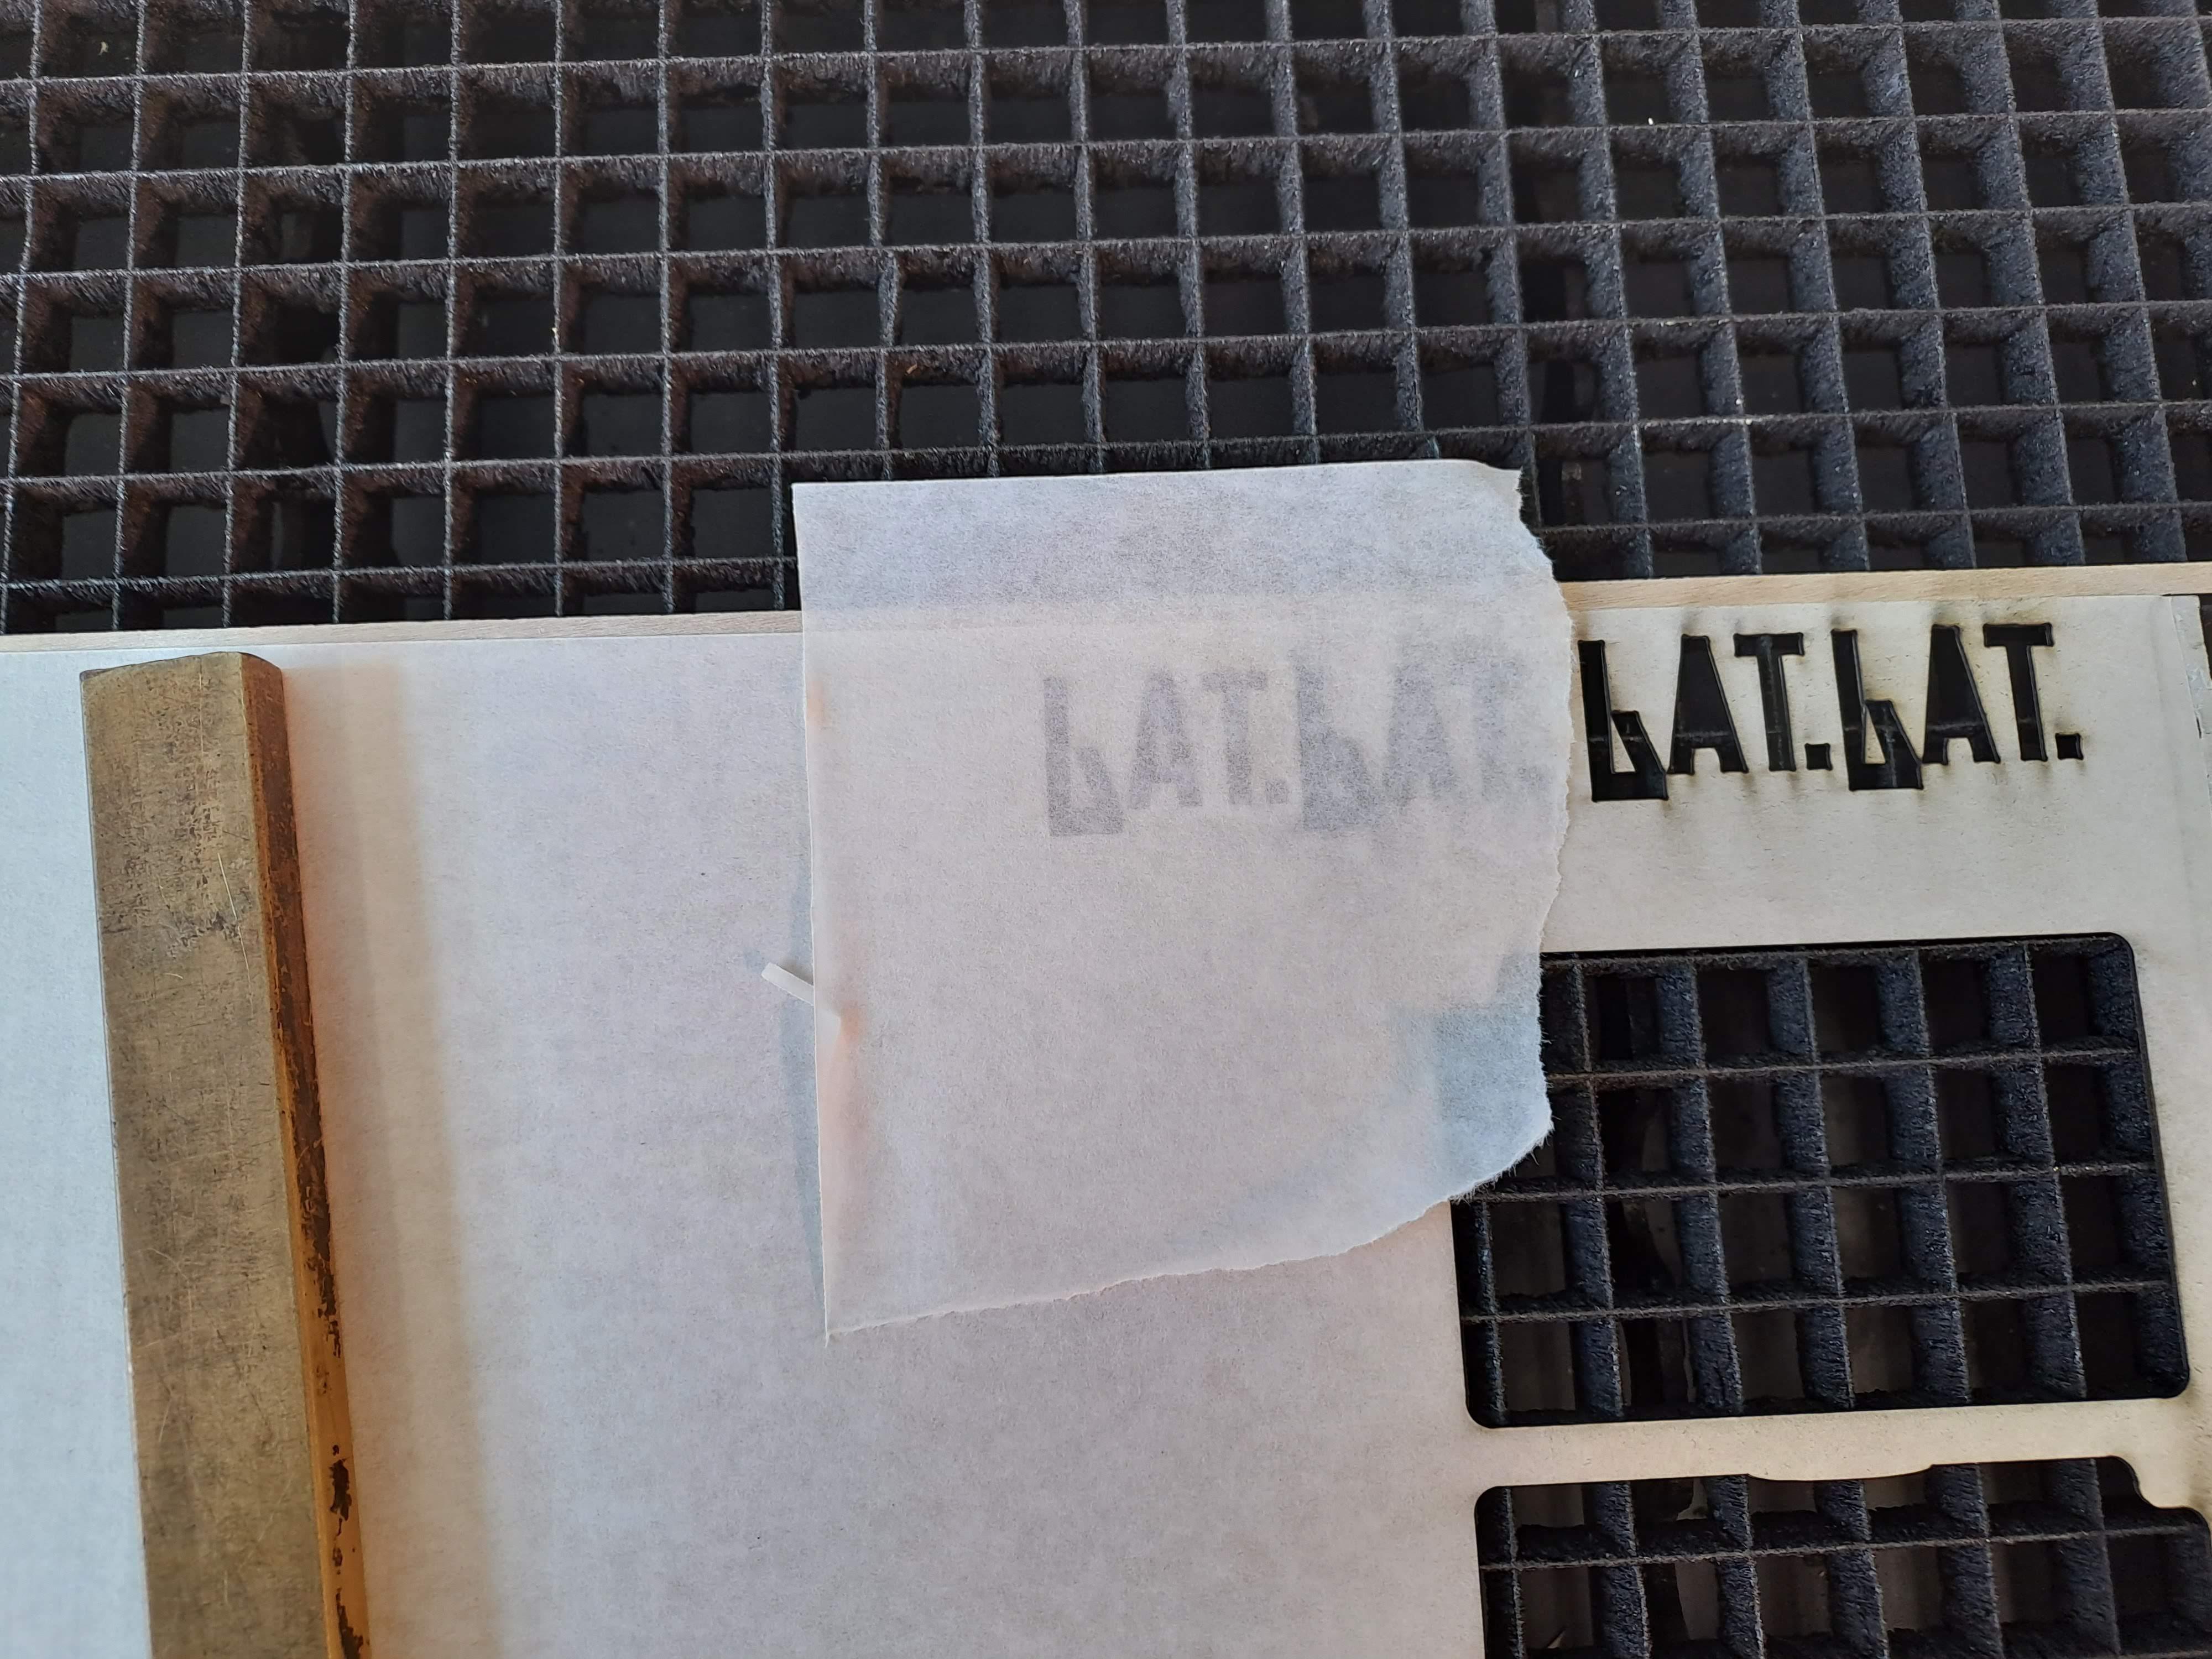
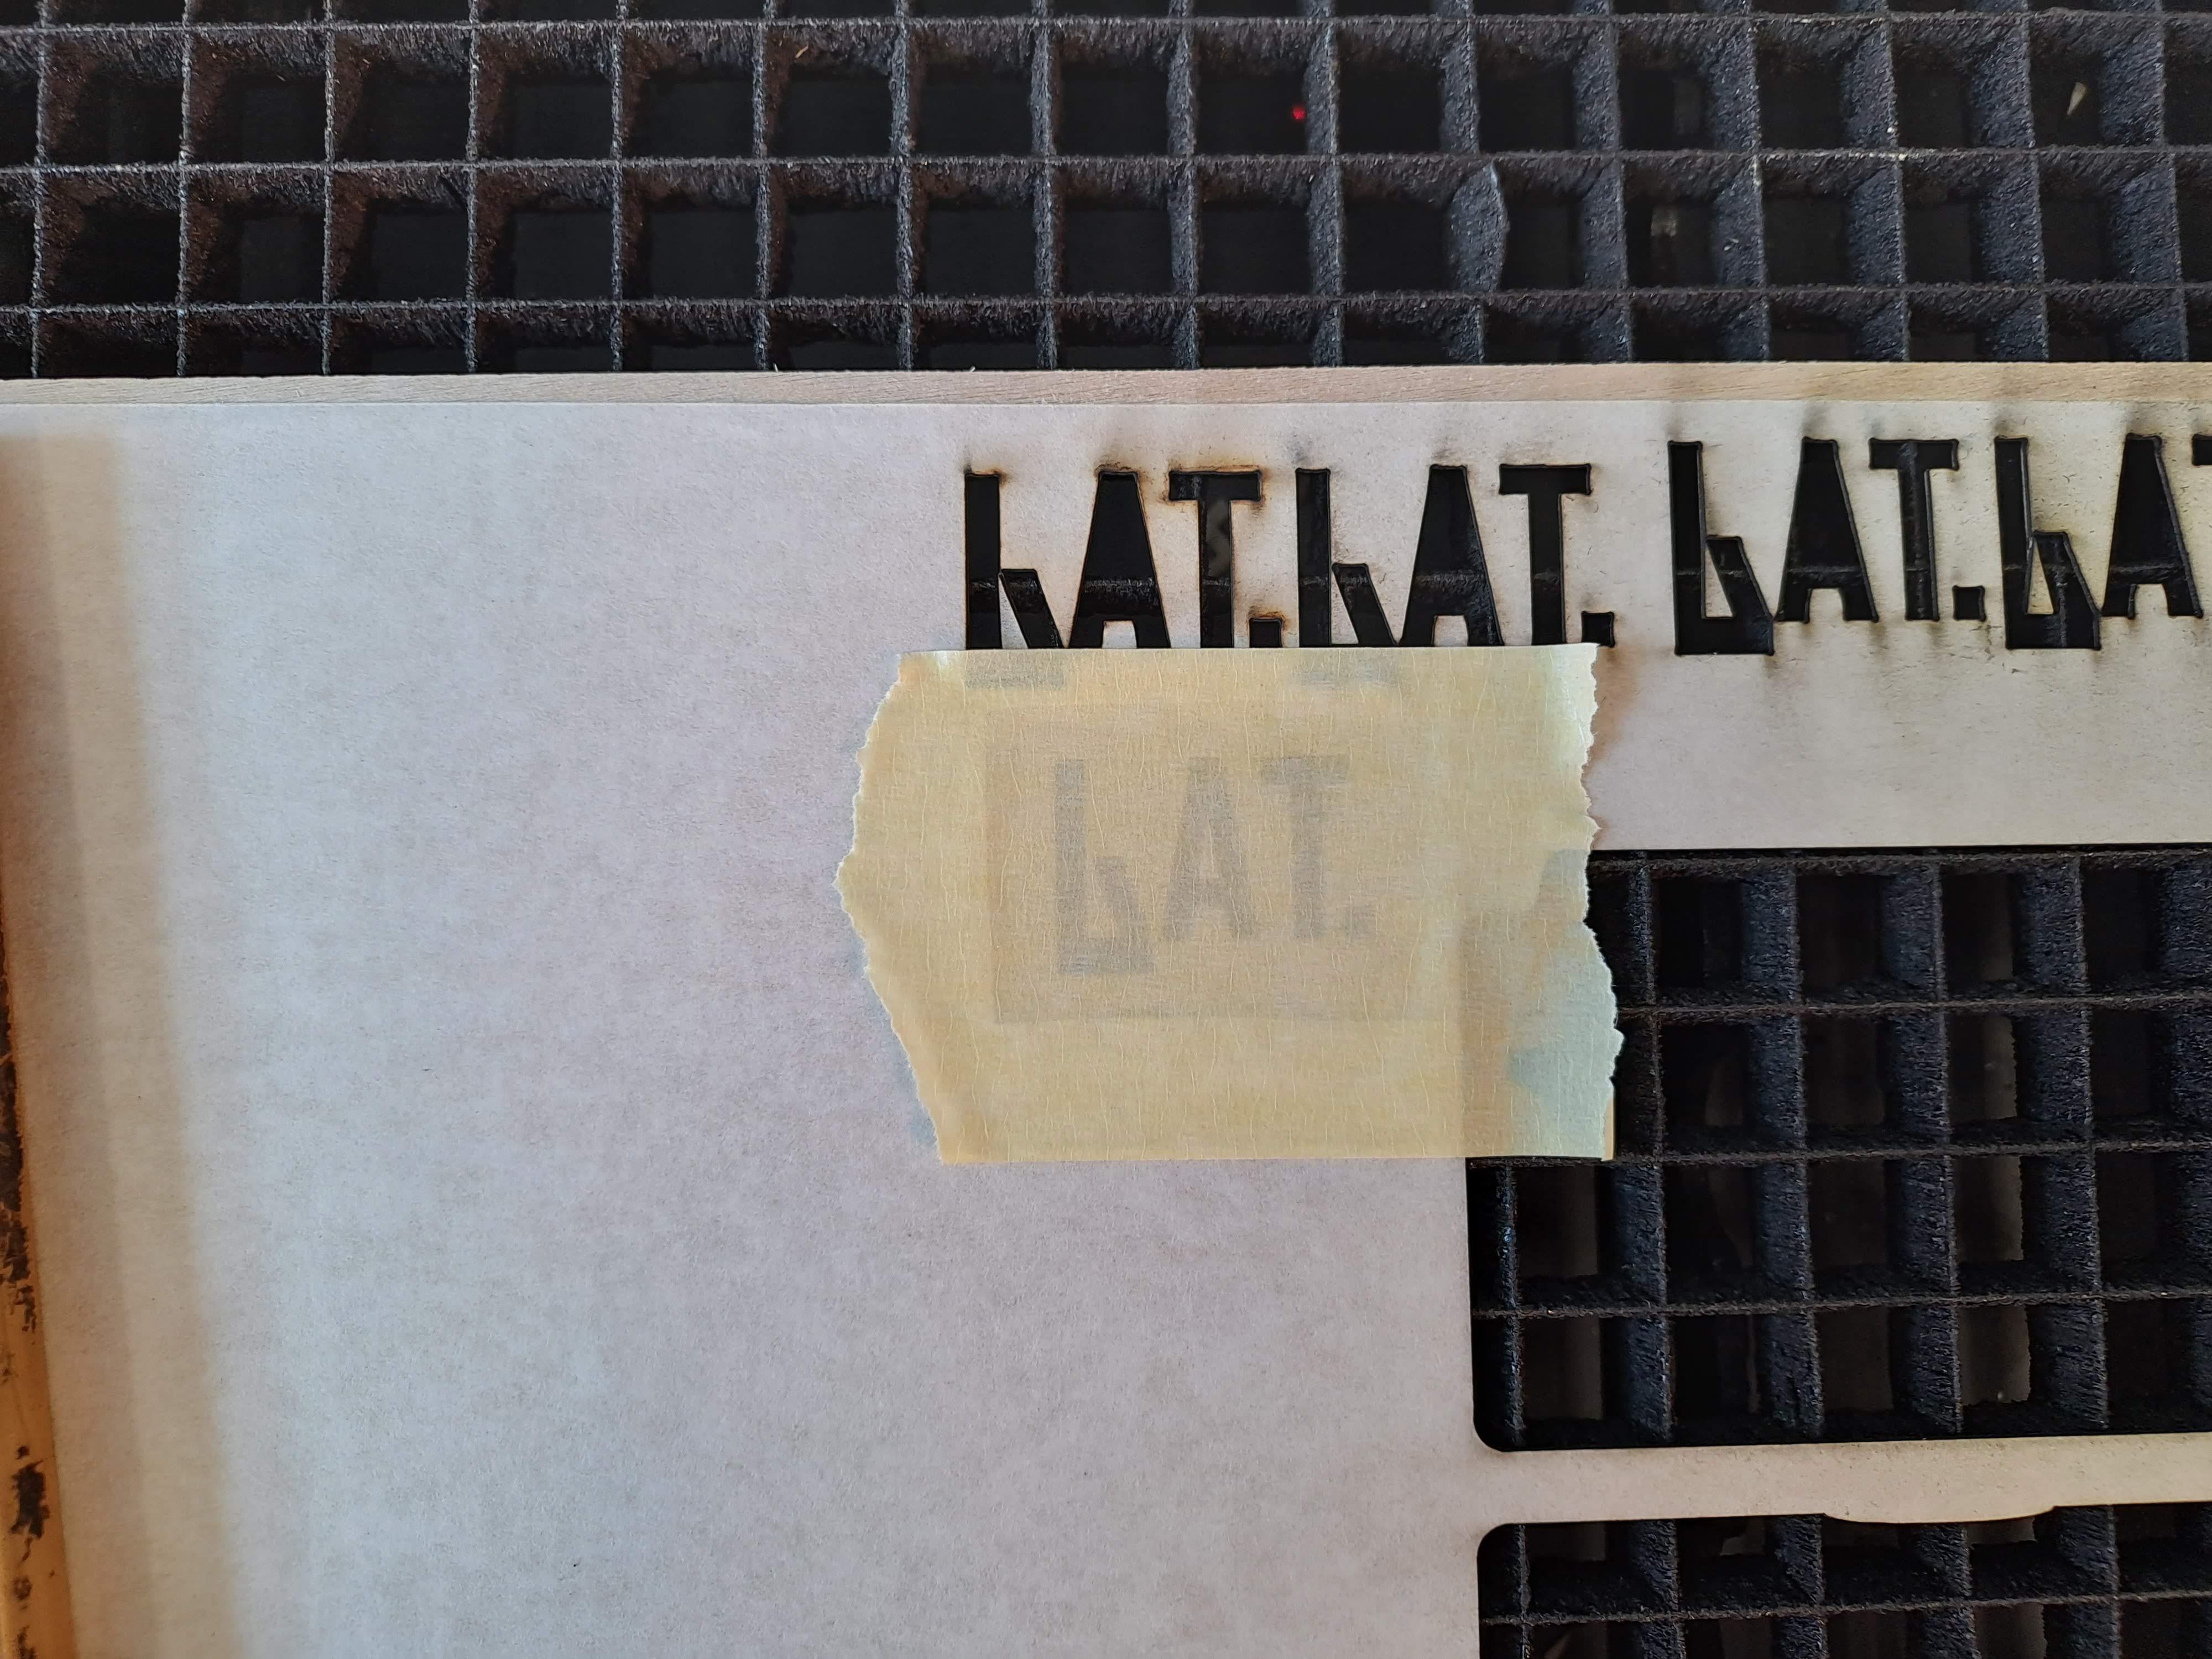
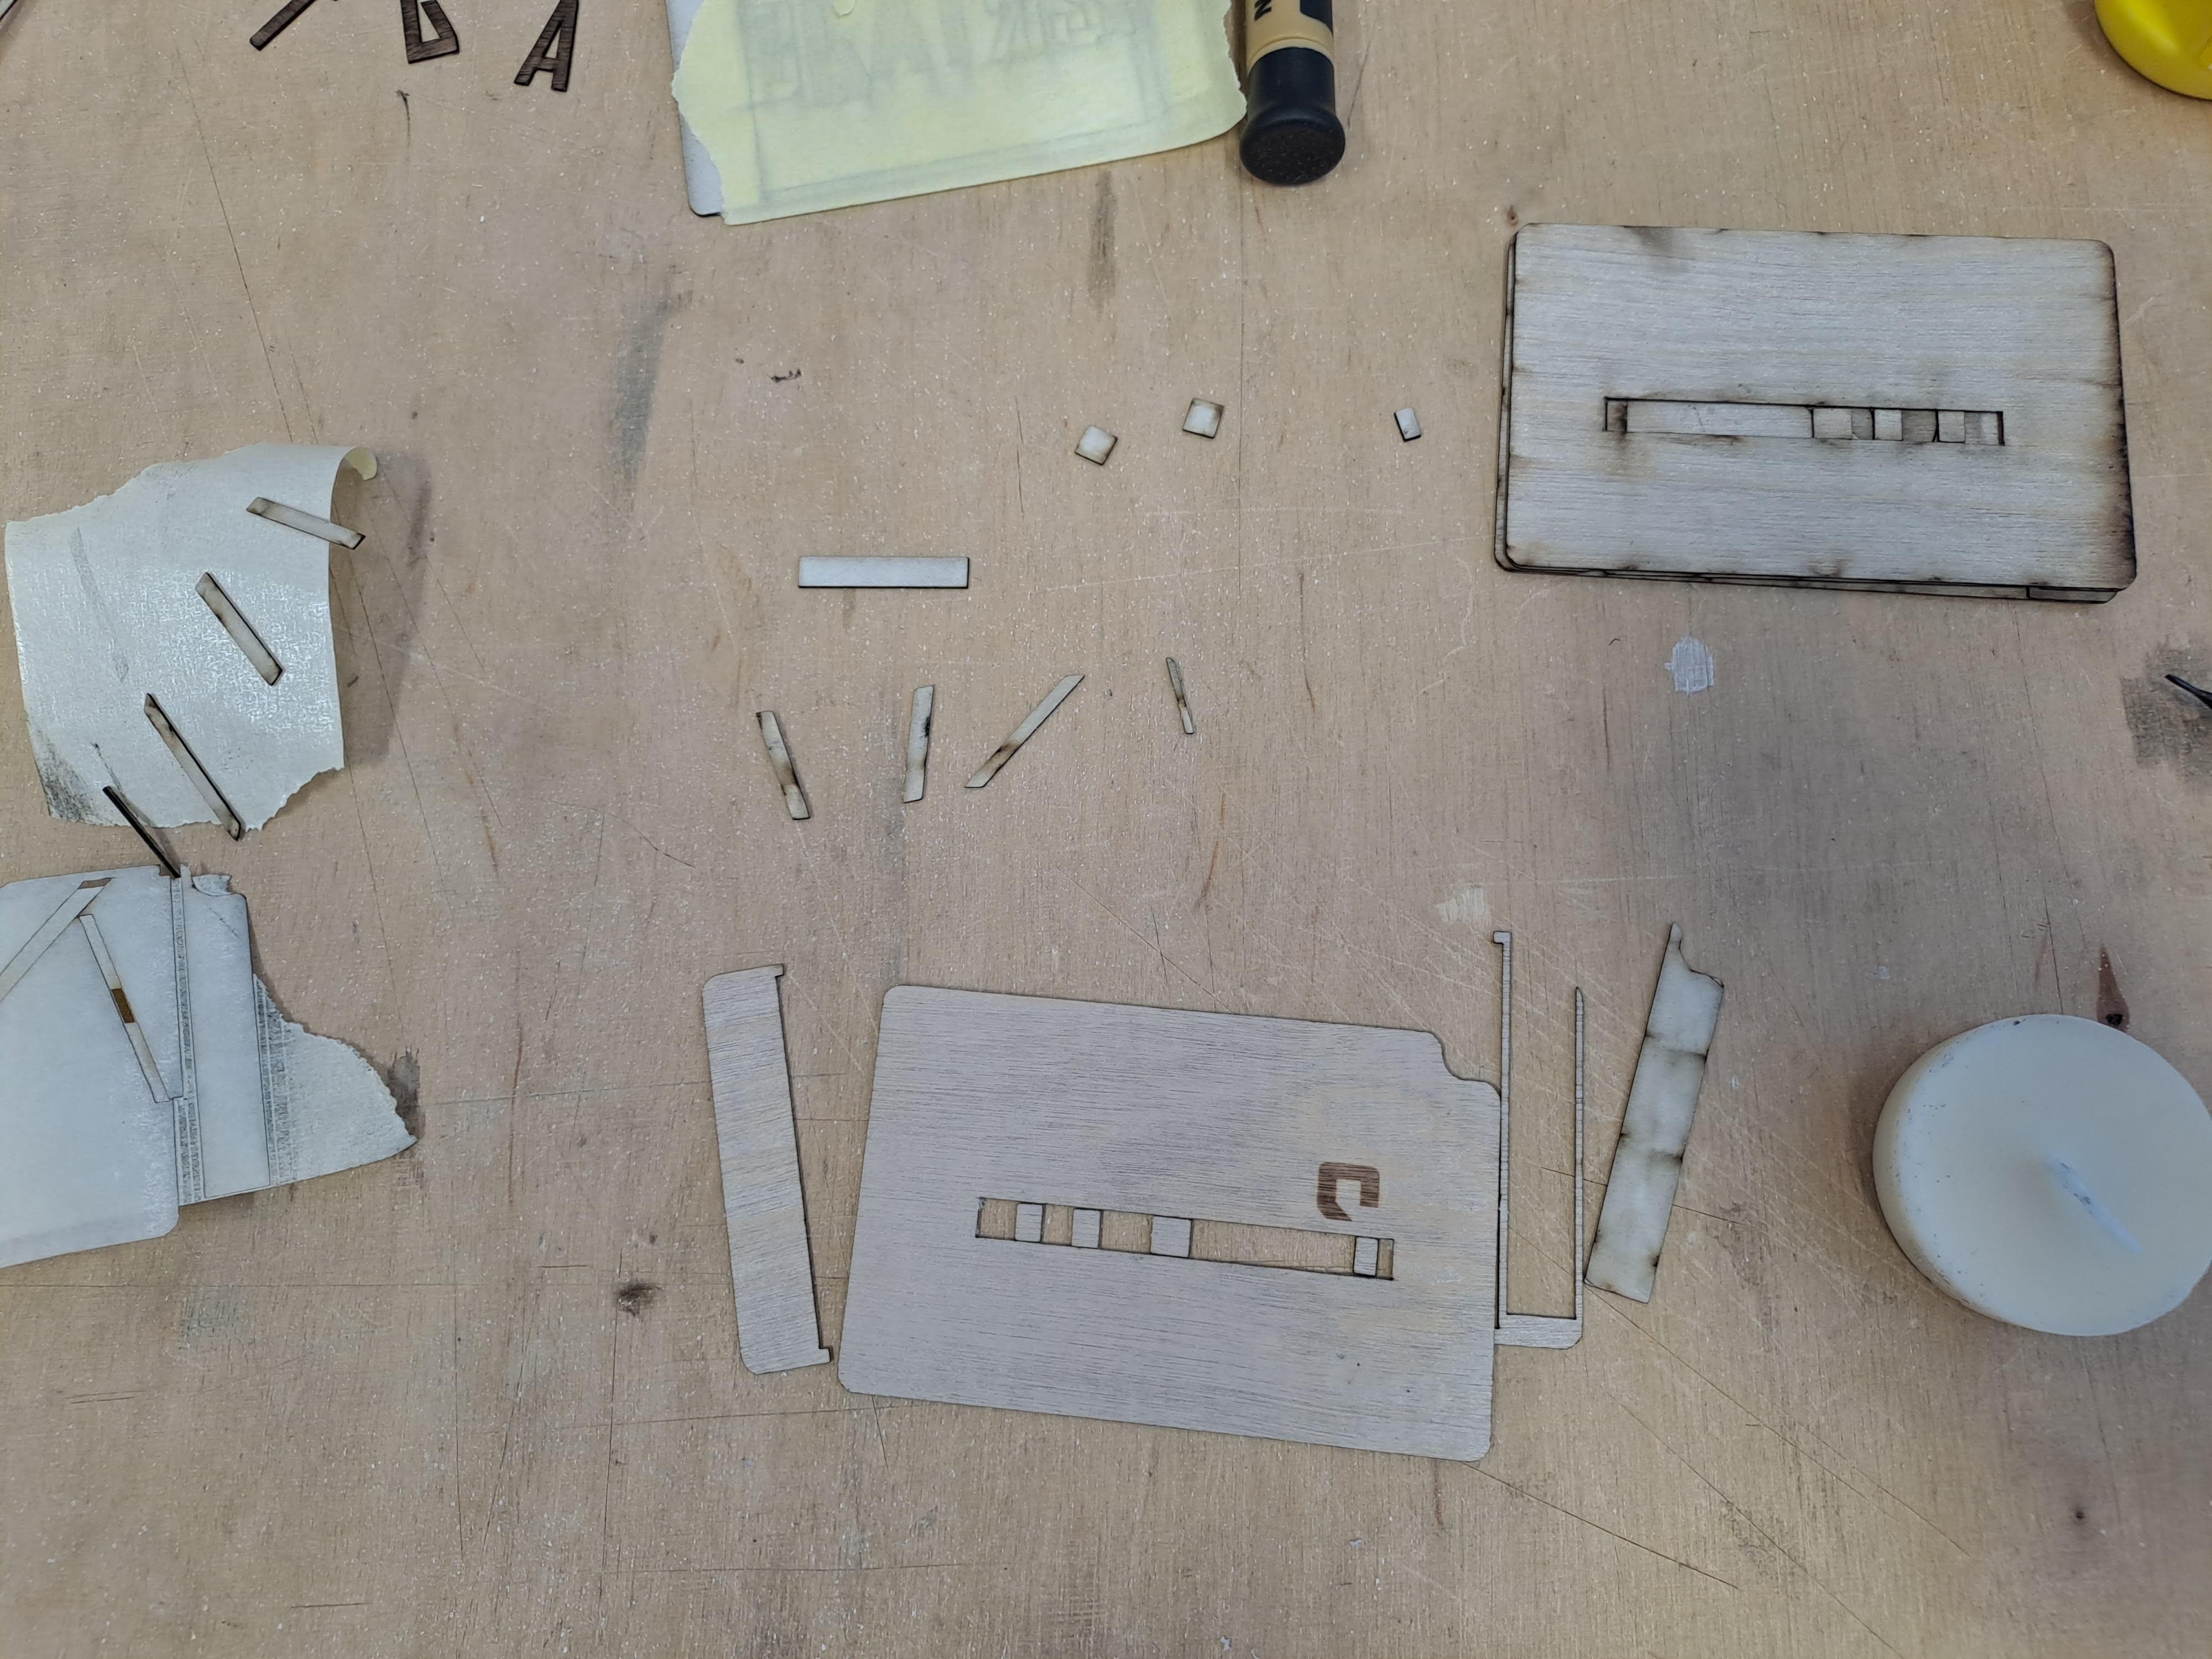
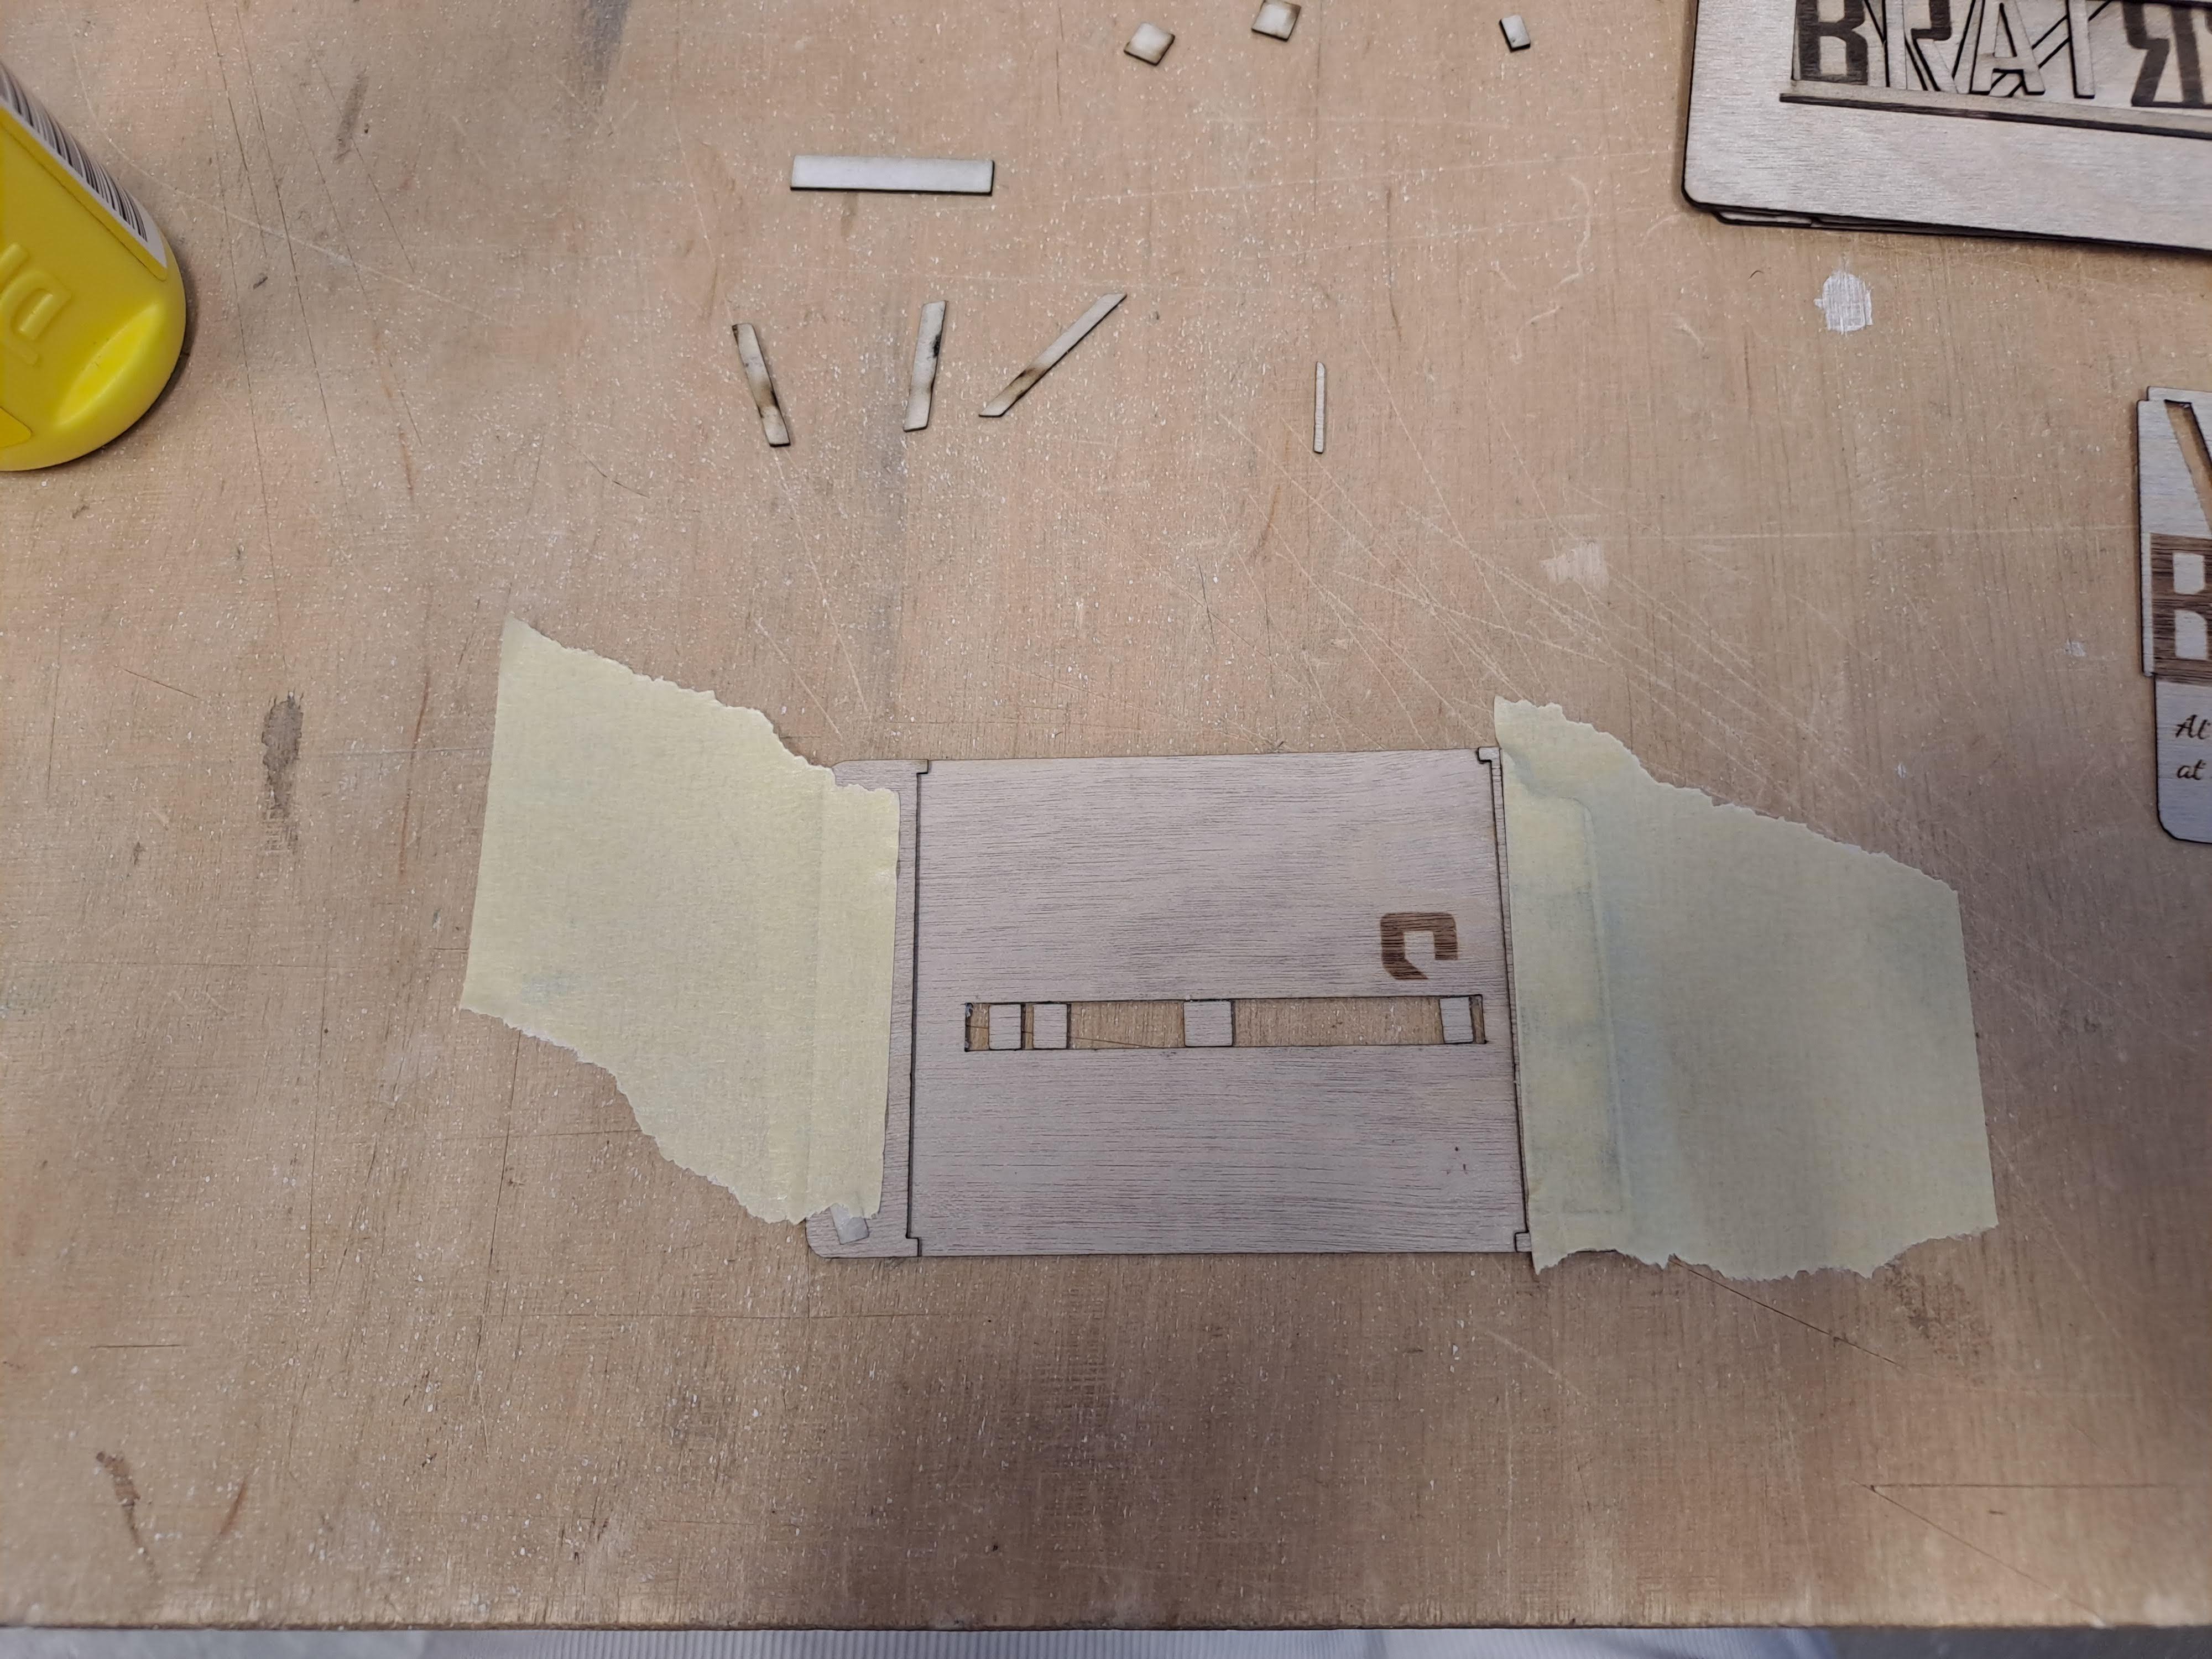
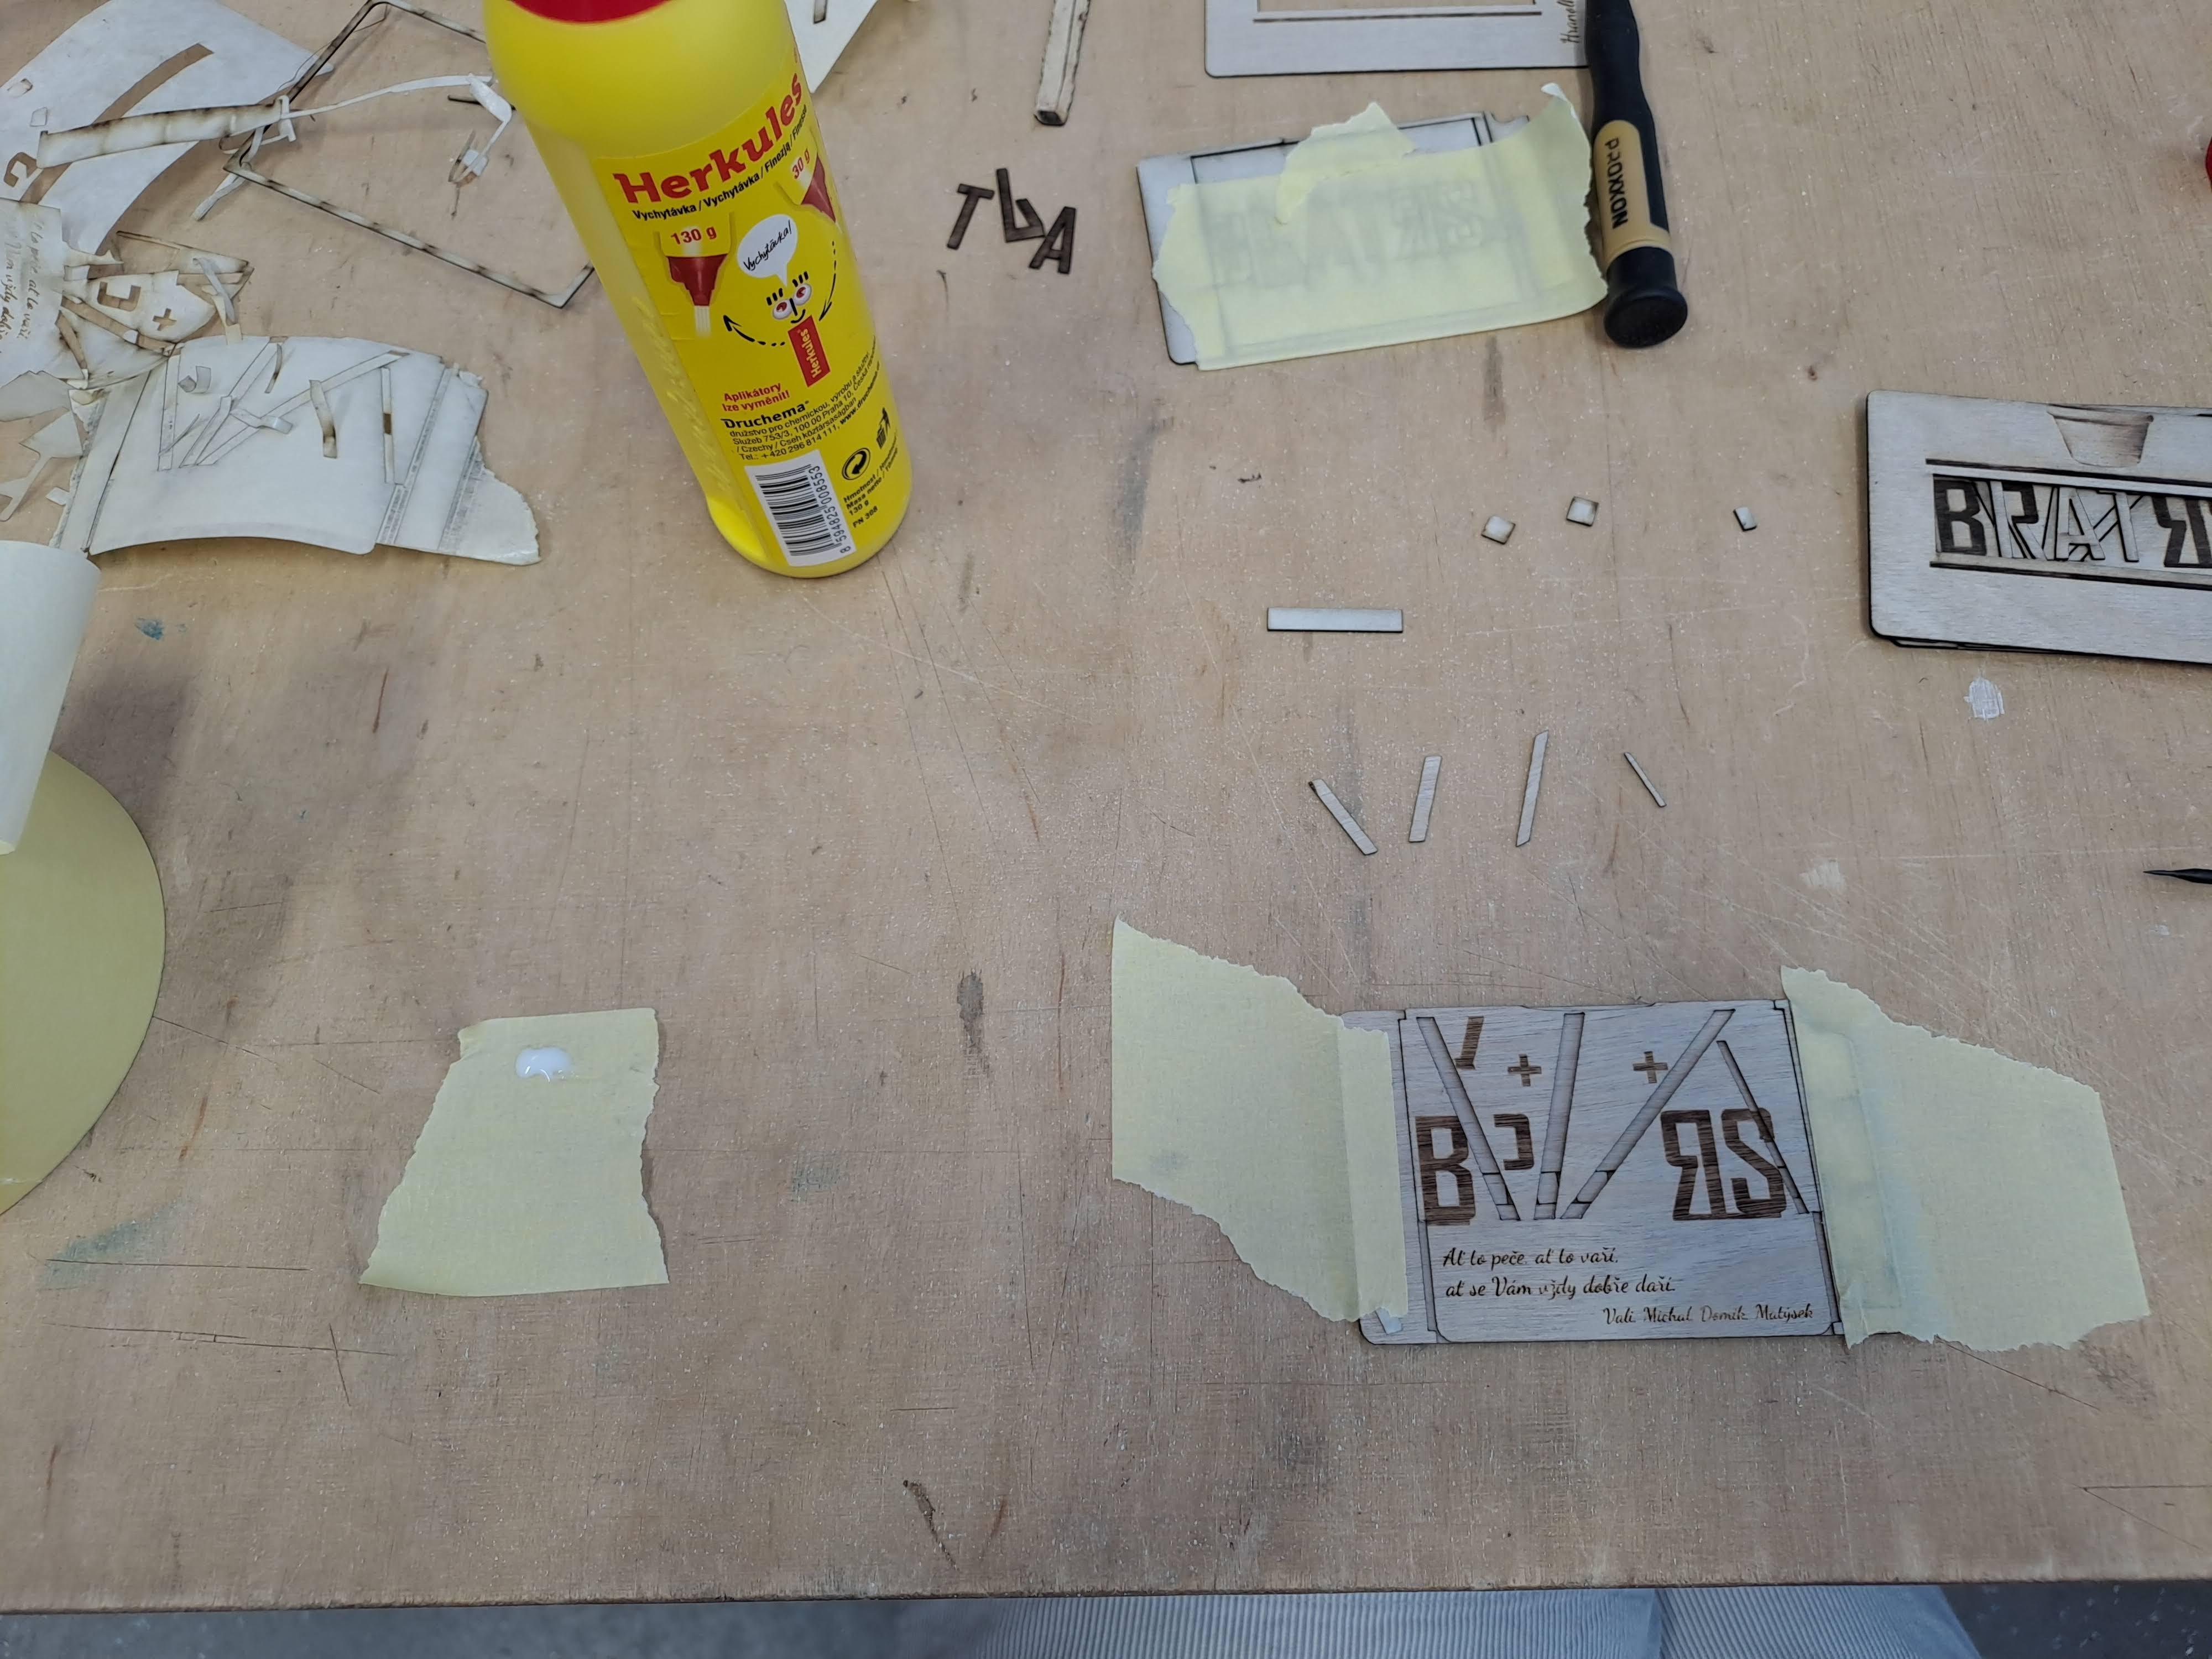
By using the clones, I already had the individual layers ready for the laser. But each part had its own specifics, so I couldn't just send it to the laser and wait for the result. Whenever possible, I use a cut without tape and then sand the burn. But it doesn't work with these small delicate parts, so I used masking tape for almost all the parts.
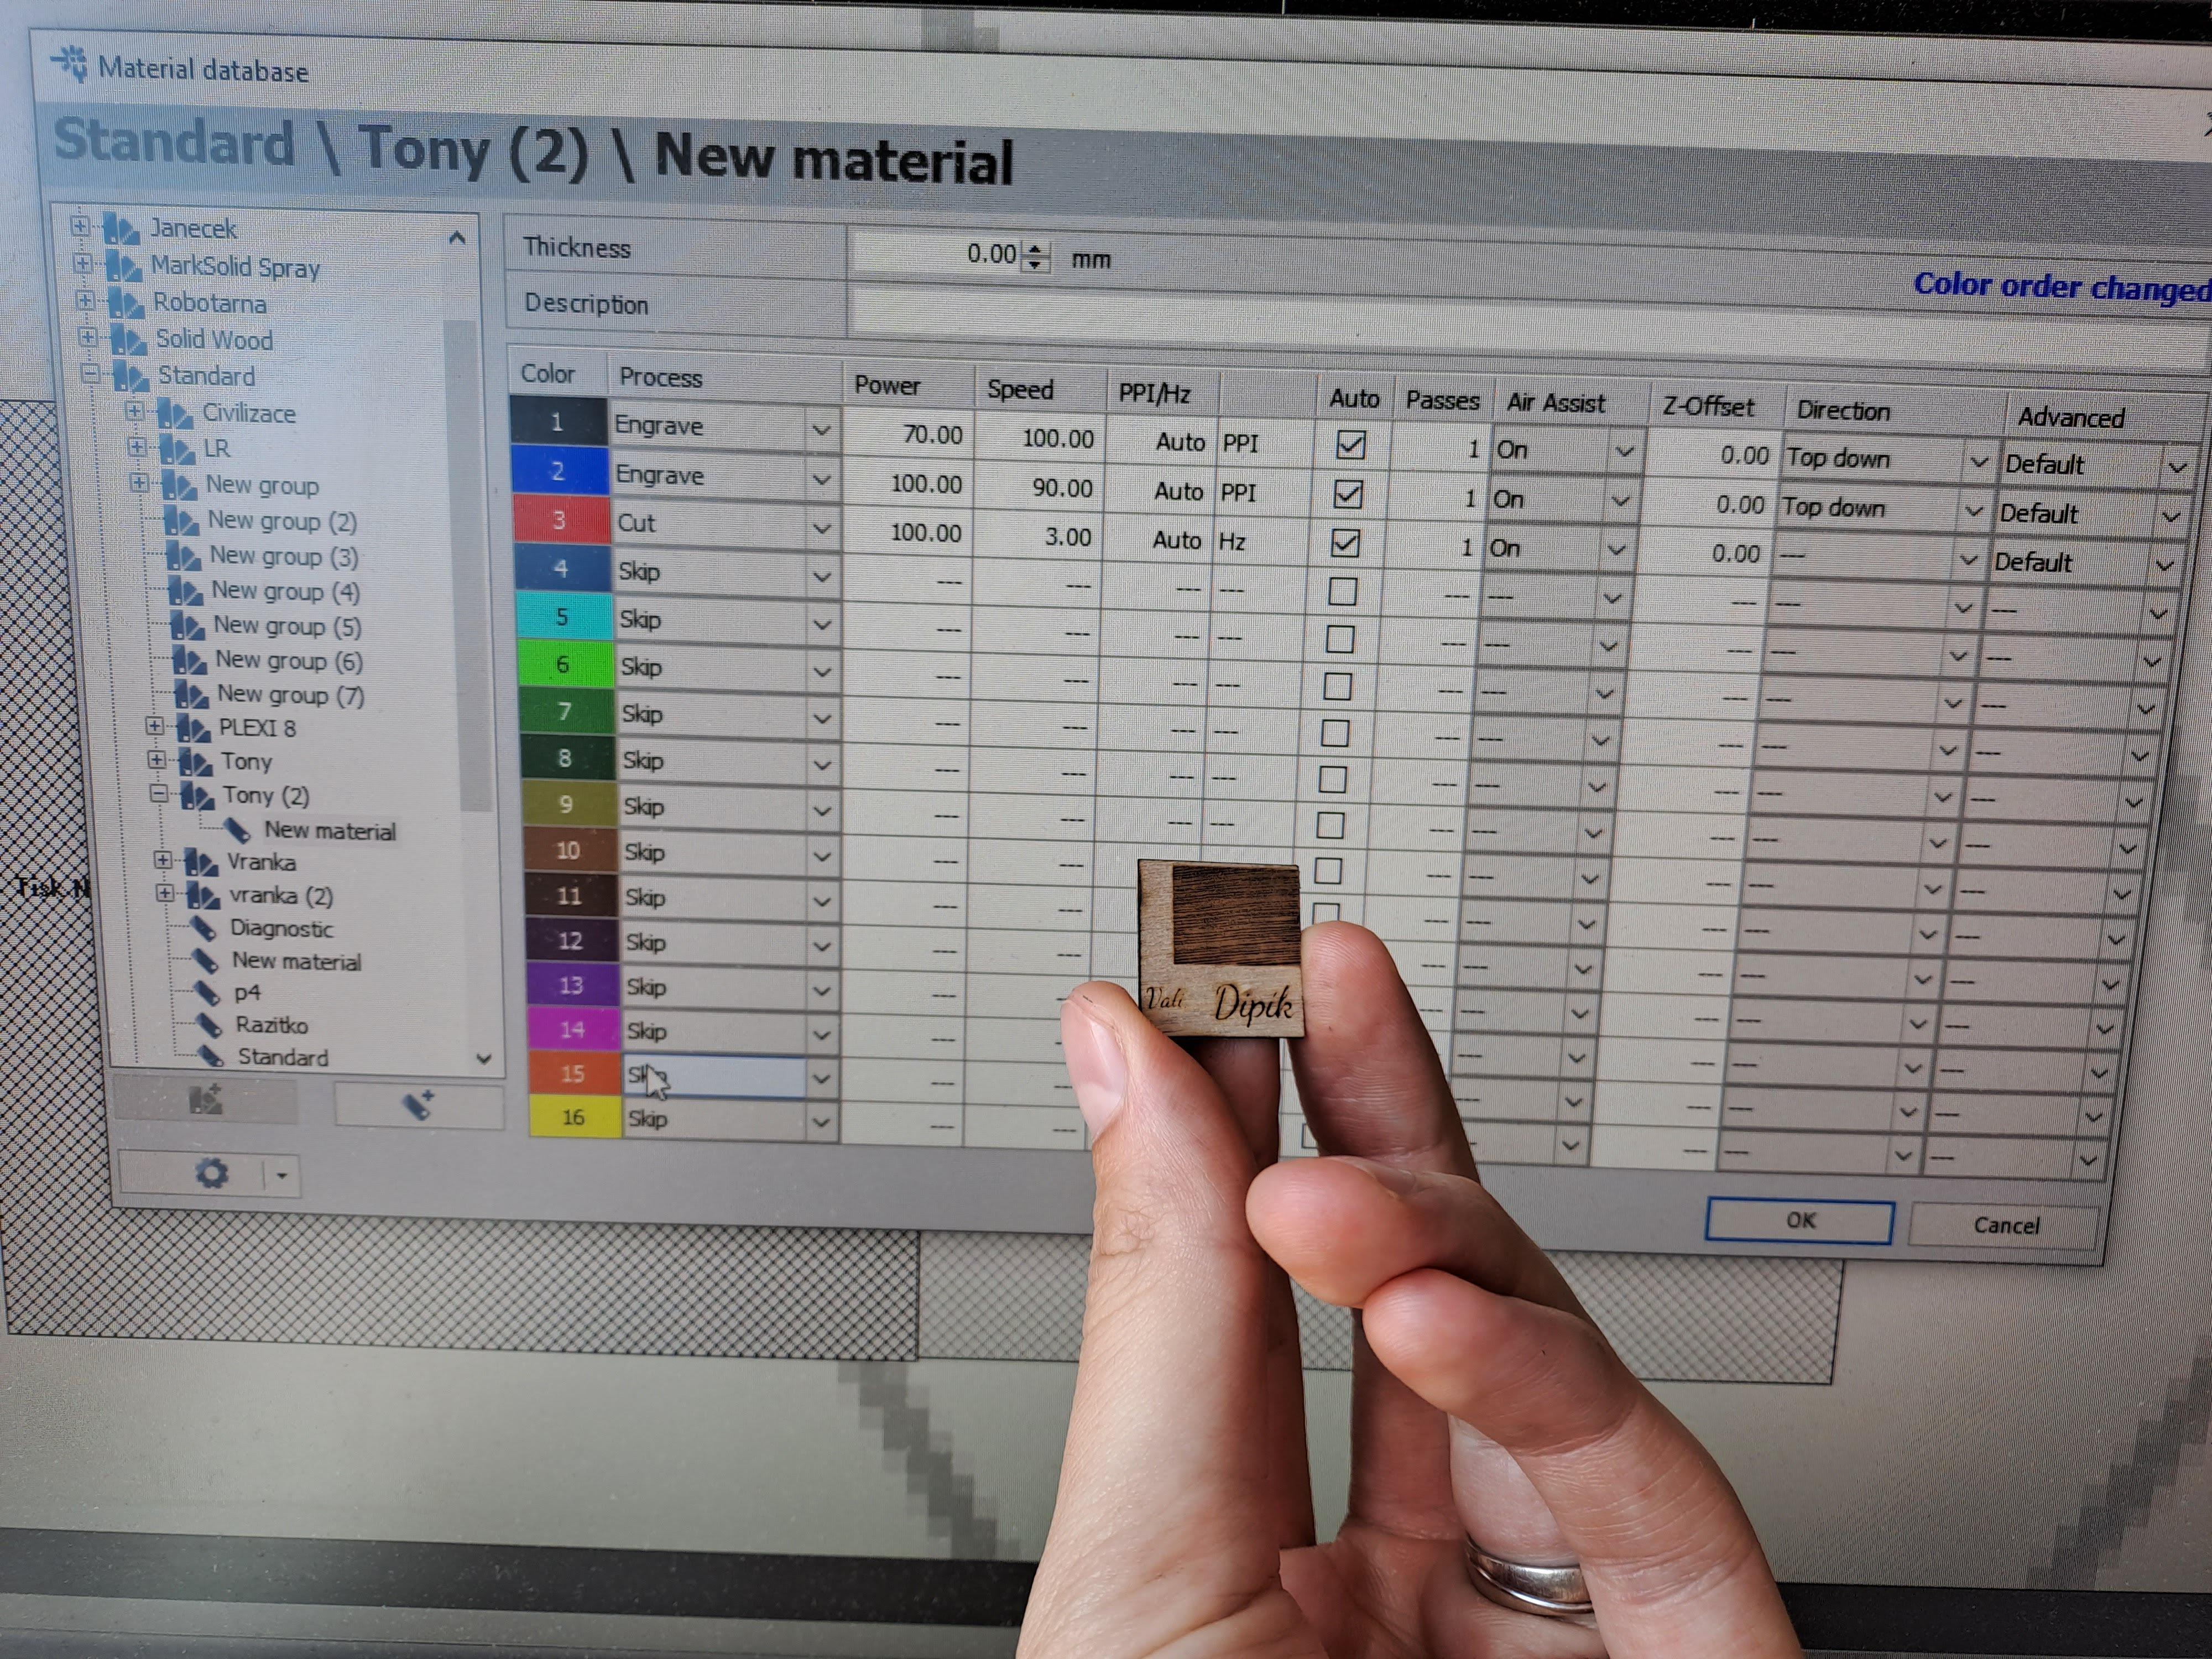
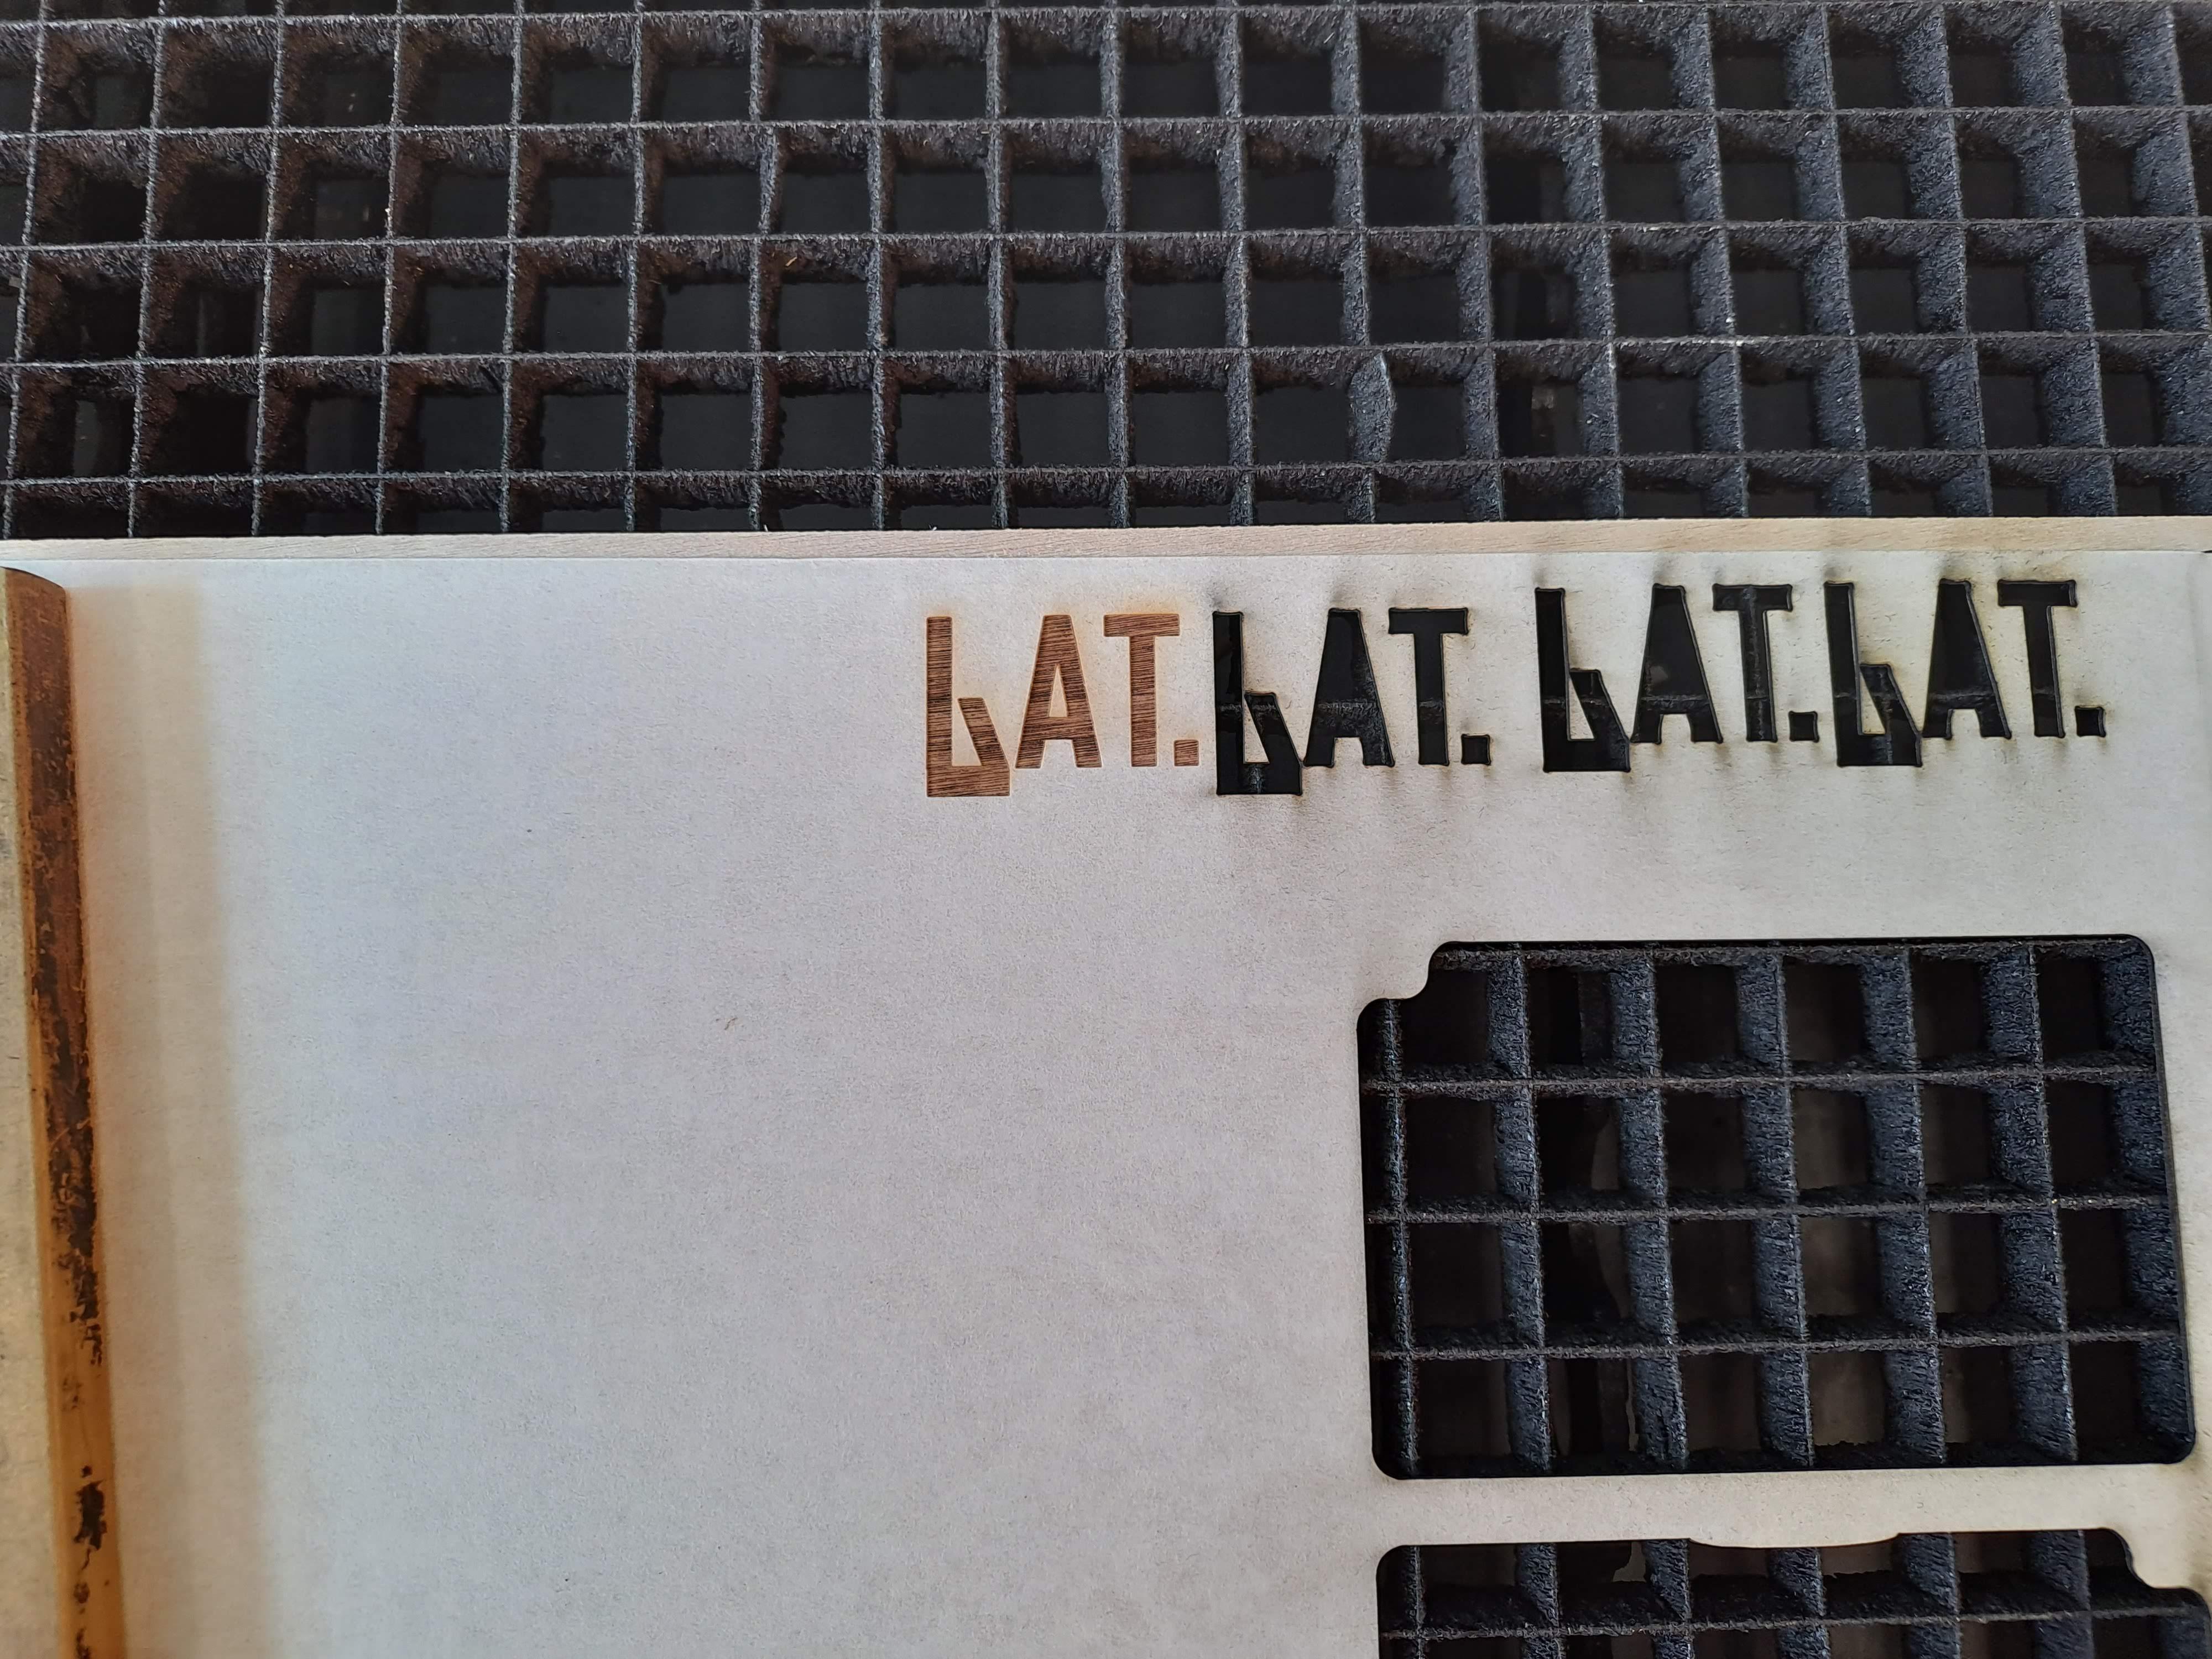
To tune parameters on the laser, I always use a test graphic in which I use all the colors and sizes from the final graphic, but in a small area to prevent material wasting. Here are real parameters that I used on the Speedy 400 (120W):
Fry (with masking tape):
- Engrave (black): Power 70%, Speed 100%
- Cut (red): Power 100%, Speed 3%
Card (with masking tape):
- Engrave (black): Power 70%, Speed 100%
- Engrave (blue): Power 100%, Speed 90%
- Cur (red): Power 100%, Speed 3%
The easiest part was the french fry: Engrave and cut on one side and then engrave on the other side.
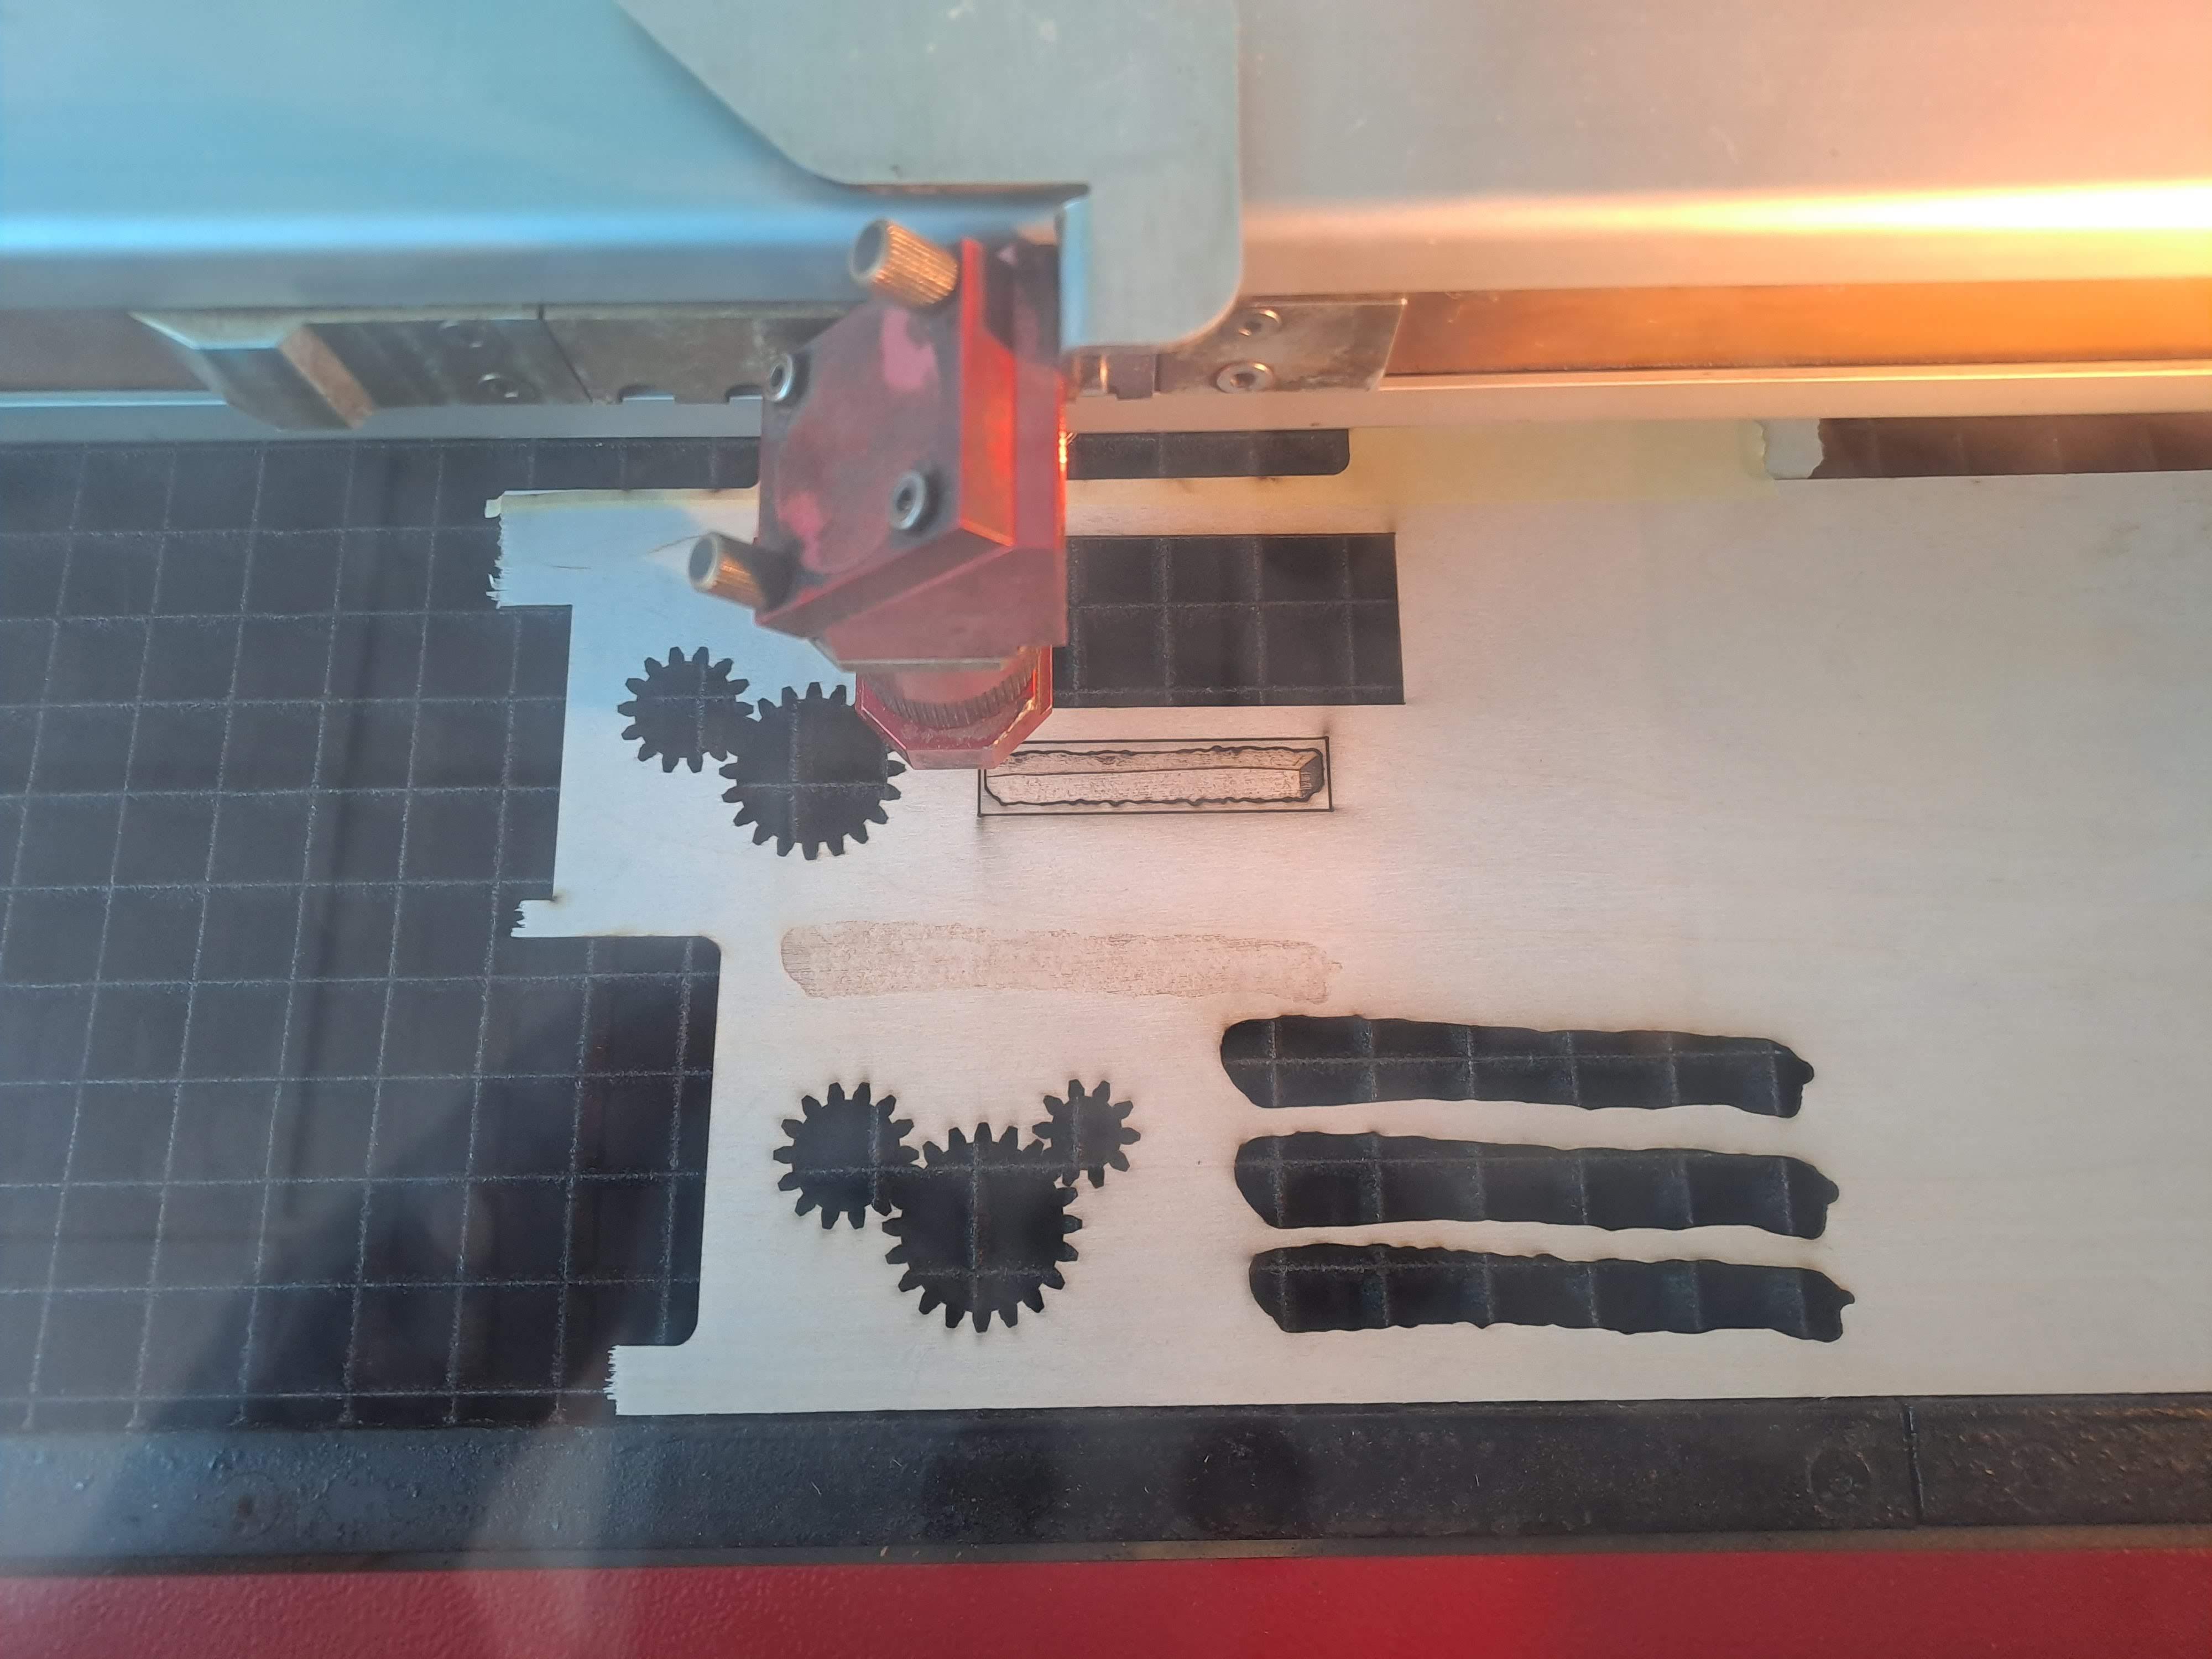
For the first layer, I first used tape, engraved the solid color parts, did the cut and then removed the tape and engraved the dip on the clean part. The dip is in grayscale and it would be difficult to engrave through the tape.

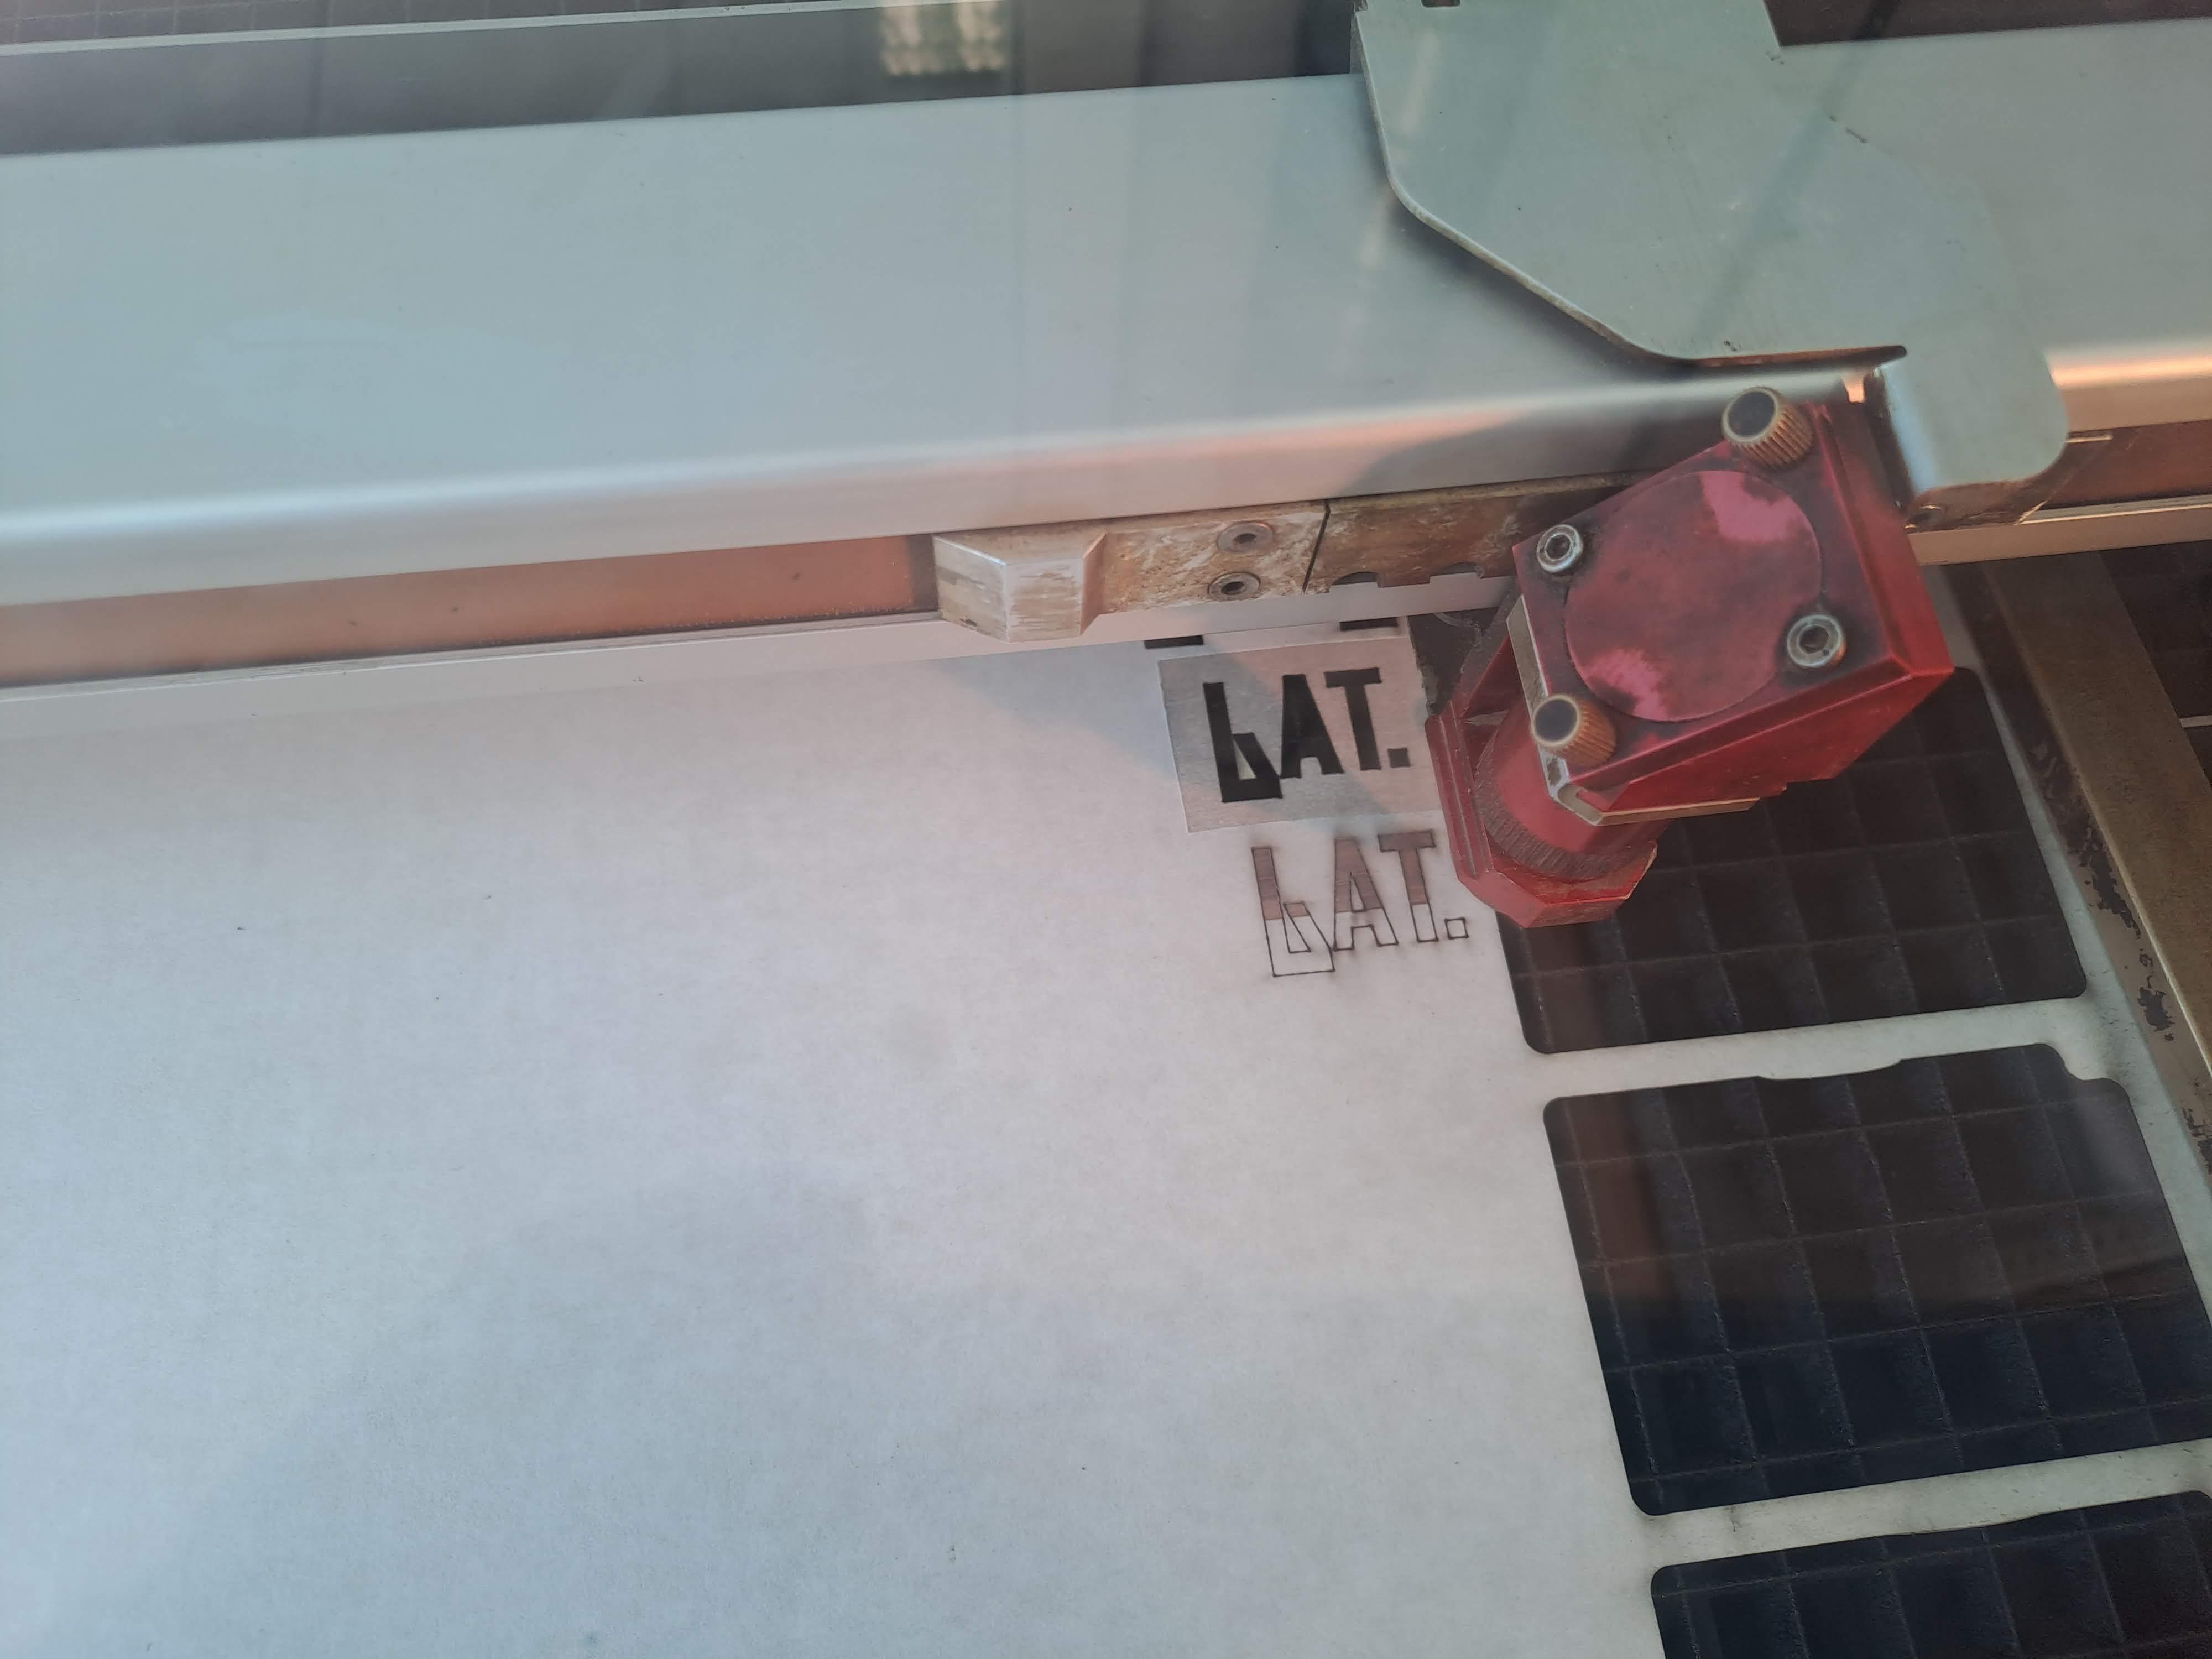
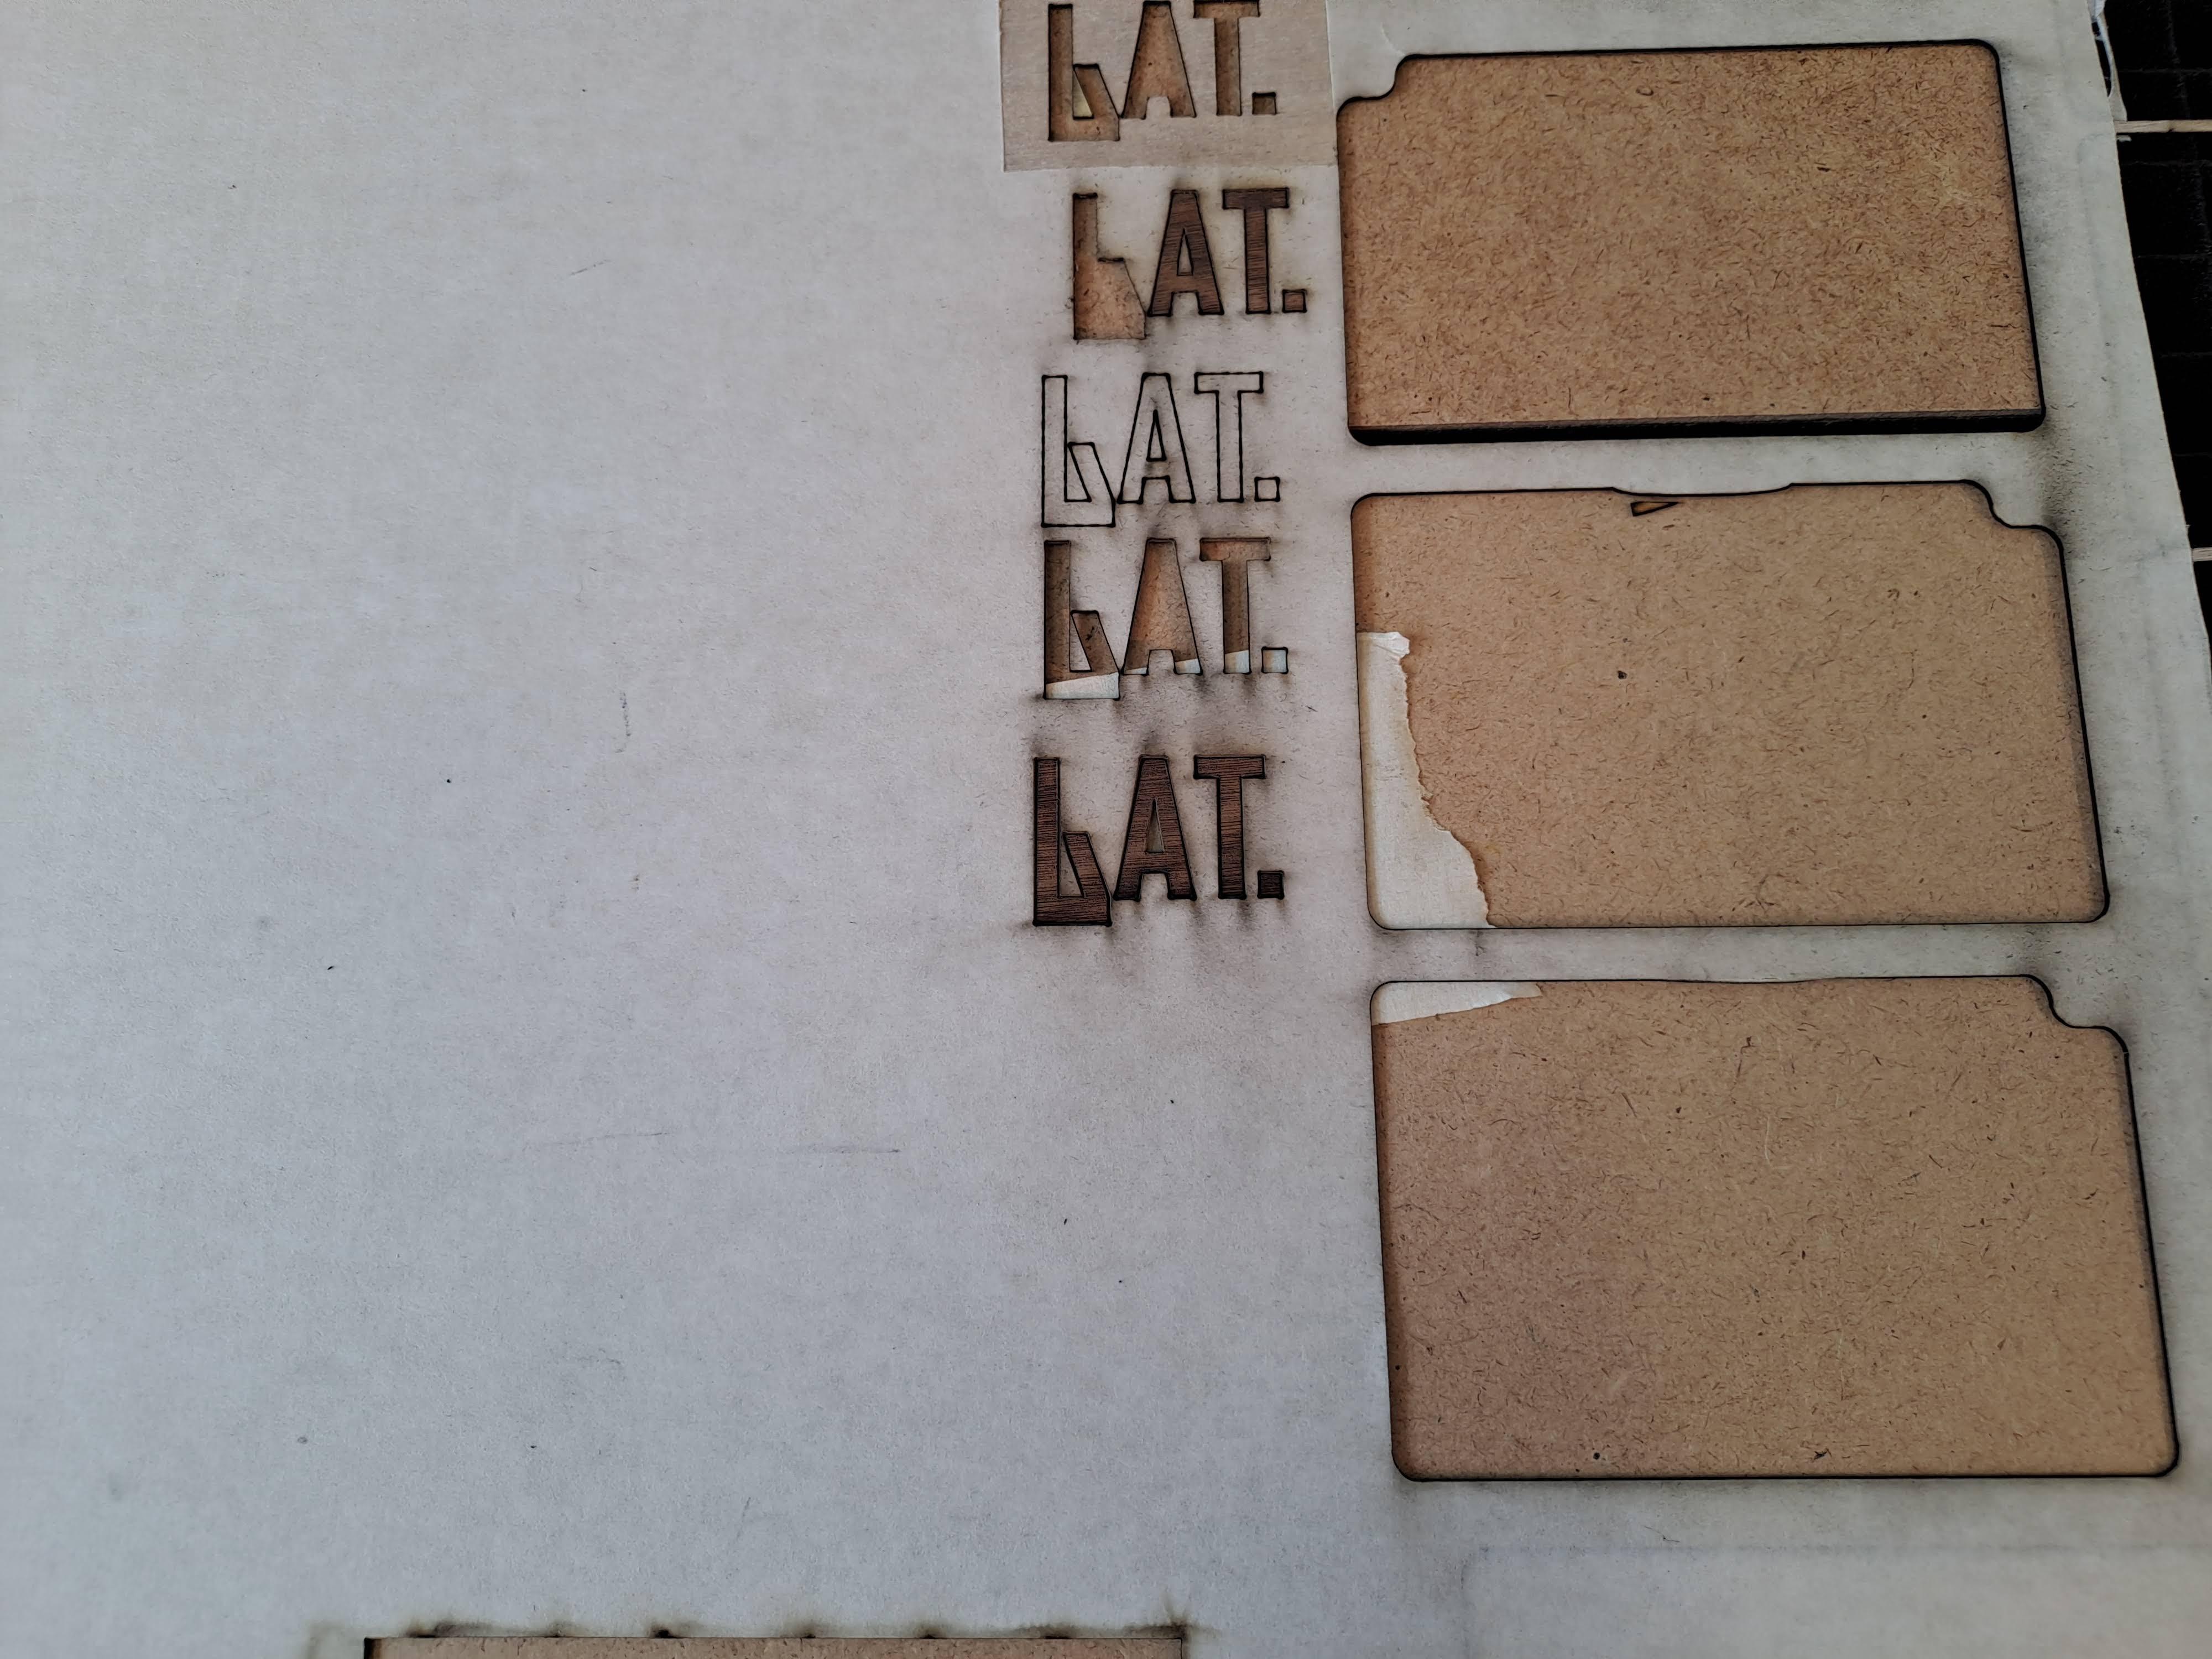
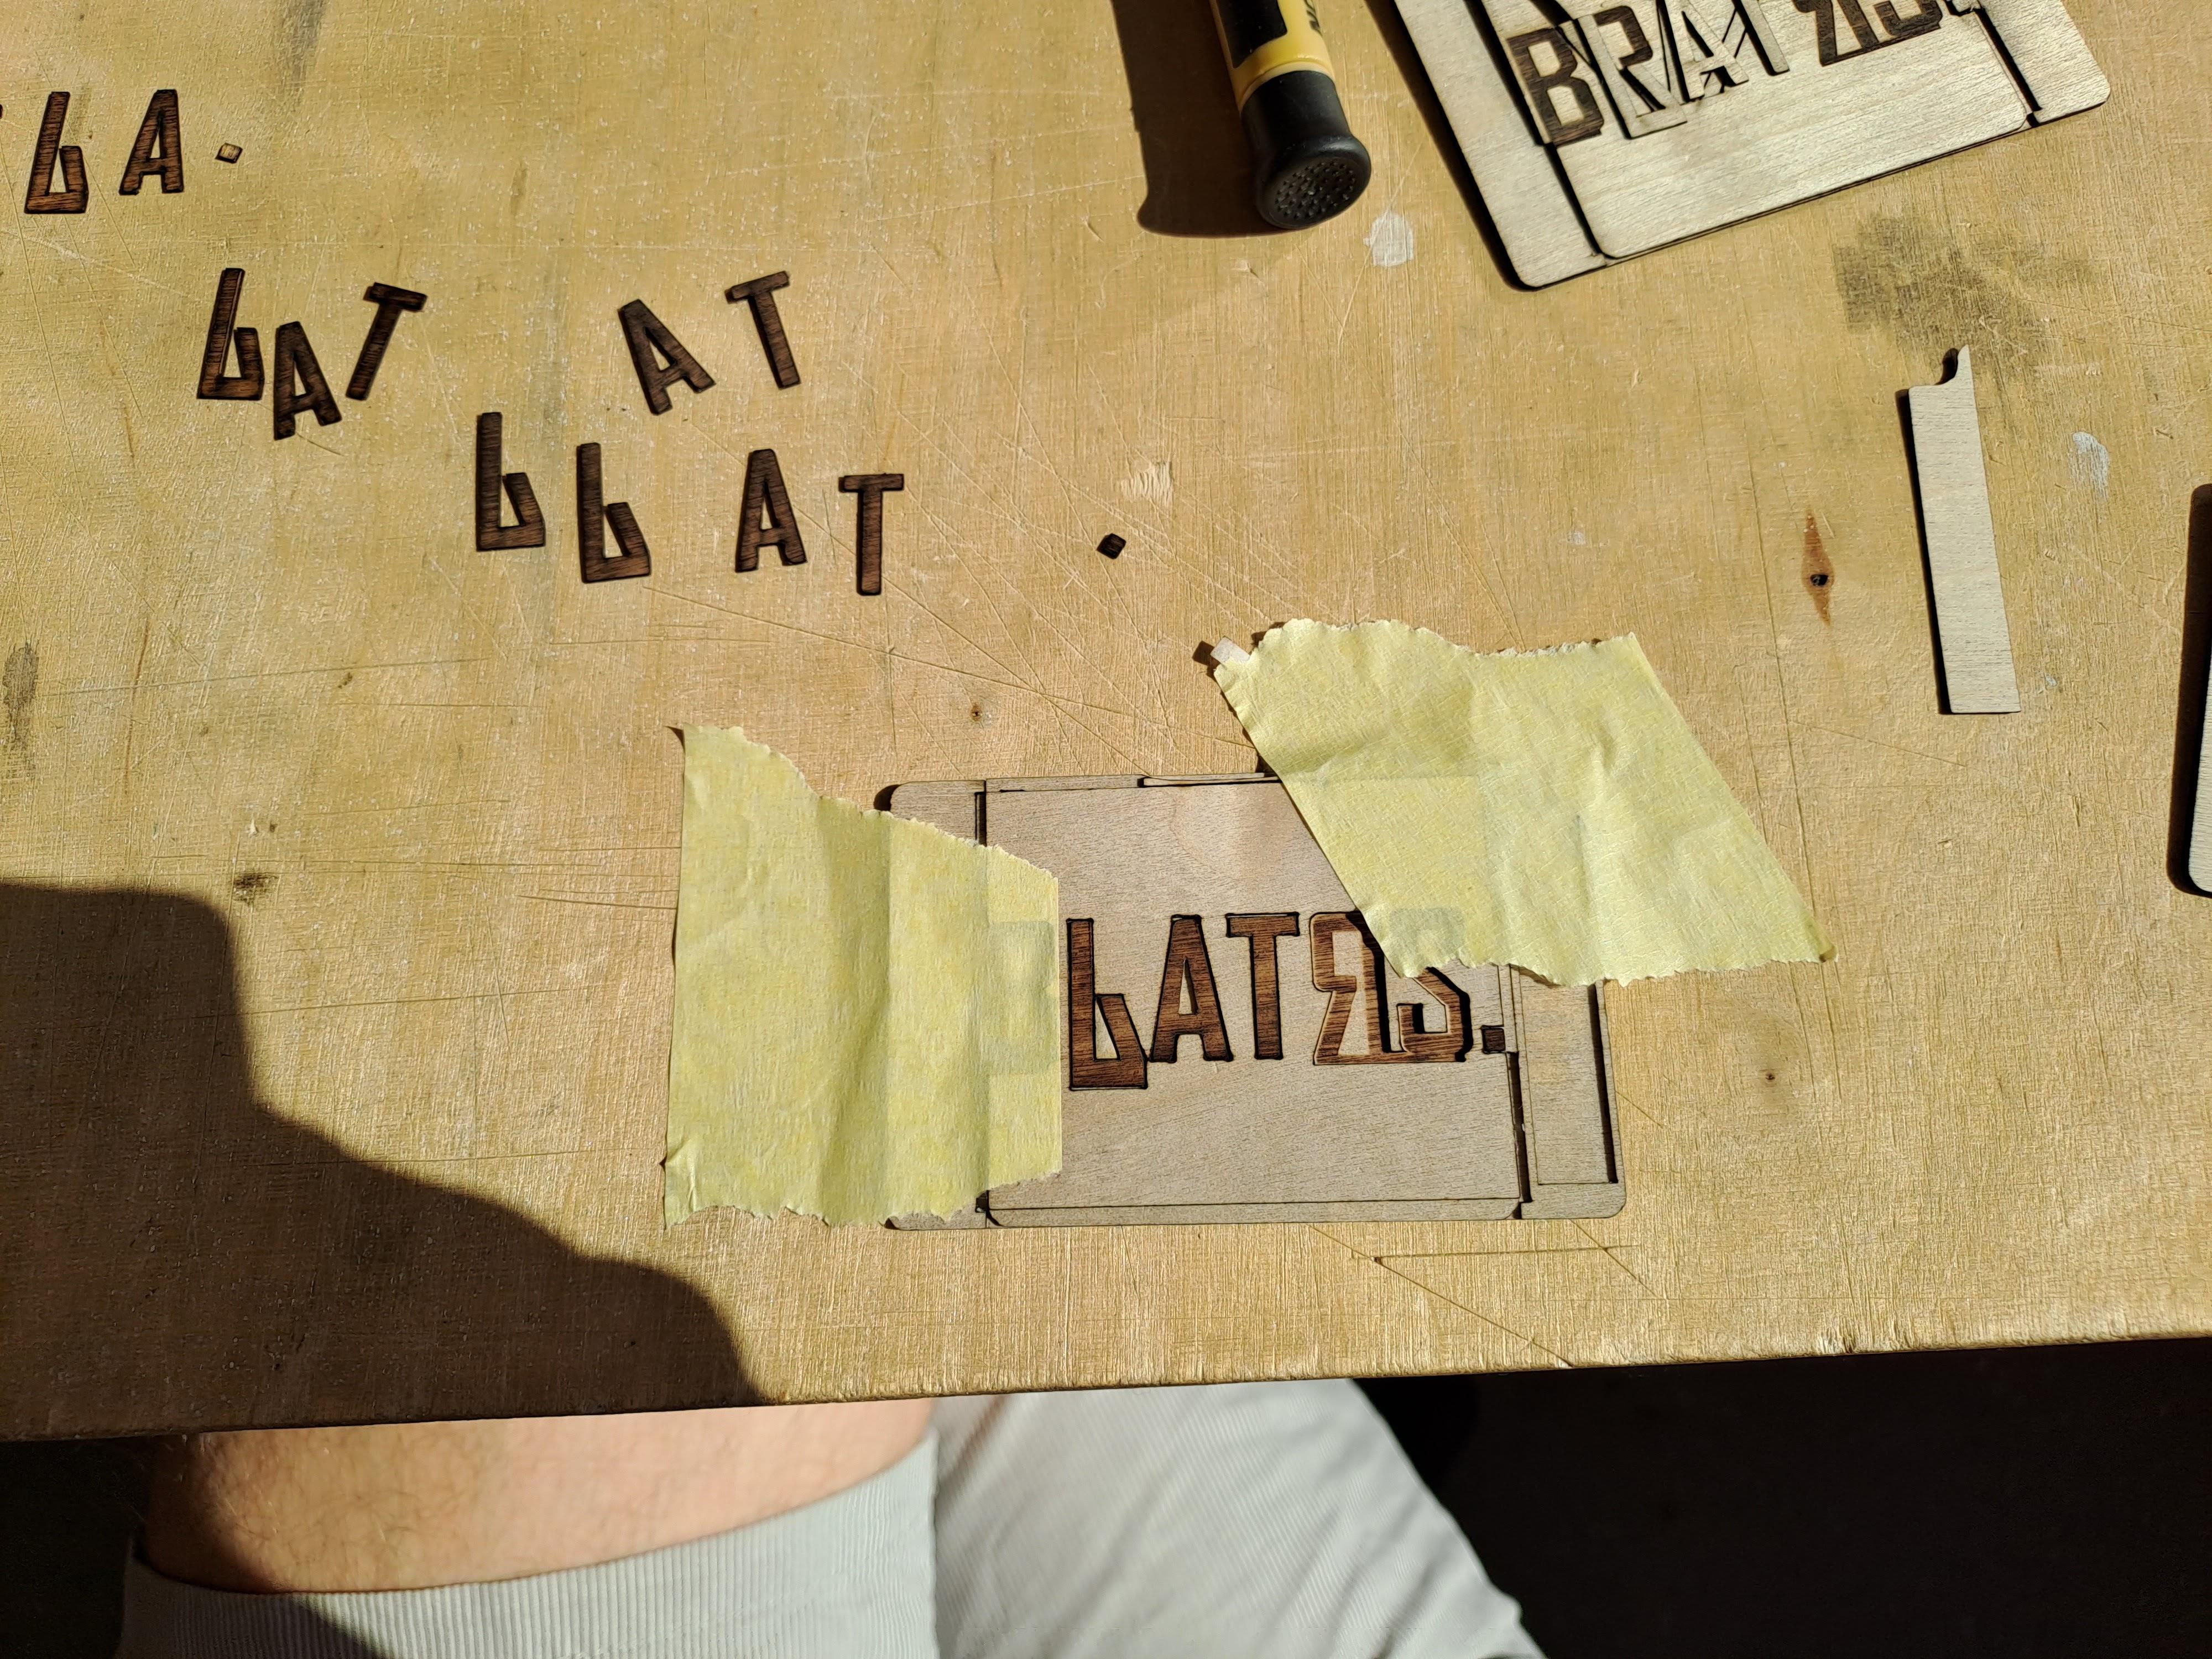
I thought that the second layer would be very simple, but it actually took me the most of the time. During assembly, I noticed that the color of the engraving on the second layer (the letters KAT) is much darker than on the third layer (the letters BRRS). At first I thought it was the material, that there was simply a differently colored wood in the ply and I tried to cut the letters from another part of the plywood, but that didn't help. After a few tries, I realized that the engraving is darker because the cut around the letters browns it. So I tried to use the tape, engrave the letters, cover the engraved part with tape again, and then do the cut. But the engraving tape did not stick well and the smoke got under it. So I decided to switch the order and do the cut with tape first and then do the engraving. But there was another problem. All small parts fell down through the grid. The bridges were very visible after cutting out, and when I used a support plate, the parts were blown away by Air assist :-). So the resulting procedure was to make a cut through the tape and using the support plate, then tape the pieces from below with masking tape to hold them in place, and finally do the engraving. Then the hue of the engraving was the same. Phew :-).
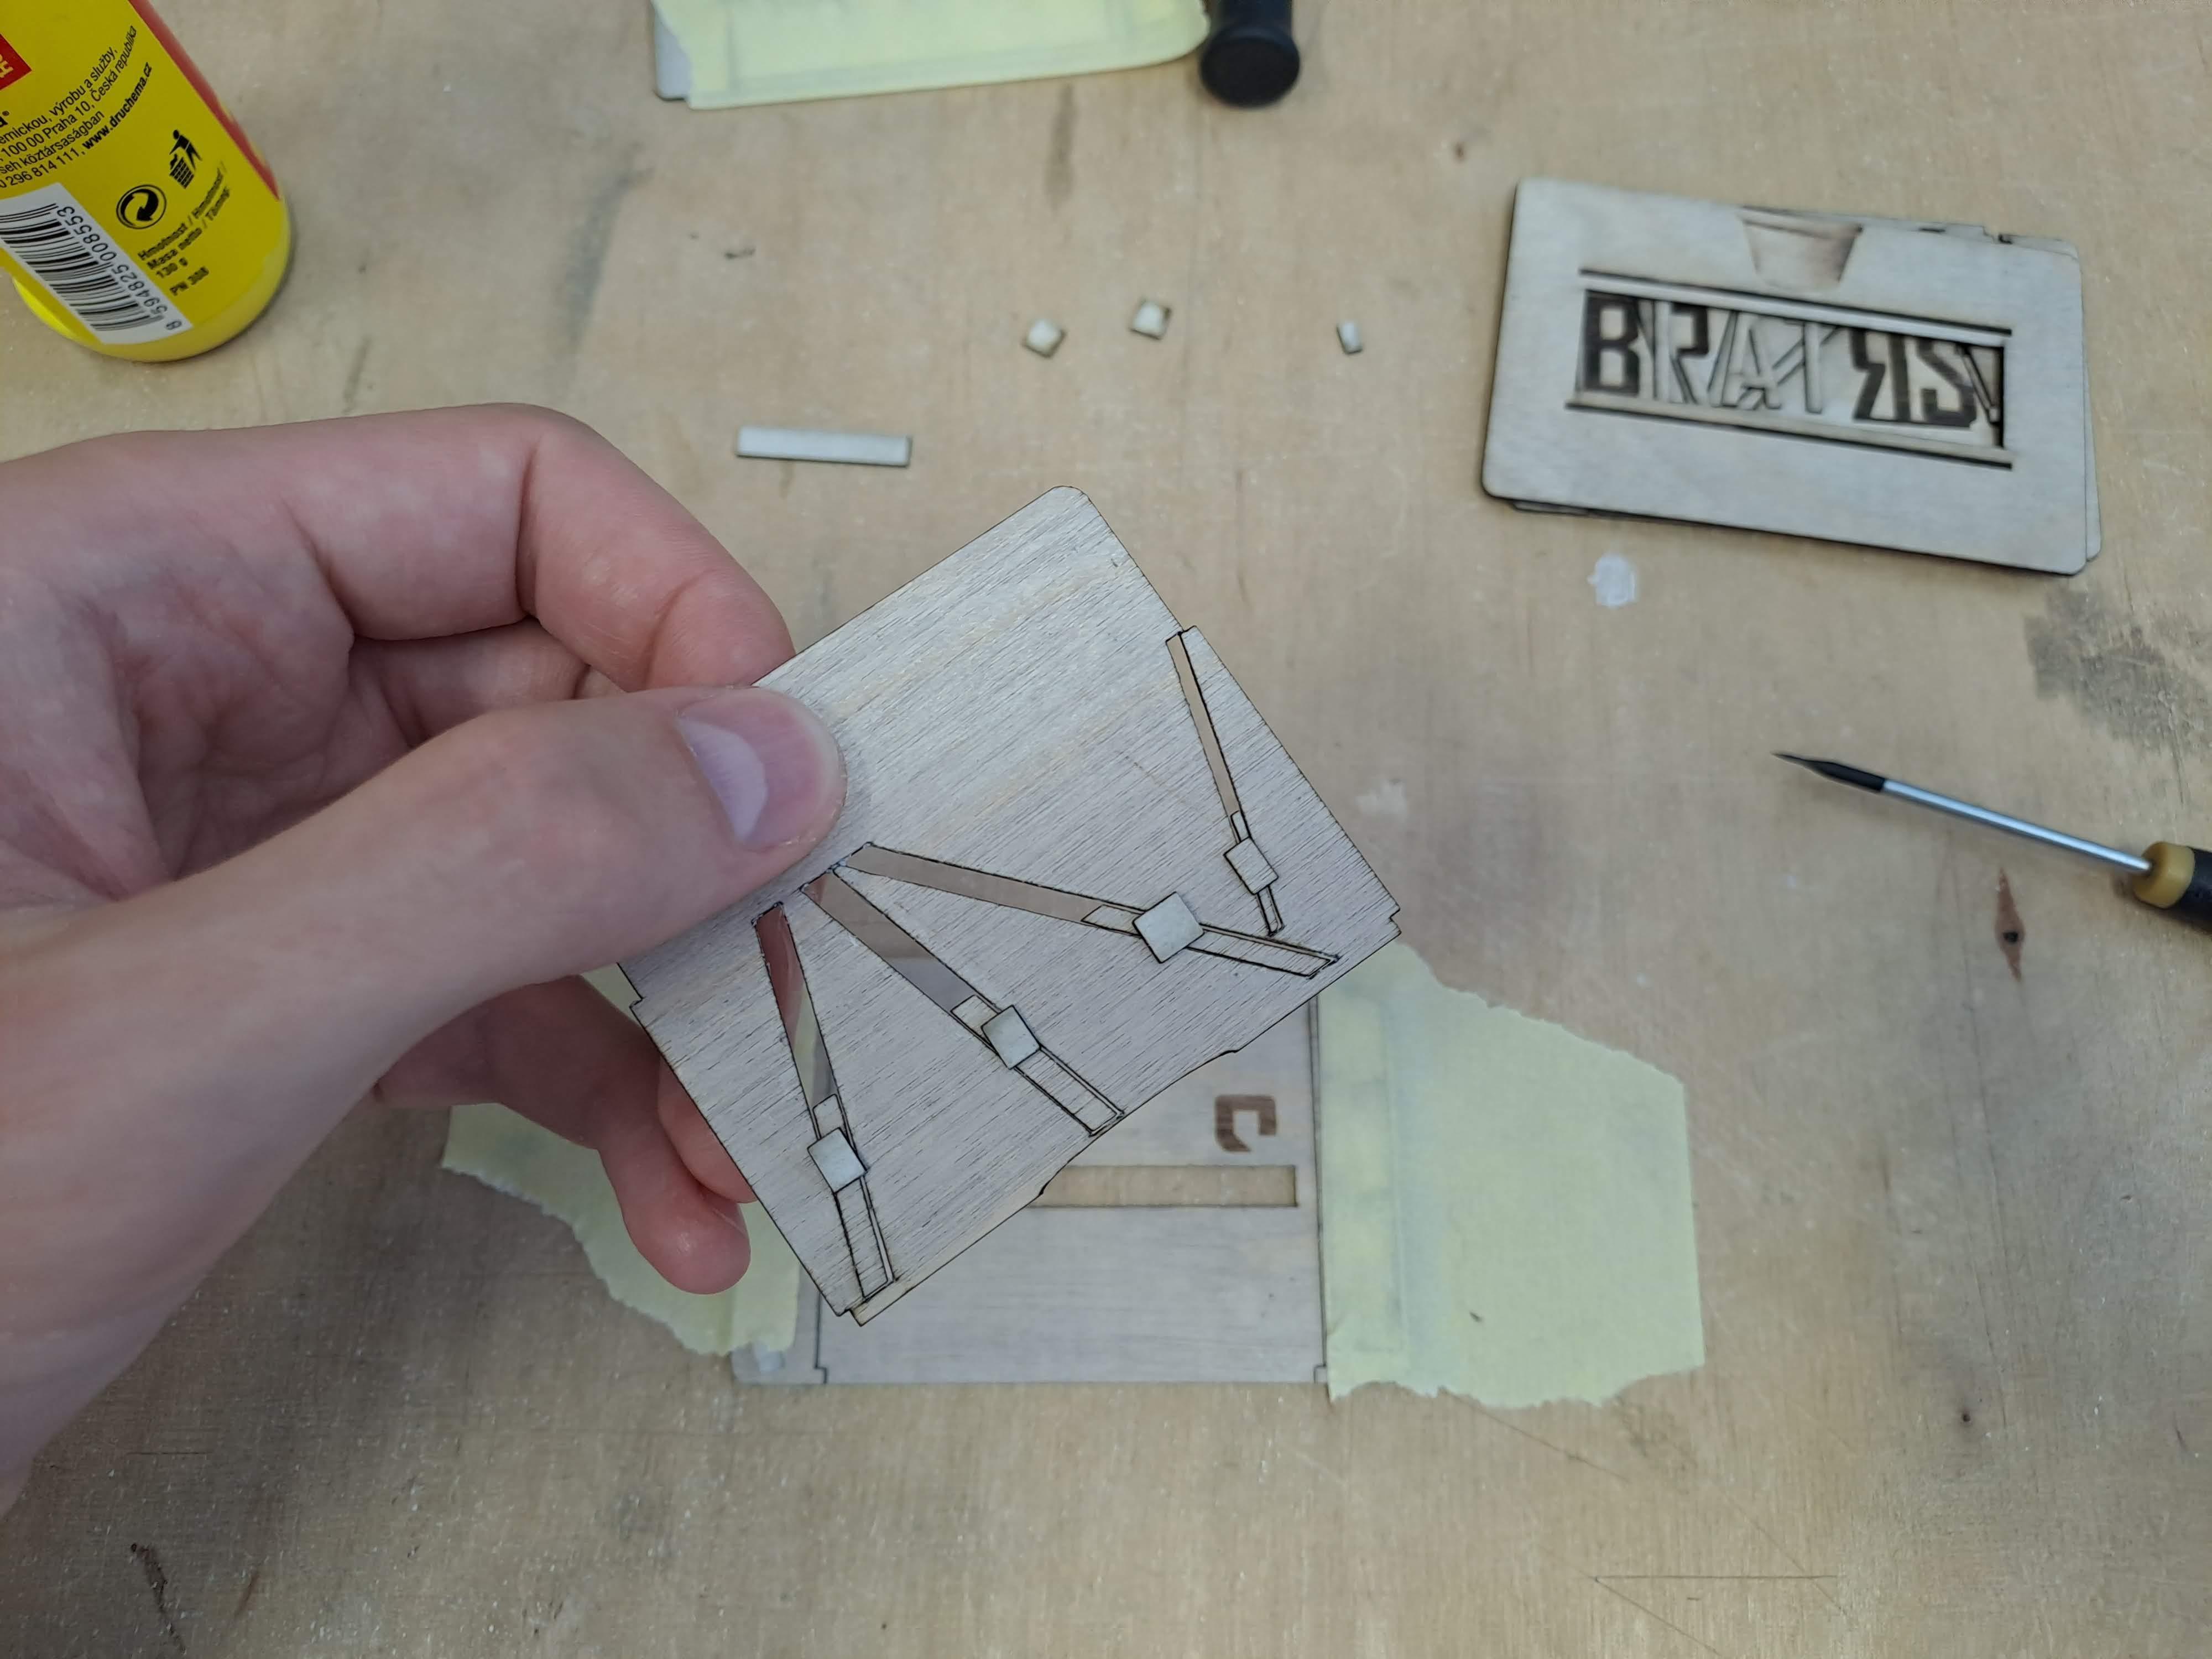
I cut the third layer from the back, because the laser never cuts the edges straight and the cut is always wider at the top and always narrower at the bottom. Thanks to this turn, the kerf in the cut is much less visible. Then I turned the piece and finished the engraving.
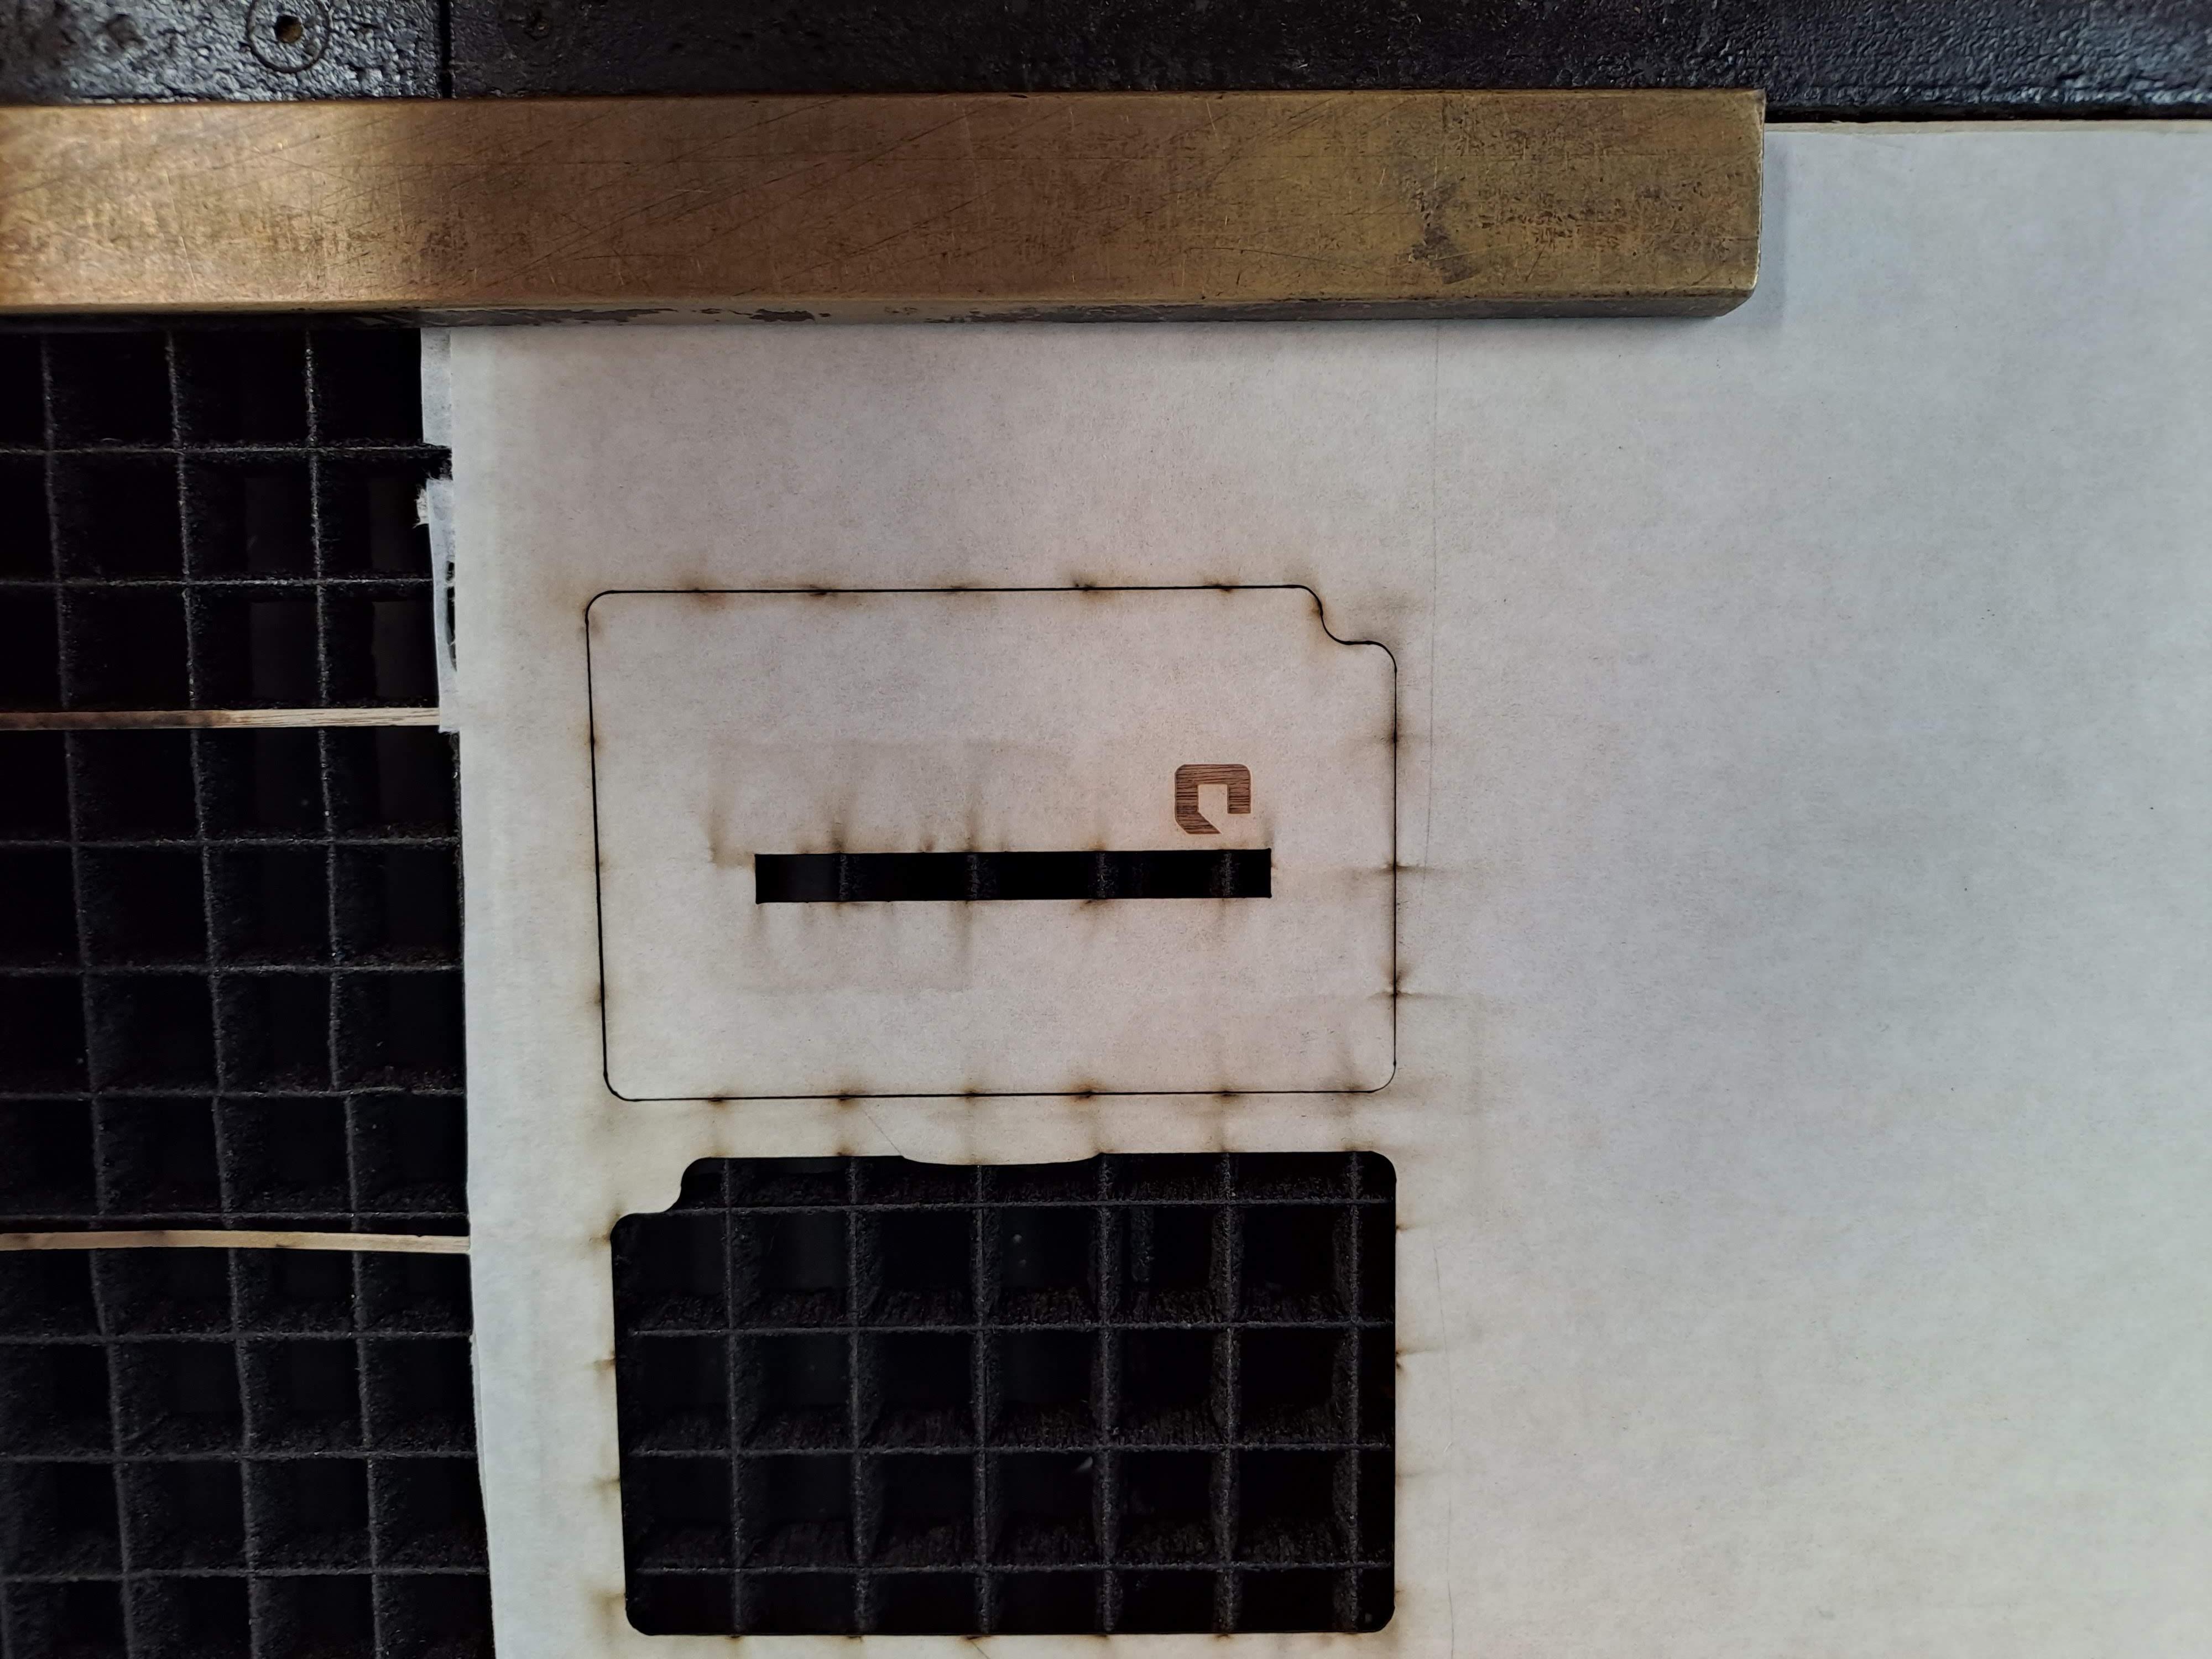
The fourth layer was easy, I just lost all the little pieces under the grid and I didn't know which one belonged where, but luckily it didn't matter much.
Assembly
The assembly was the funniest part. First I waxed the moving parts with a tea candle. I went over each part several times and then always removed any wax residues that could interfere with glueing. I accidentally moved the card a few times and moved everything a little bit, so I taped it to the table and then everything went better.
After glueing each piece, I waited a few seconds and then immediately tried to move all the parts that were supposed to movecarefully, to make sure that everything is in the right place and that the glue didn't leak somewhere it wasn't supposed to. Then I then weighted the whole card down with books in order to dry it up. every 15 minutes I took the card out and tested the whole movement. I let it cure overnight and everything turned out great.
Result

I was honestly surprised how everything fit together and everything worked on the first try. Guys really liked the gift card and there were almost tears, so it seems to me that it was a great success. I believe that you too will be able to make an original gift card or business card that will make someone very happy :-).


Starring
Laser Cutting Machine
The Trotec Speedy 300 allows you to cut, engrave and mark wood, paper board and plexiglass up to a thickness of 8 mm with a maximum area of 726 x 432 mm.
I want to know more >
Share project with others Facebook on Twitter